

 November 14th, 2014
  Paul Peterson
 Here is a step by step process to put decking in a dirt oval late model body. I start out with one piece of RJ speed lexan. It almost fits inside a 1/8th scale body, it all depends how you want the decking to look. It really is up to you. I prefer the drop down decking. If you follow my steps here you should be able to do it fairly easy.
The best way to bend the decking is to use a brake. In the photo below you will see a very inexpensive brake that you can pick up from Harbor Freight Tools for around $40.00. Make sure you have some “C” clamps to hold the top metal piece down. Better brakes will cost more money, but will make the process a little faster.
Place the lexan under the top metal piece and measure out 3/4 inch. Tighten the “C” clamps down and pull the lever back. Now, your first bend is complete. Make sure you keep the protective wrap on the the lexan as this will help against scratches from the lexan sliding when you bend it. This is where a more expensive brake with a better clamping system will work better.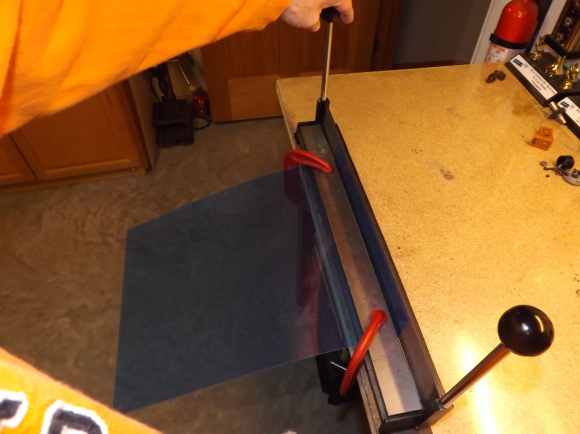
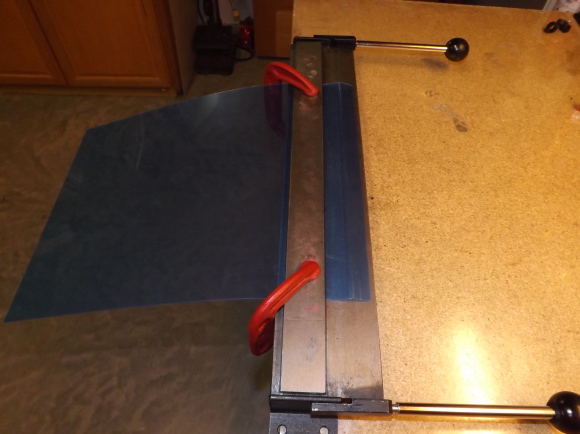
Now remove clamps and flip over the lexan to the opposite side. Measure about an inch and place the metal piece over the lexan and clamp down until tight. Pull the arm back (sometimes it is good to repeat the the step of the arm to make sure you have a nice crease in the bend.
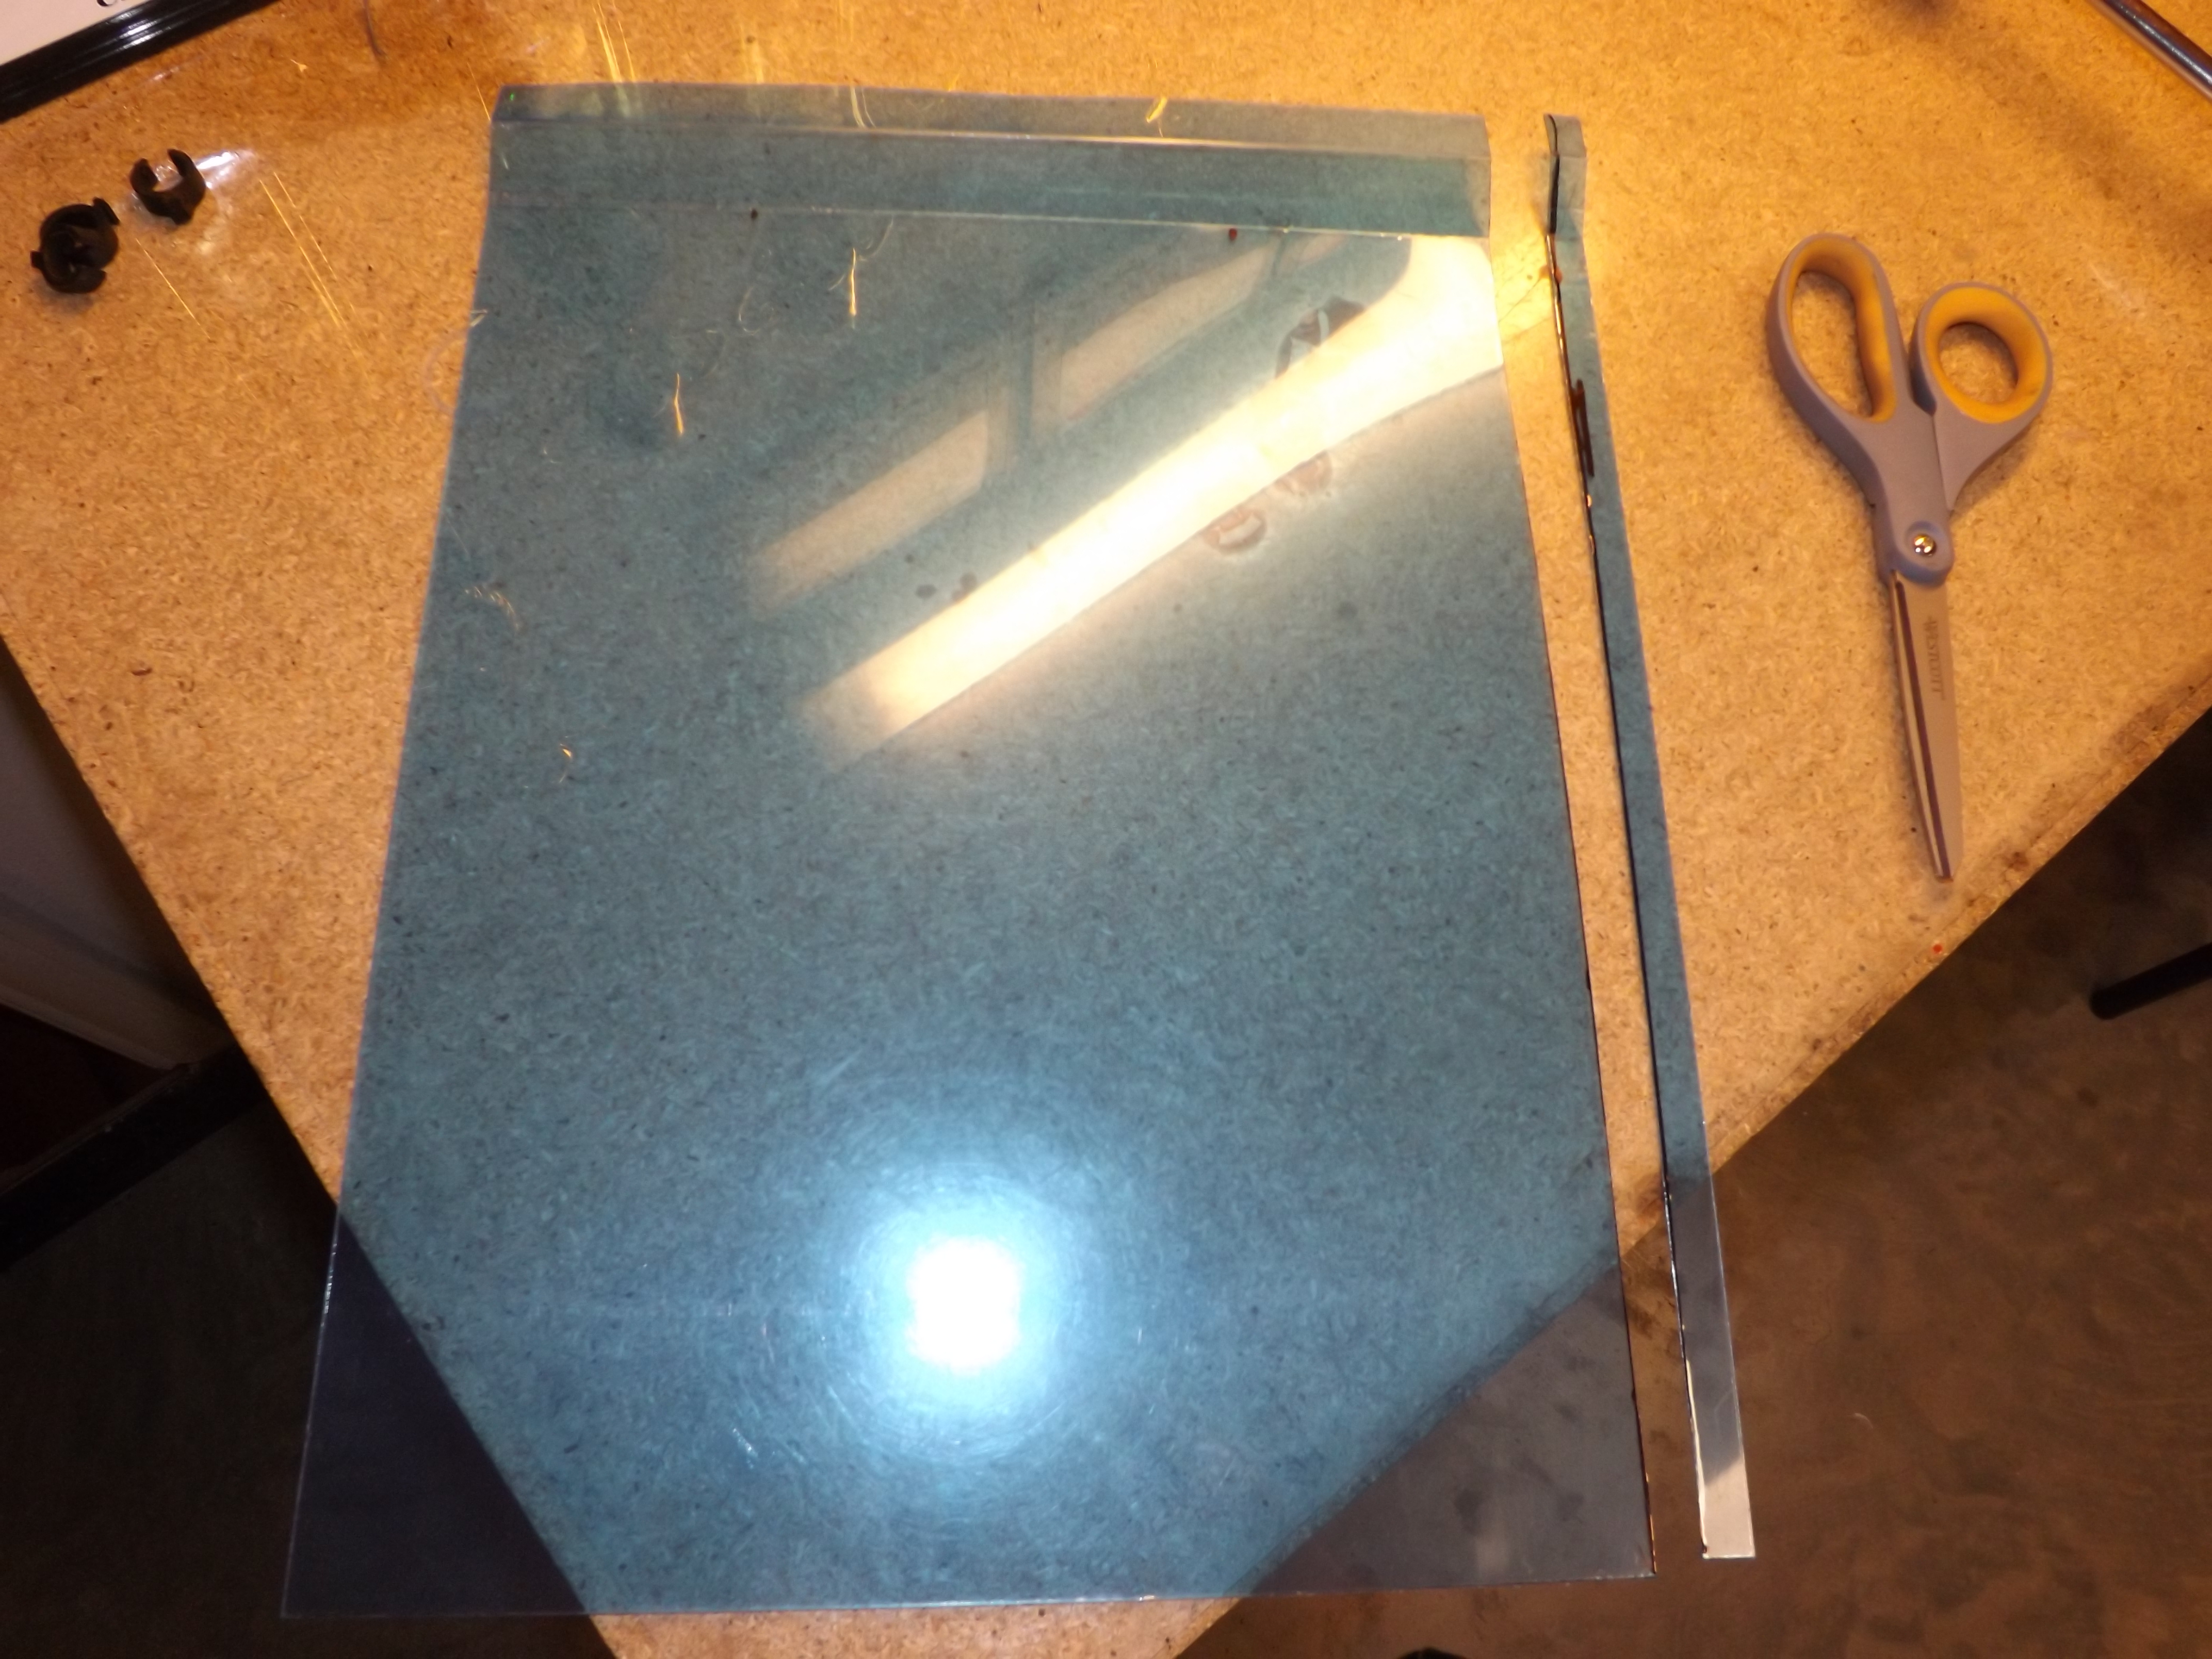
Now you want to Size it…. you could cut this part off in the first step if you wanted to as well.. I cut off about a 1/4″ and this is enough for my 1/8th scale C&M Atomic SC body. Just regular scissors will do just fine.
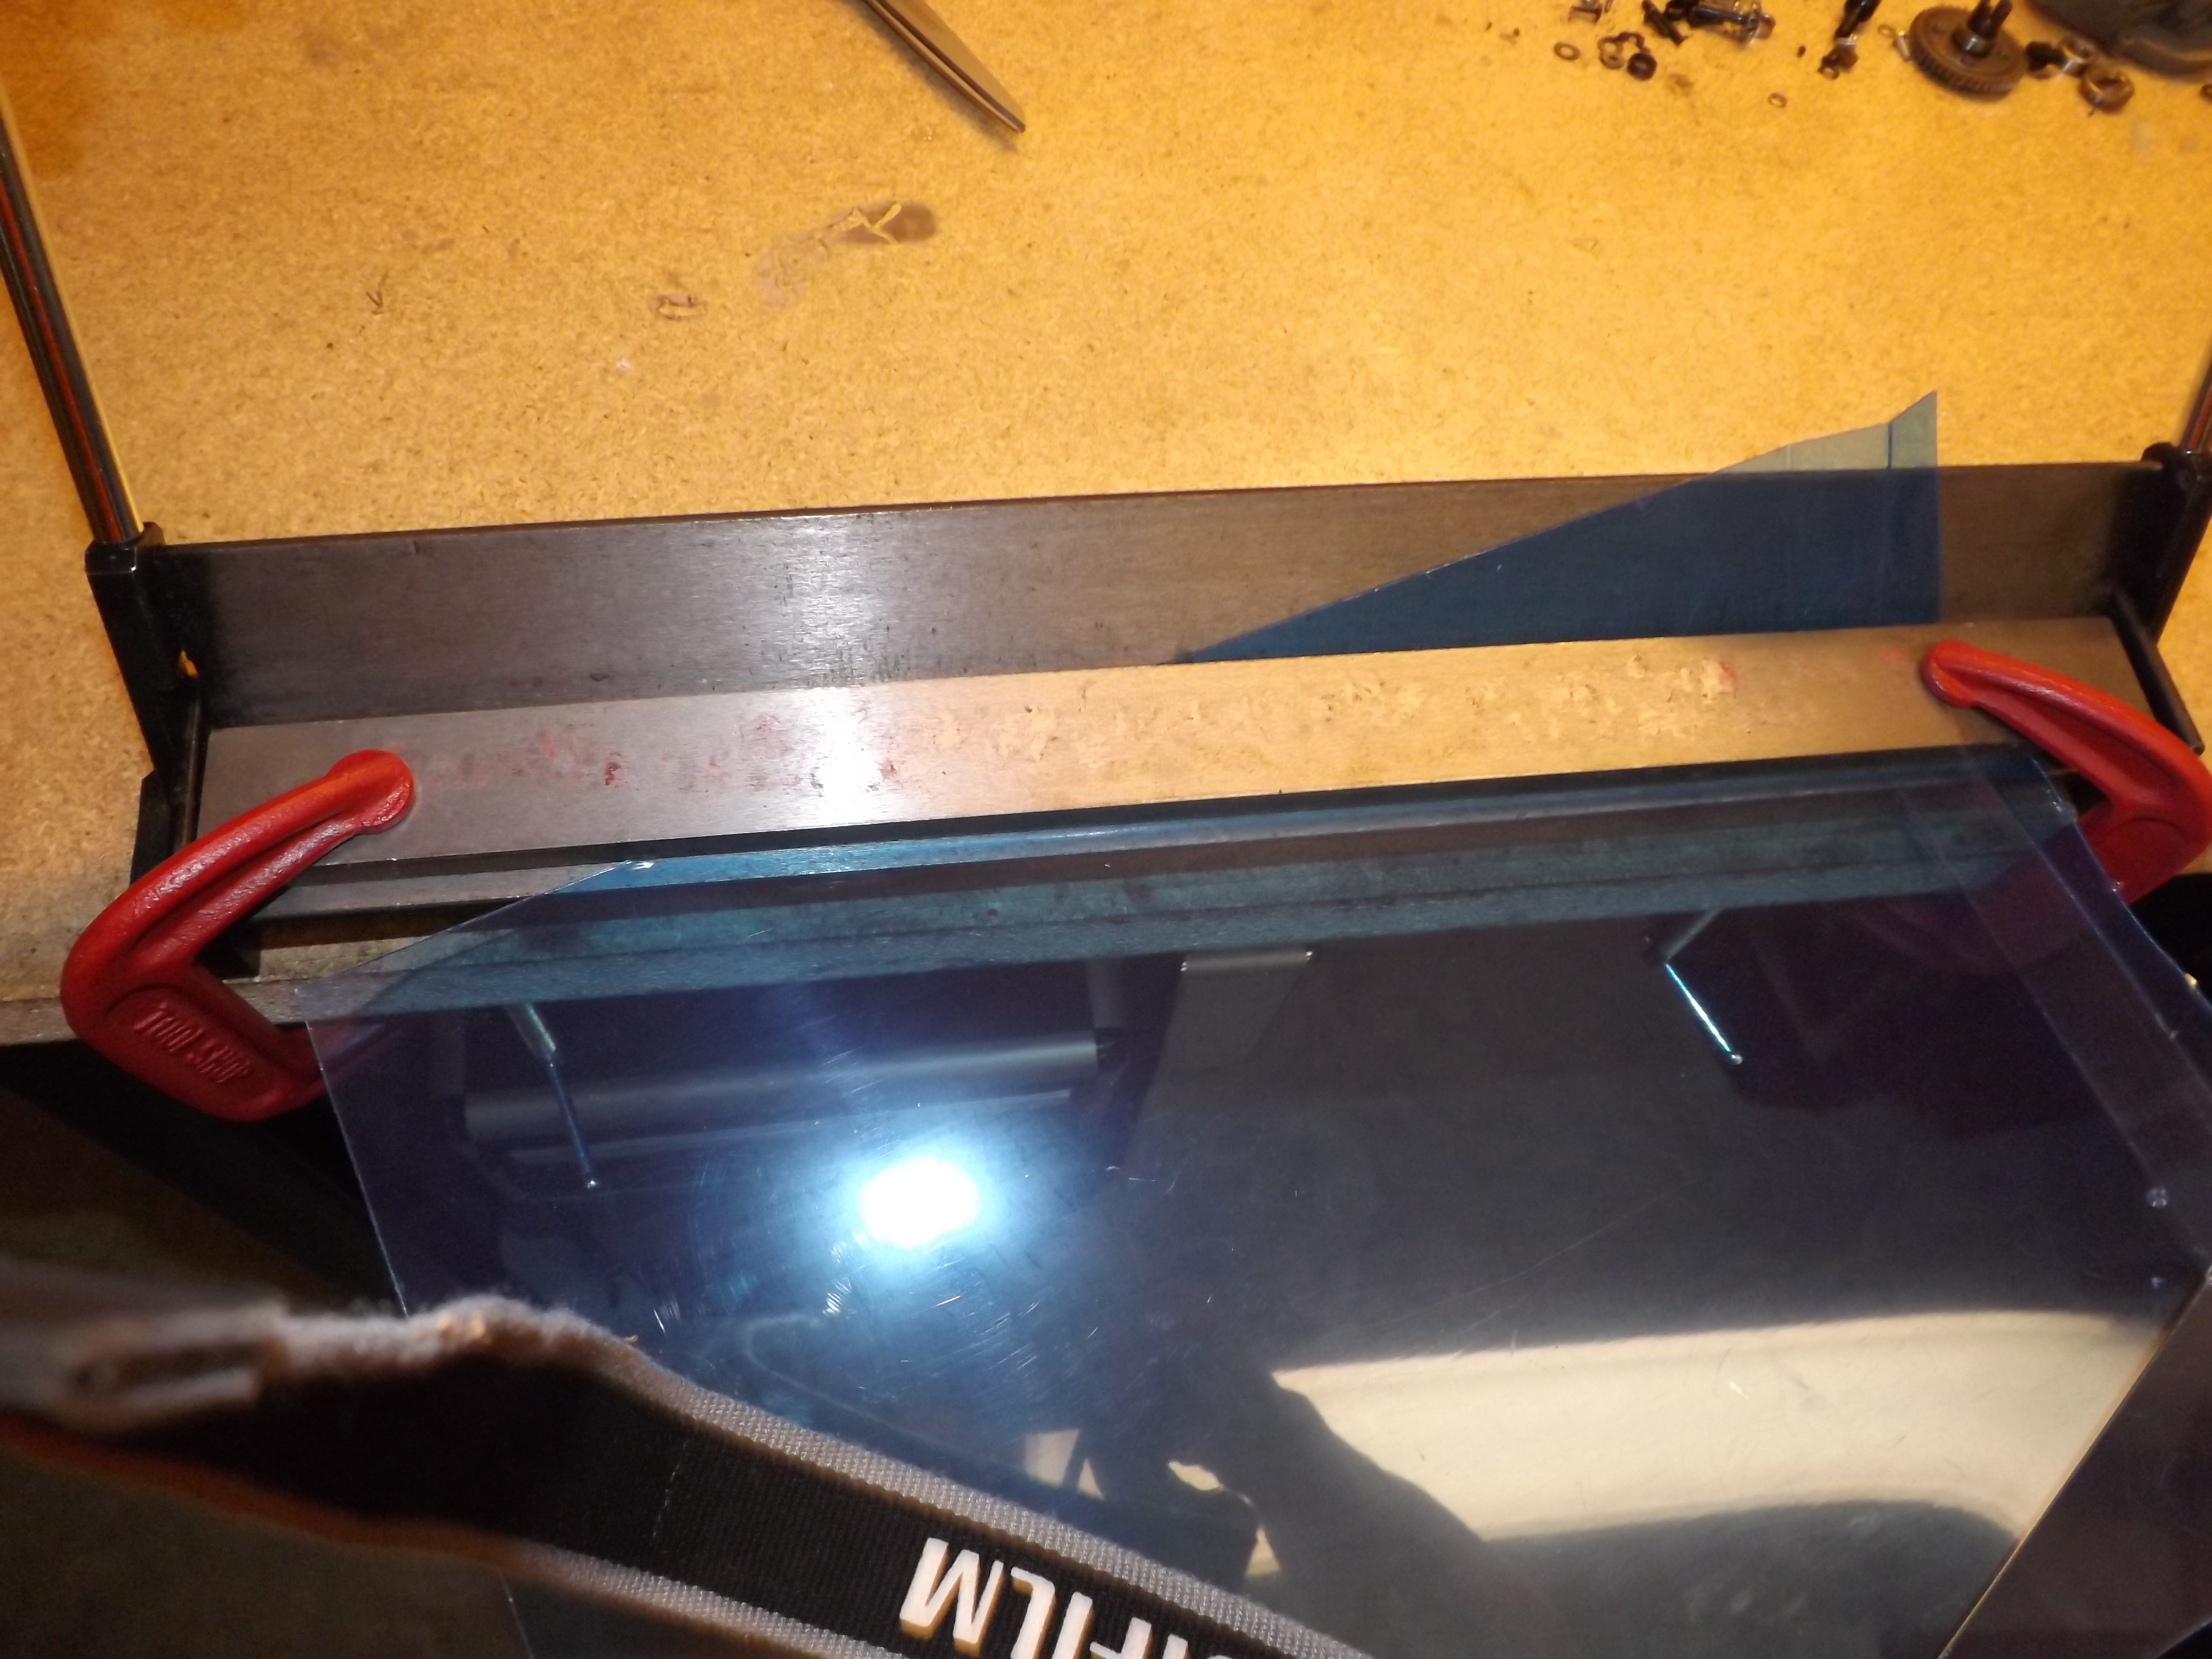
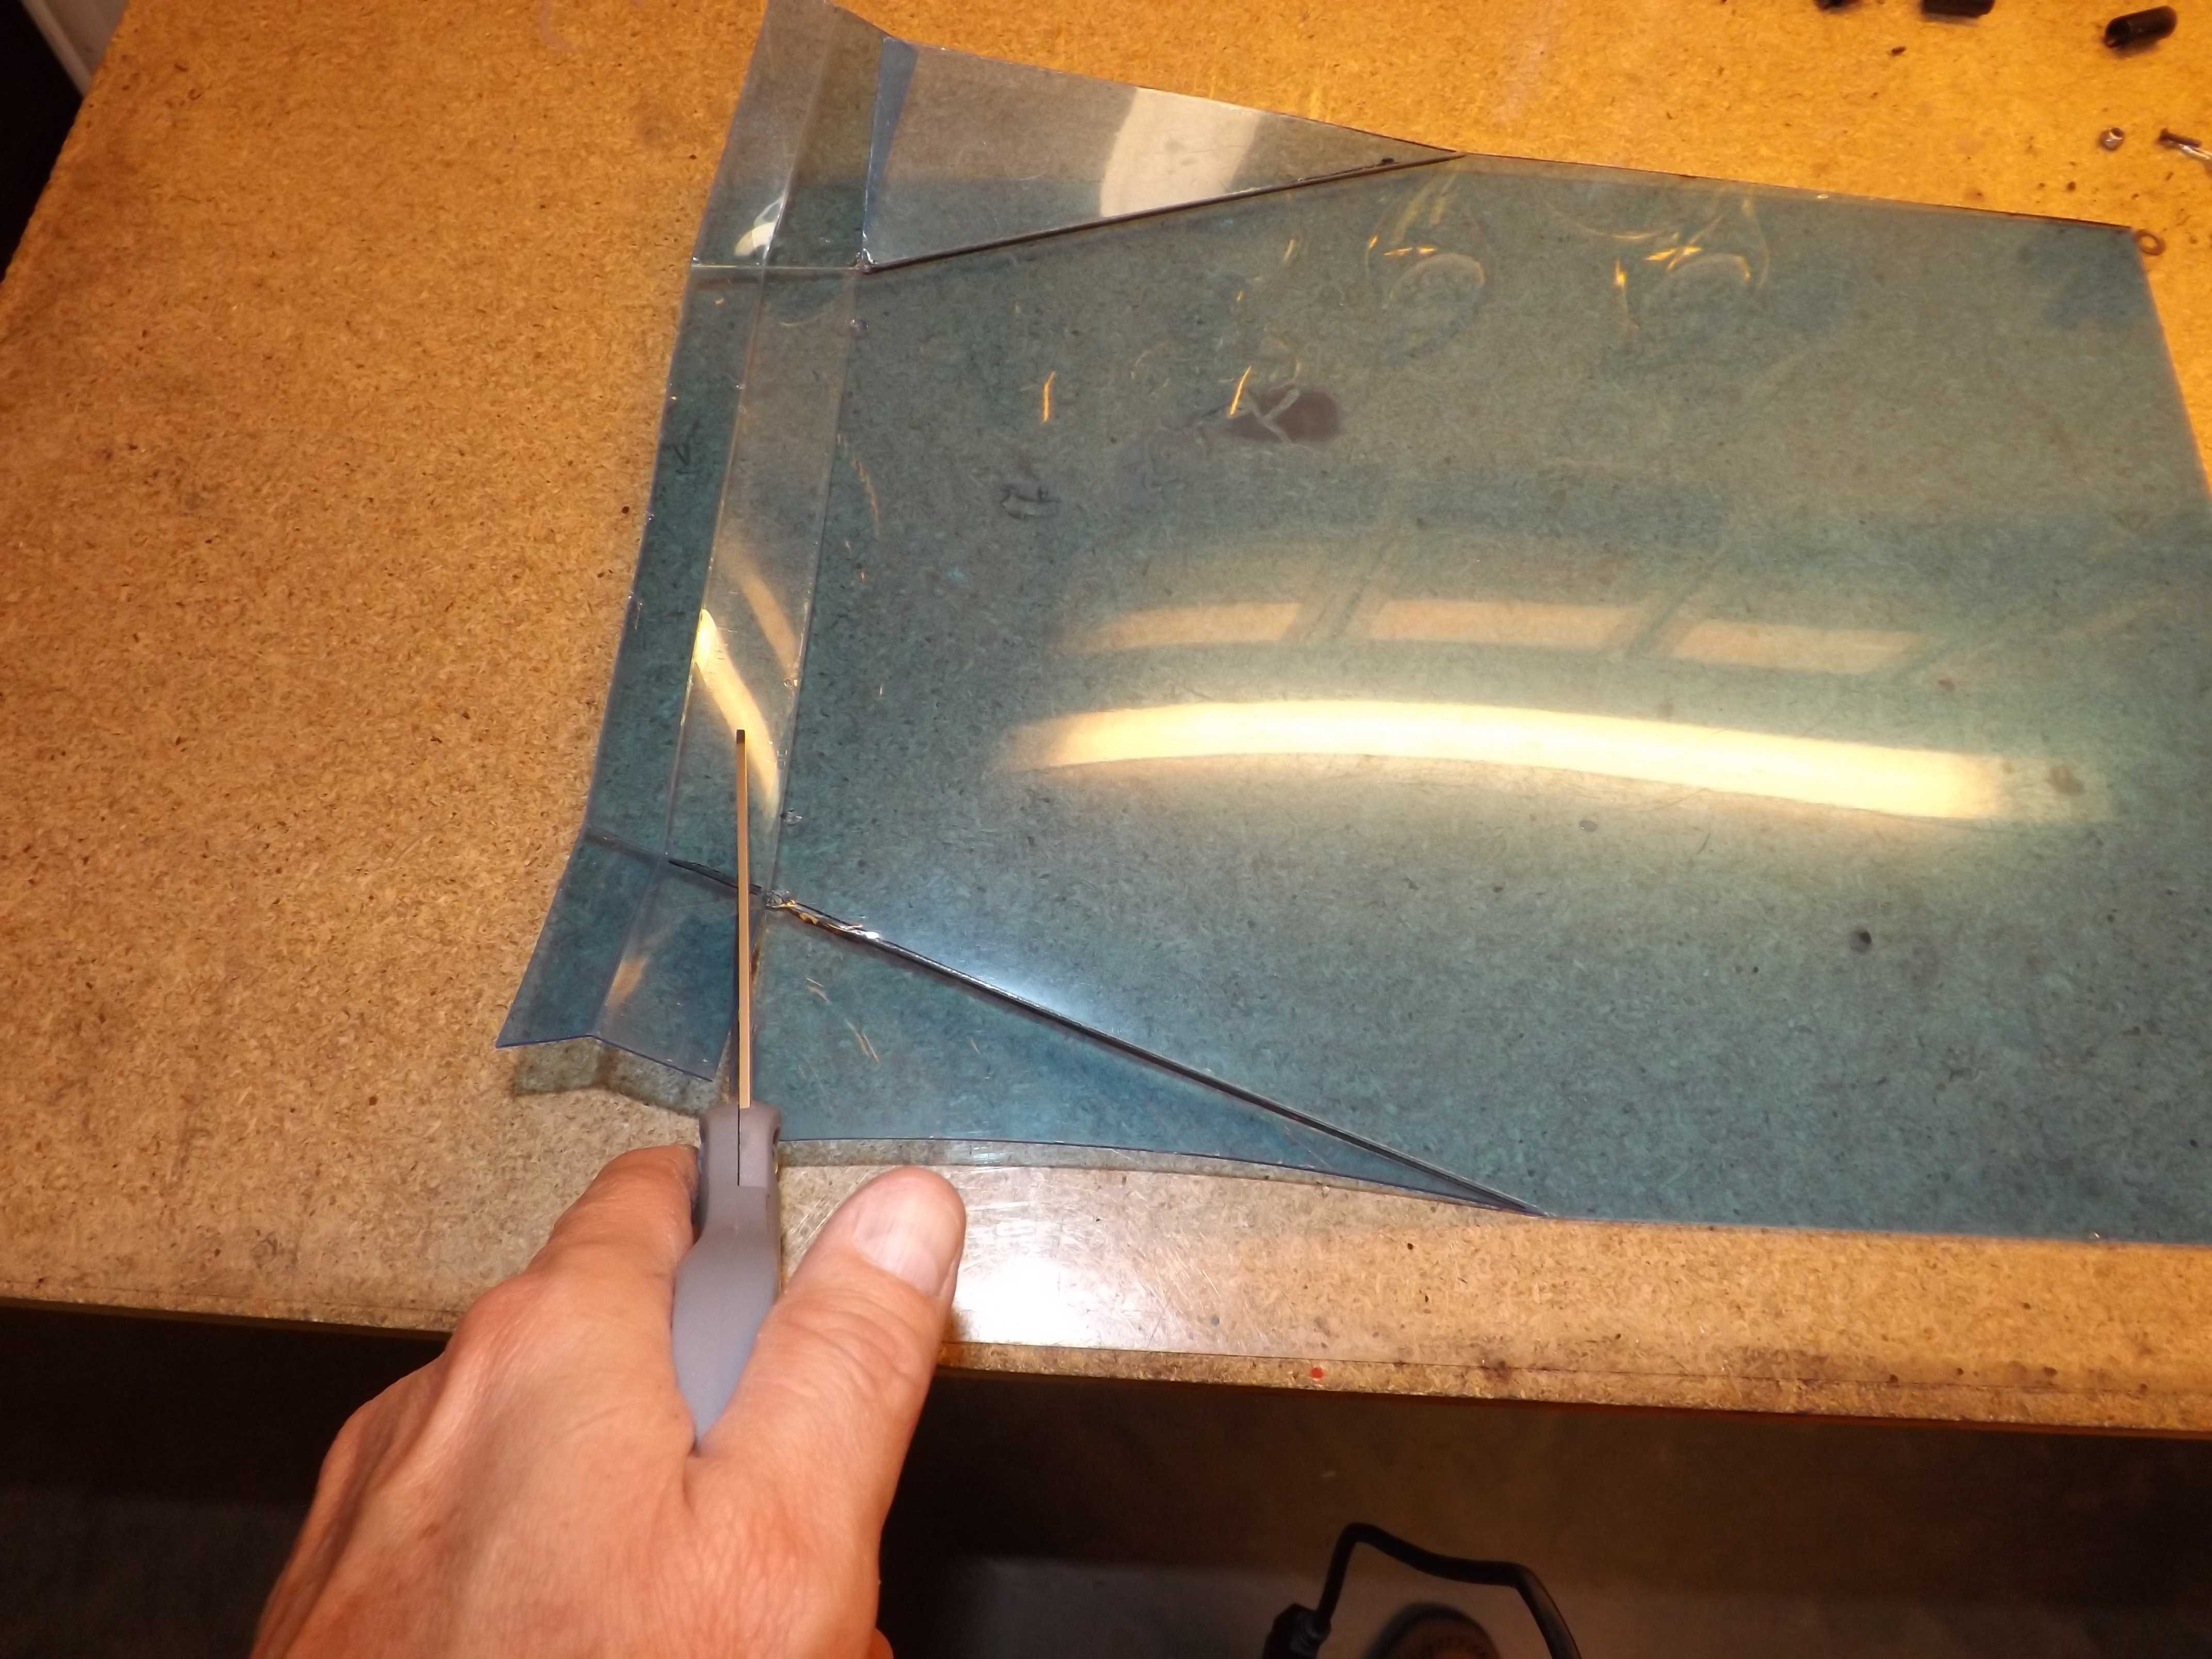
The next step is the tricky part. With my cheaper brake, I have to re-flatten out my first bends and mark the lexan for the diagonal bend. This will all depend on the size of your body whether it is 1/10th scale or 1/8th scale. I start at the front part about 2″ in and slowly tapper off to where the rear roof post starts. Once I have the line drawn, it is back to the original steps to bend it… continue on to the other side of the lexan piece.
This is what the decking will look like once you rebend the front parts (with your hand, as the creases make this easy to do. Now I put a small hole with a body reamer where the straight crease meets the angle crease. This will prevent the cut from ripping further. I cut a straight line on the crease until I hit the small hole where the side crease meets. Continue doing this to the other side.
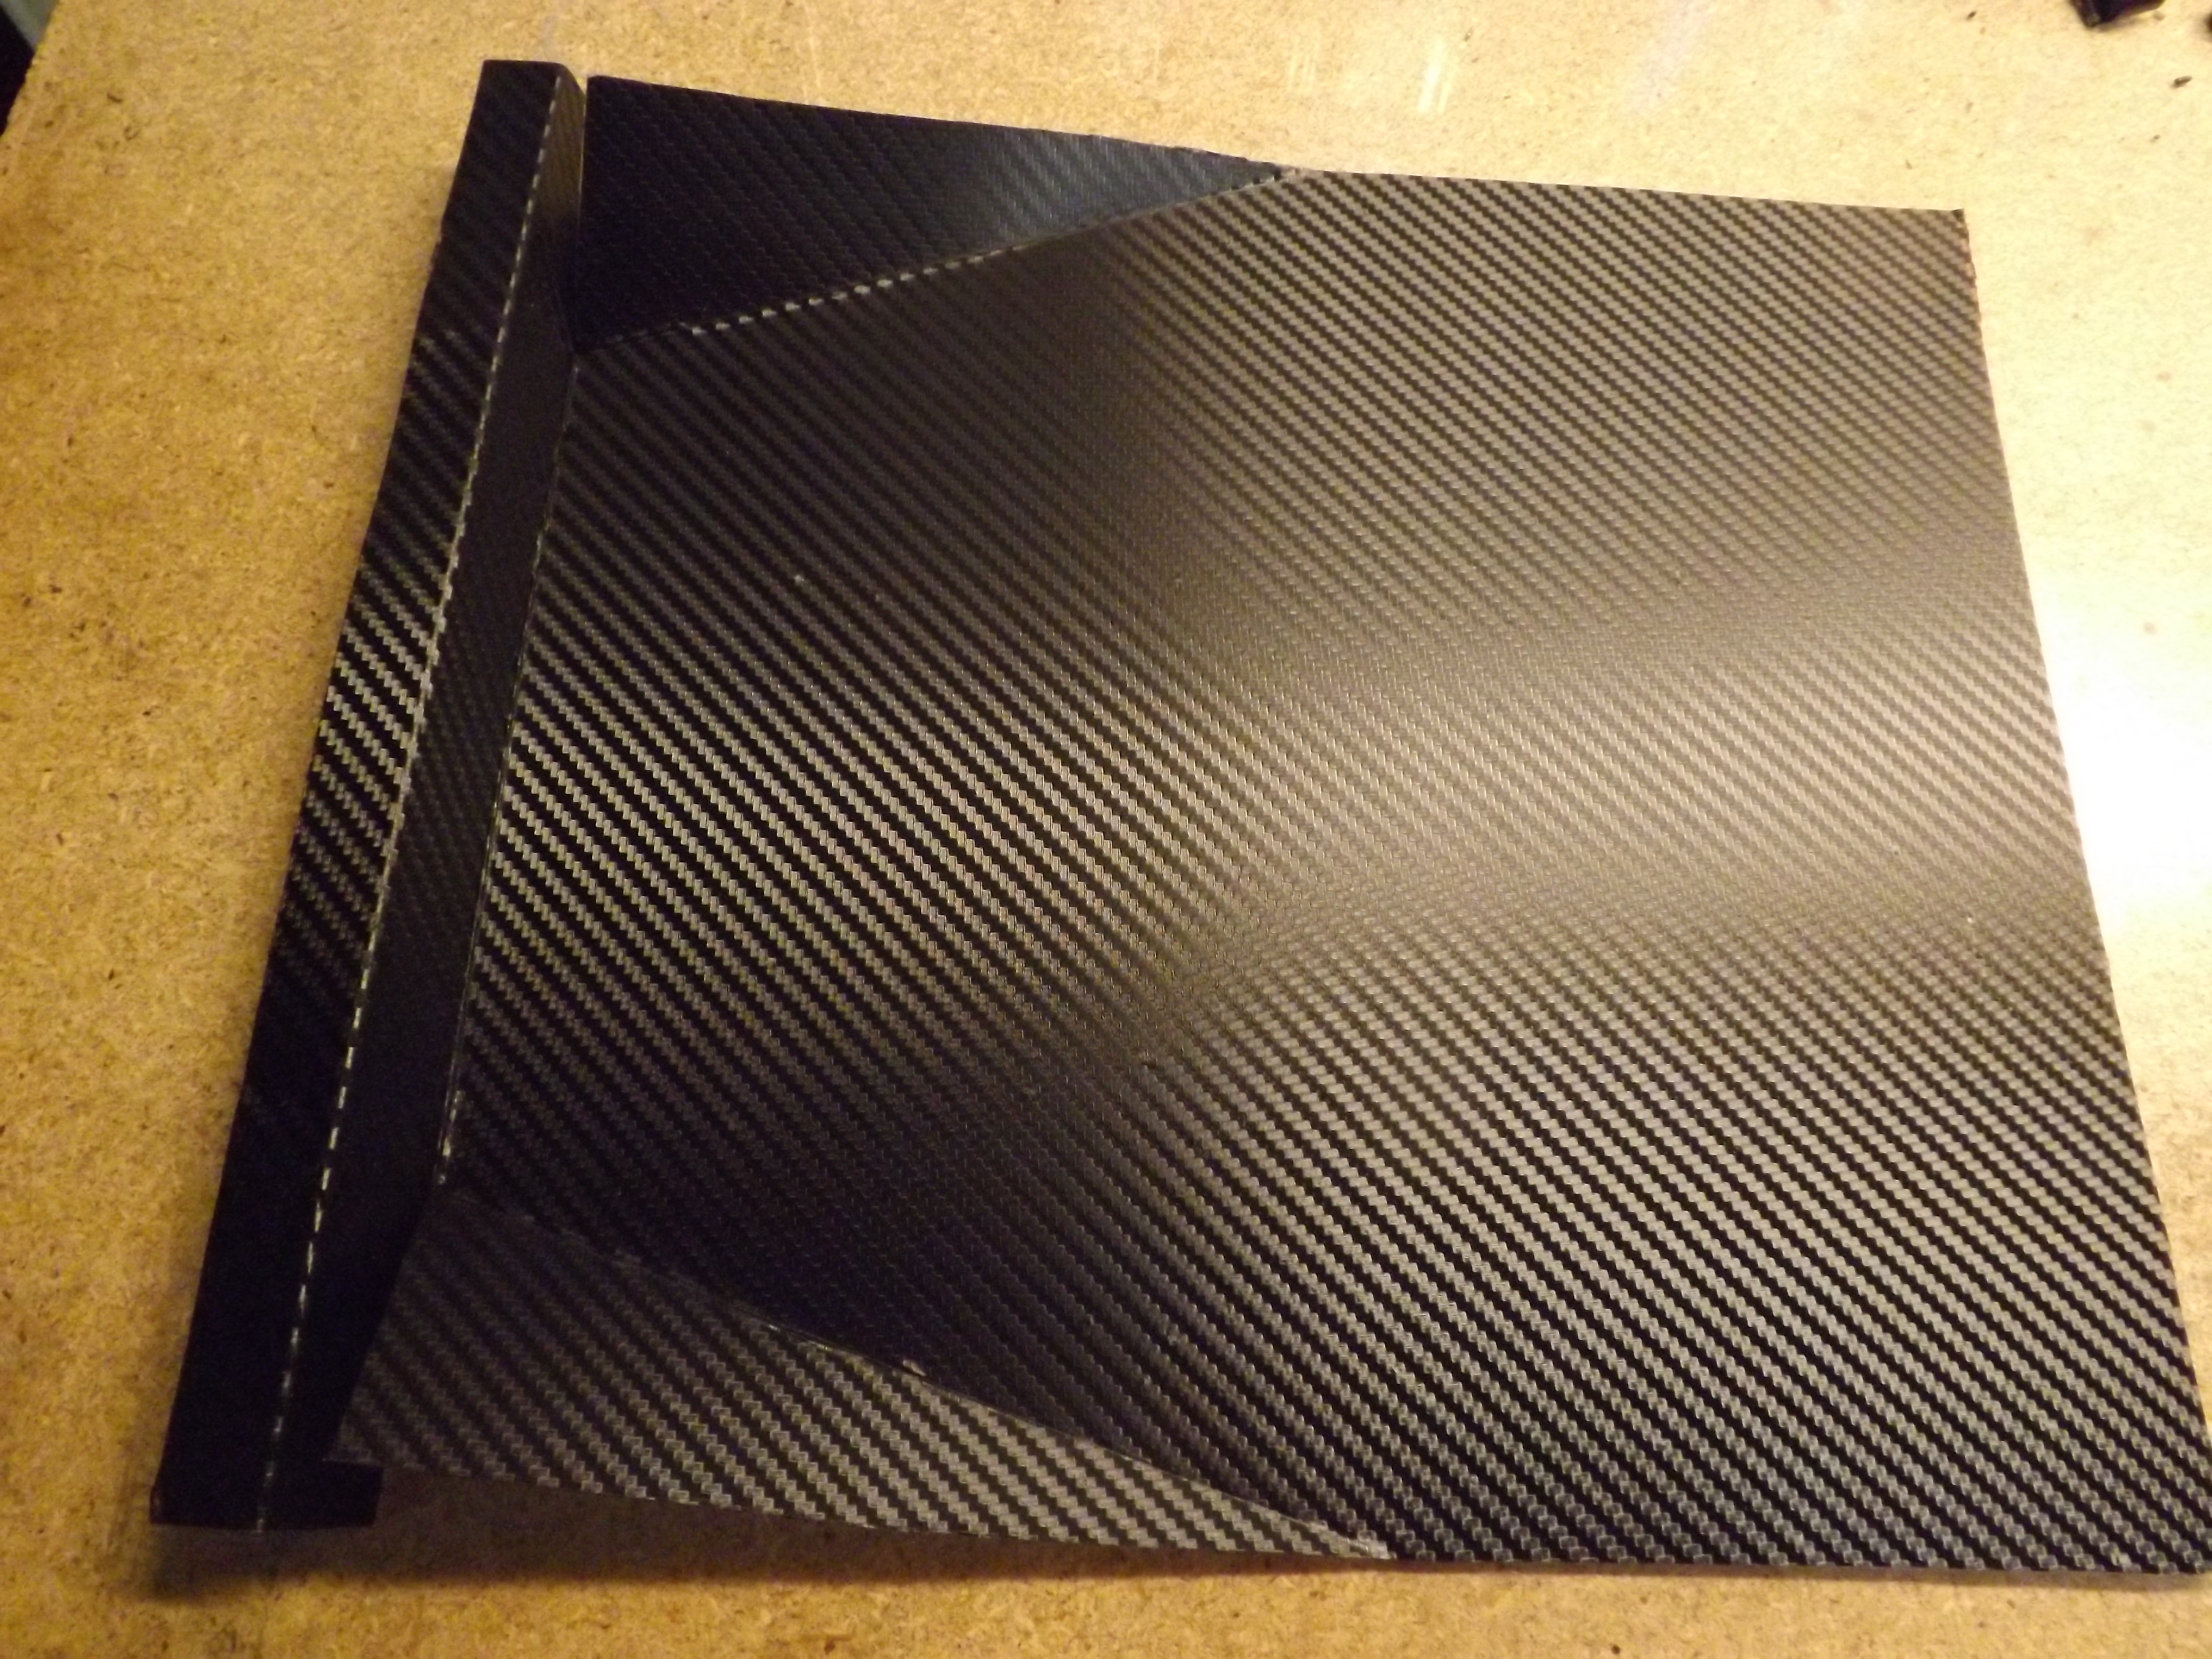
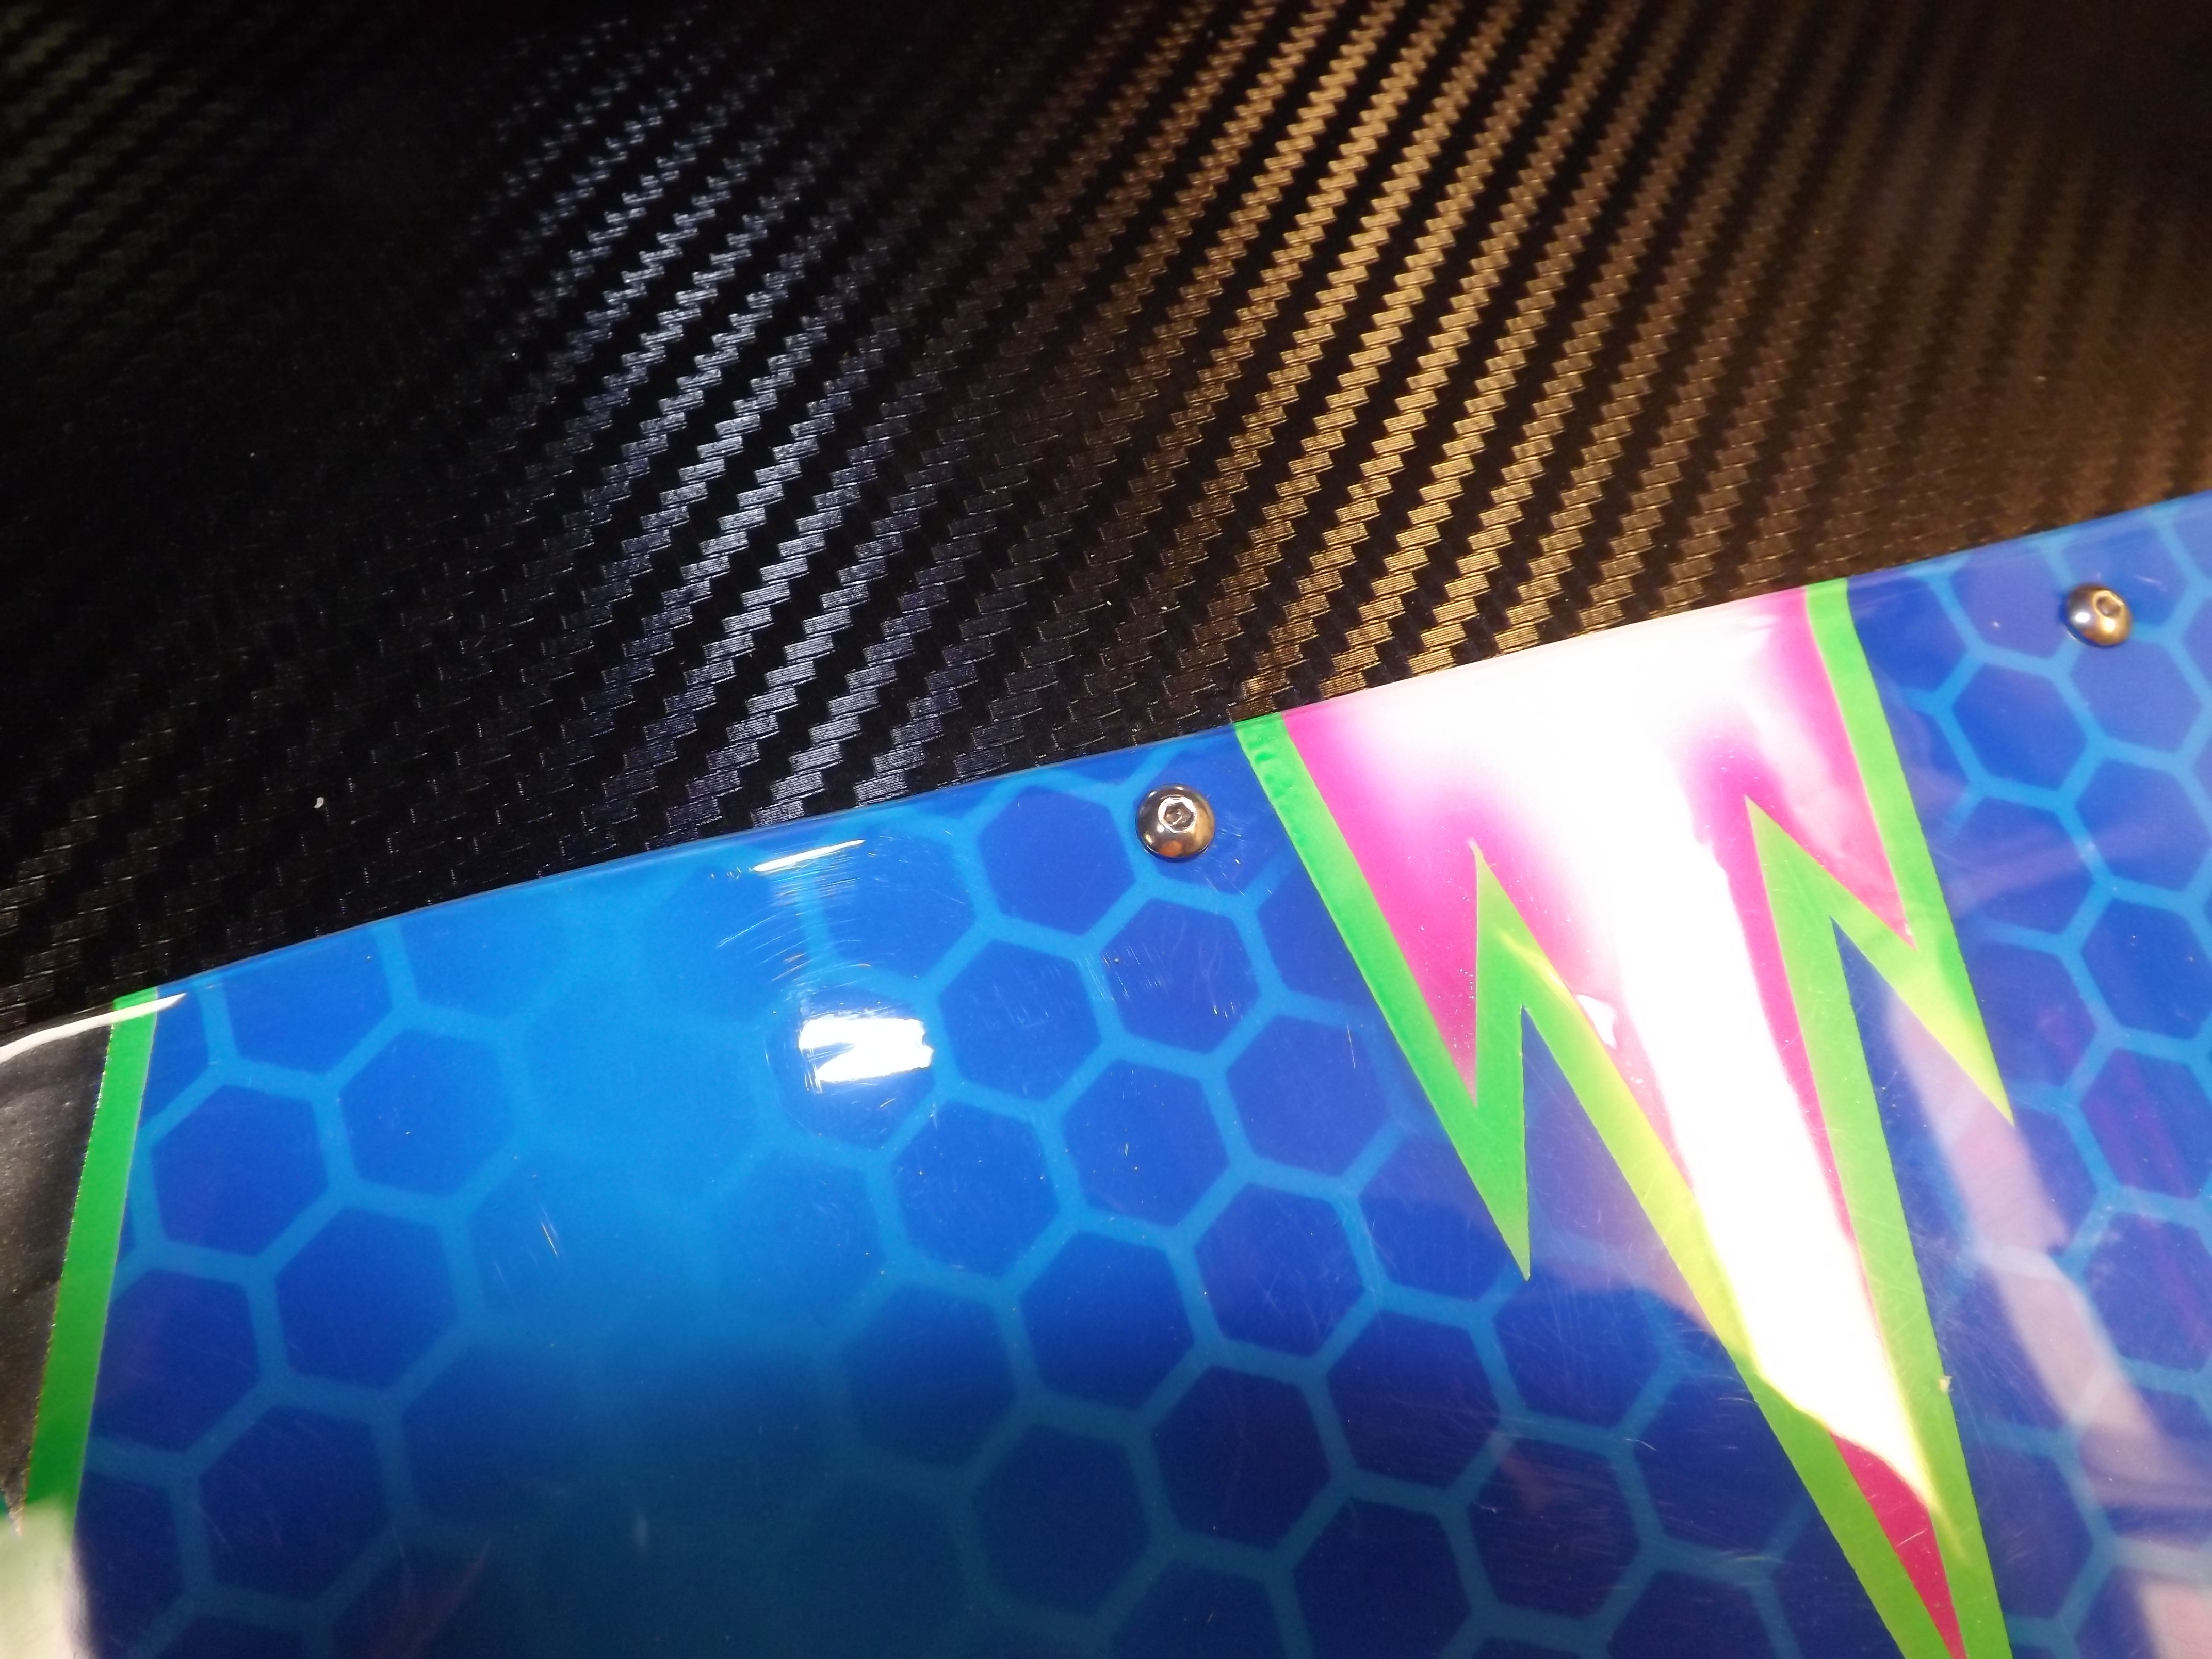
Remove the protective film on the lexan. Now you are ready to paint it. Or if you like, you can use a really cool carbon fiber vinyl. I picked this up on eBay pretty cheap…. $7.00 shipping included. It comes in different sizes. I purchased the 12″ by 5 ‘ one and that will make 4 interiors…. So less than $2.00 each.. Make sure the lexan is clean and free of grit and dirt as these will stick to the vinyl and will end up showing when you are complete… As you can see below the vinyl does an excellent job of hiding the extra creases i had to make.
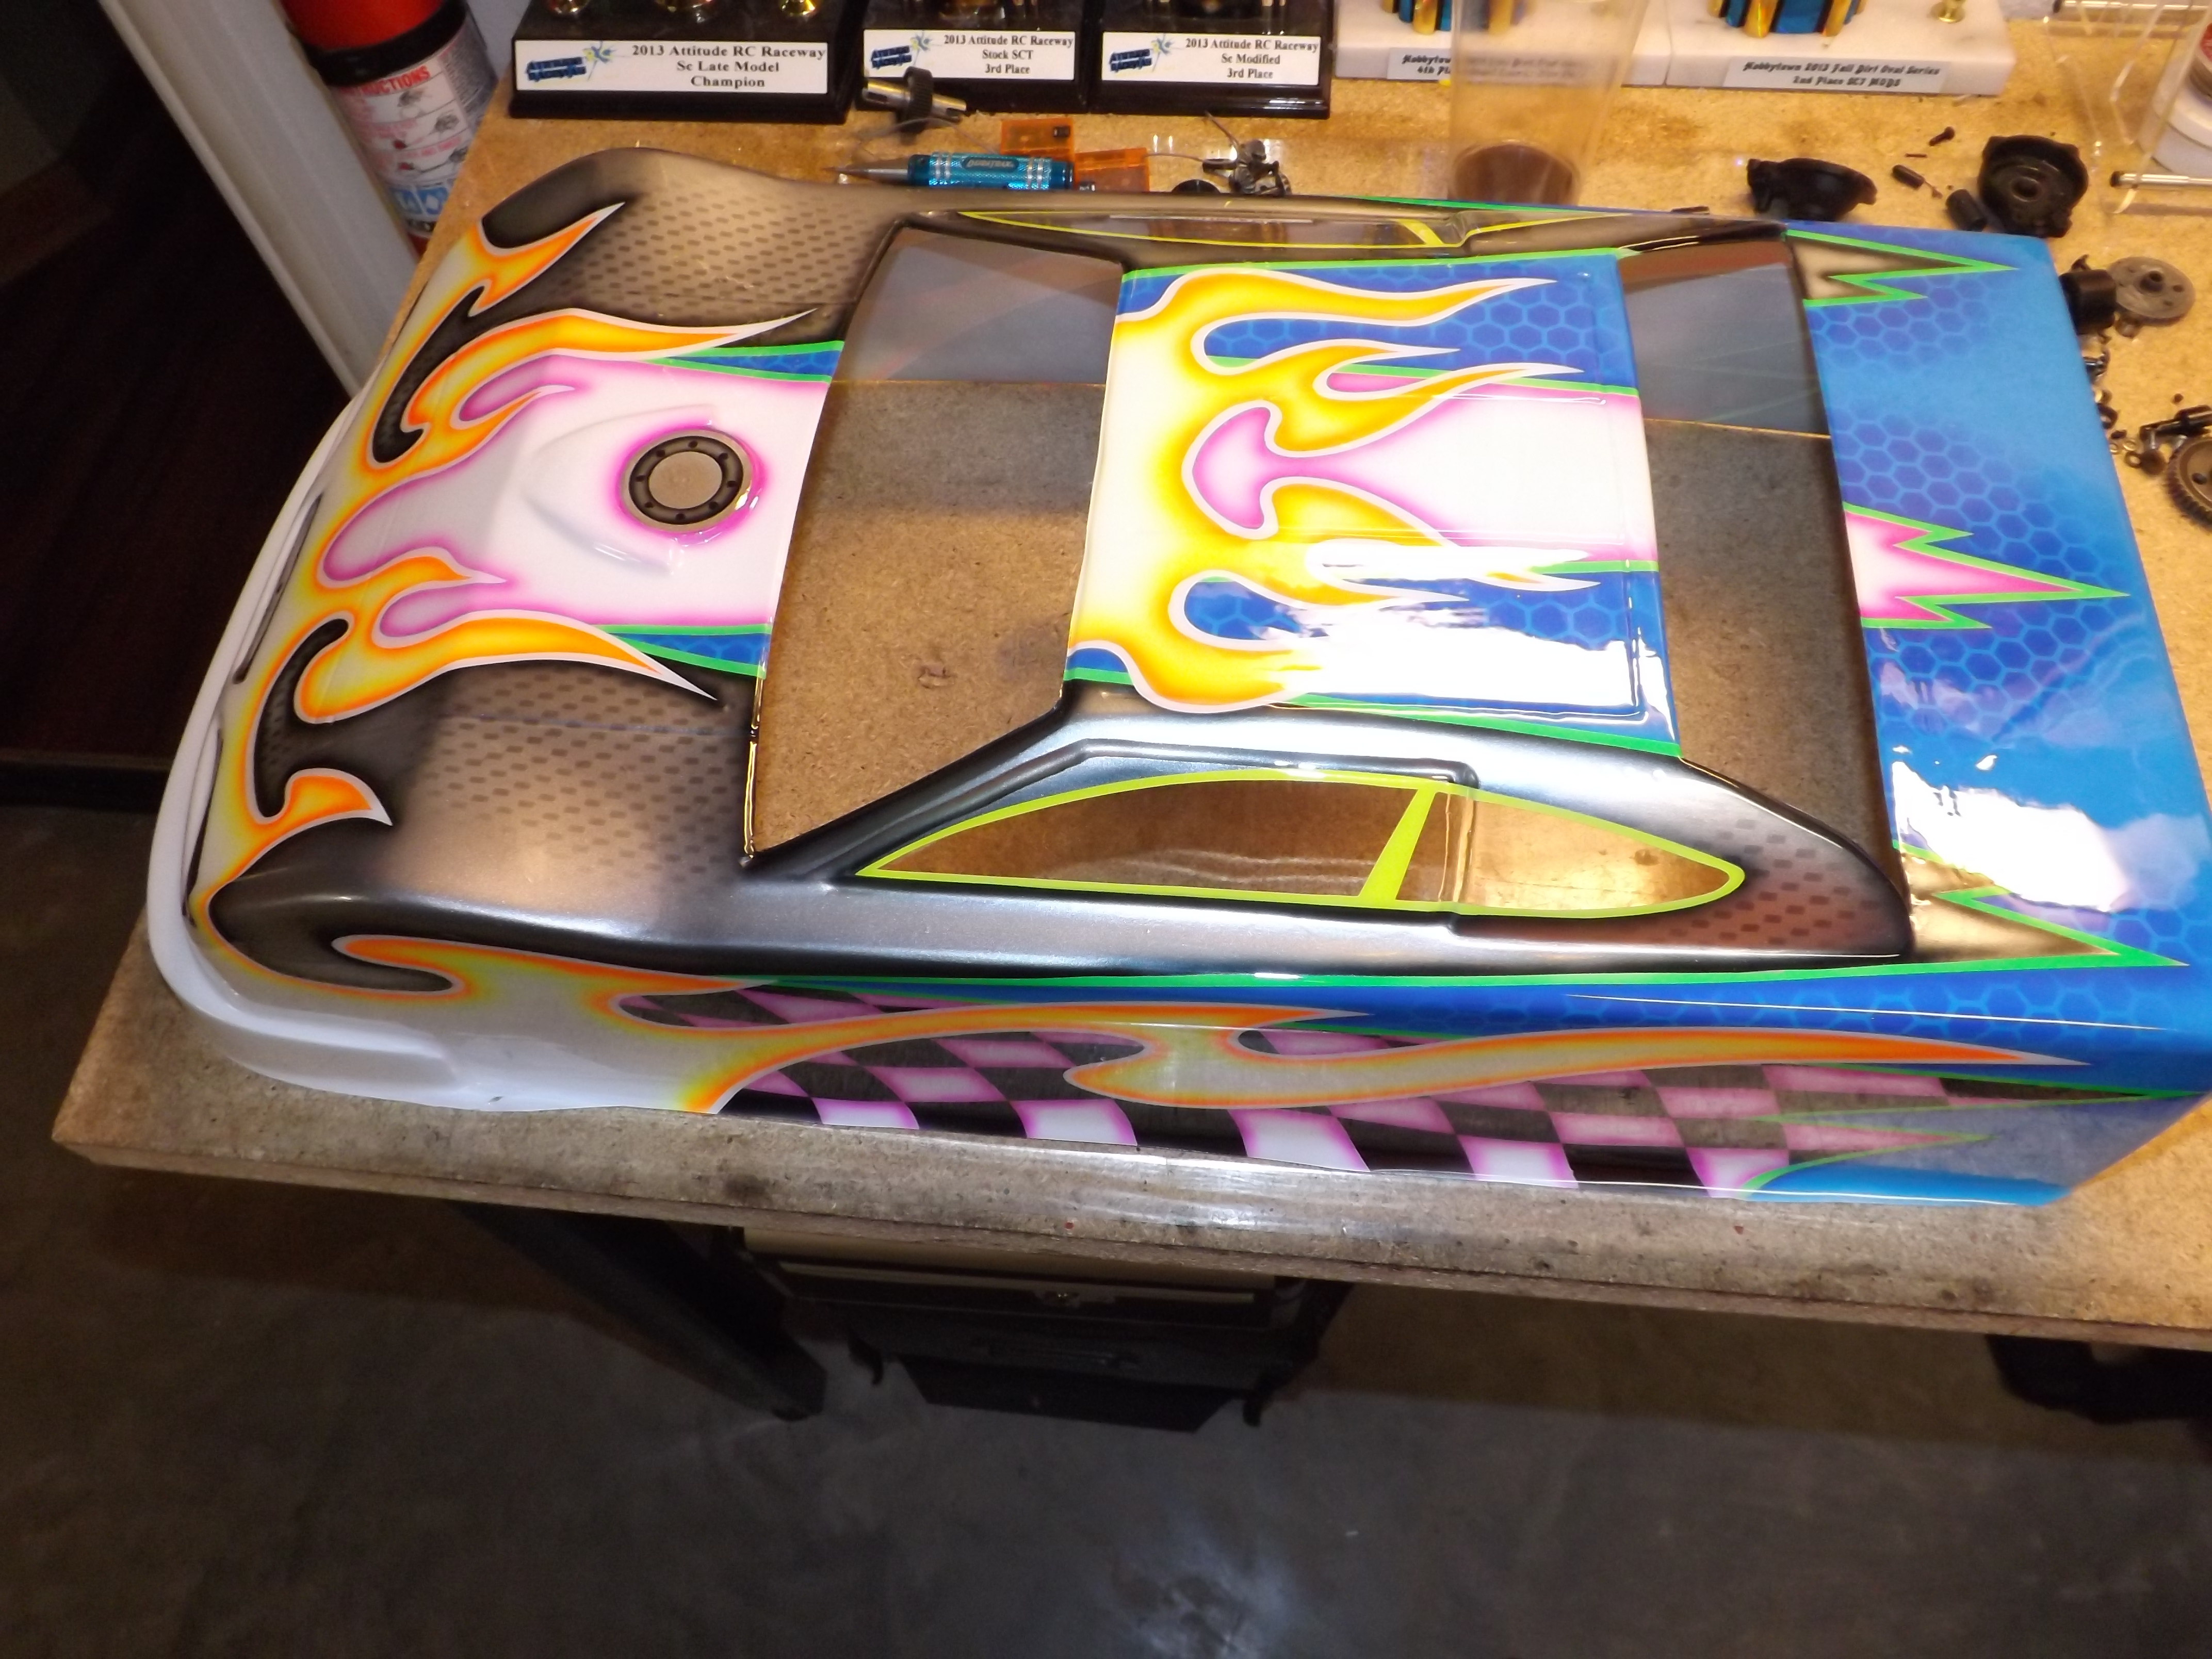
Now you can get your body prepped. Cut out the windows using a lexan scissors, while using a reamer to bore out the corners to make it easier to cut the windows at the corners. Sometimes cutting the window out in a few pieces make it a little easier. I have my bodies custom painted by Diggity Designs and Paints. Check them out if you like sweet looking paint jobs.
Using a body reamer, make a small hole thru the body and the interior at the same time….. making sure you place the interior straight inside. The top flap on the front on the decking will sit flat against the inside of the body and the 1″ drop will give you a lower interior look in the front.
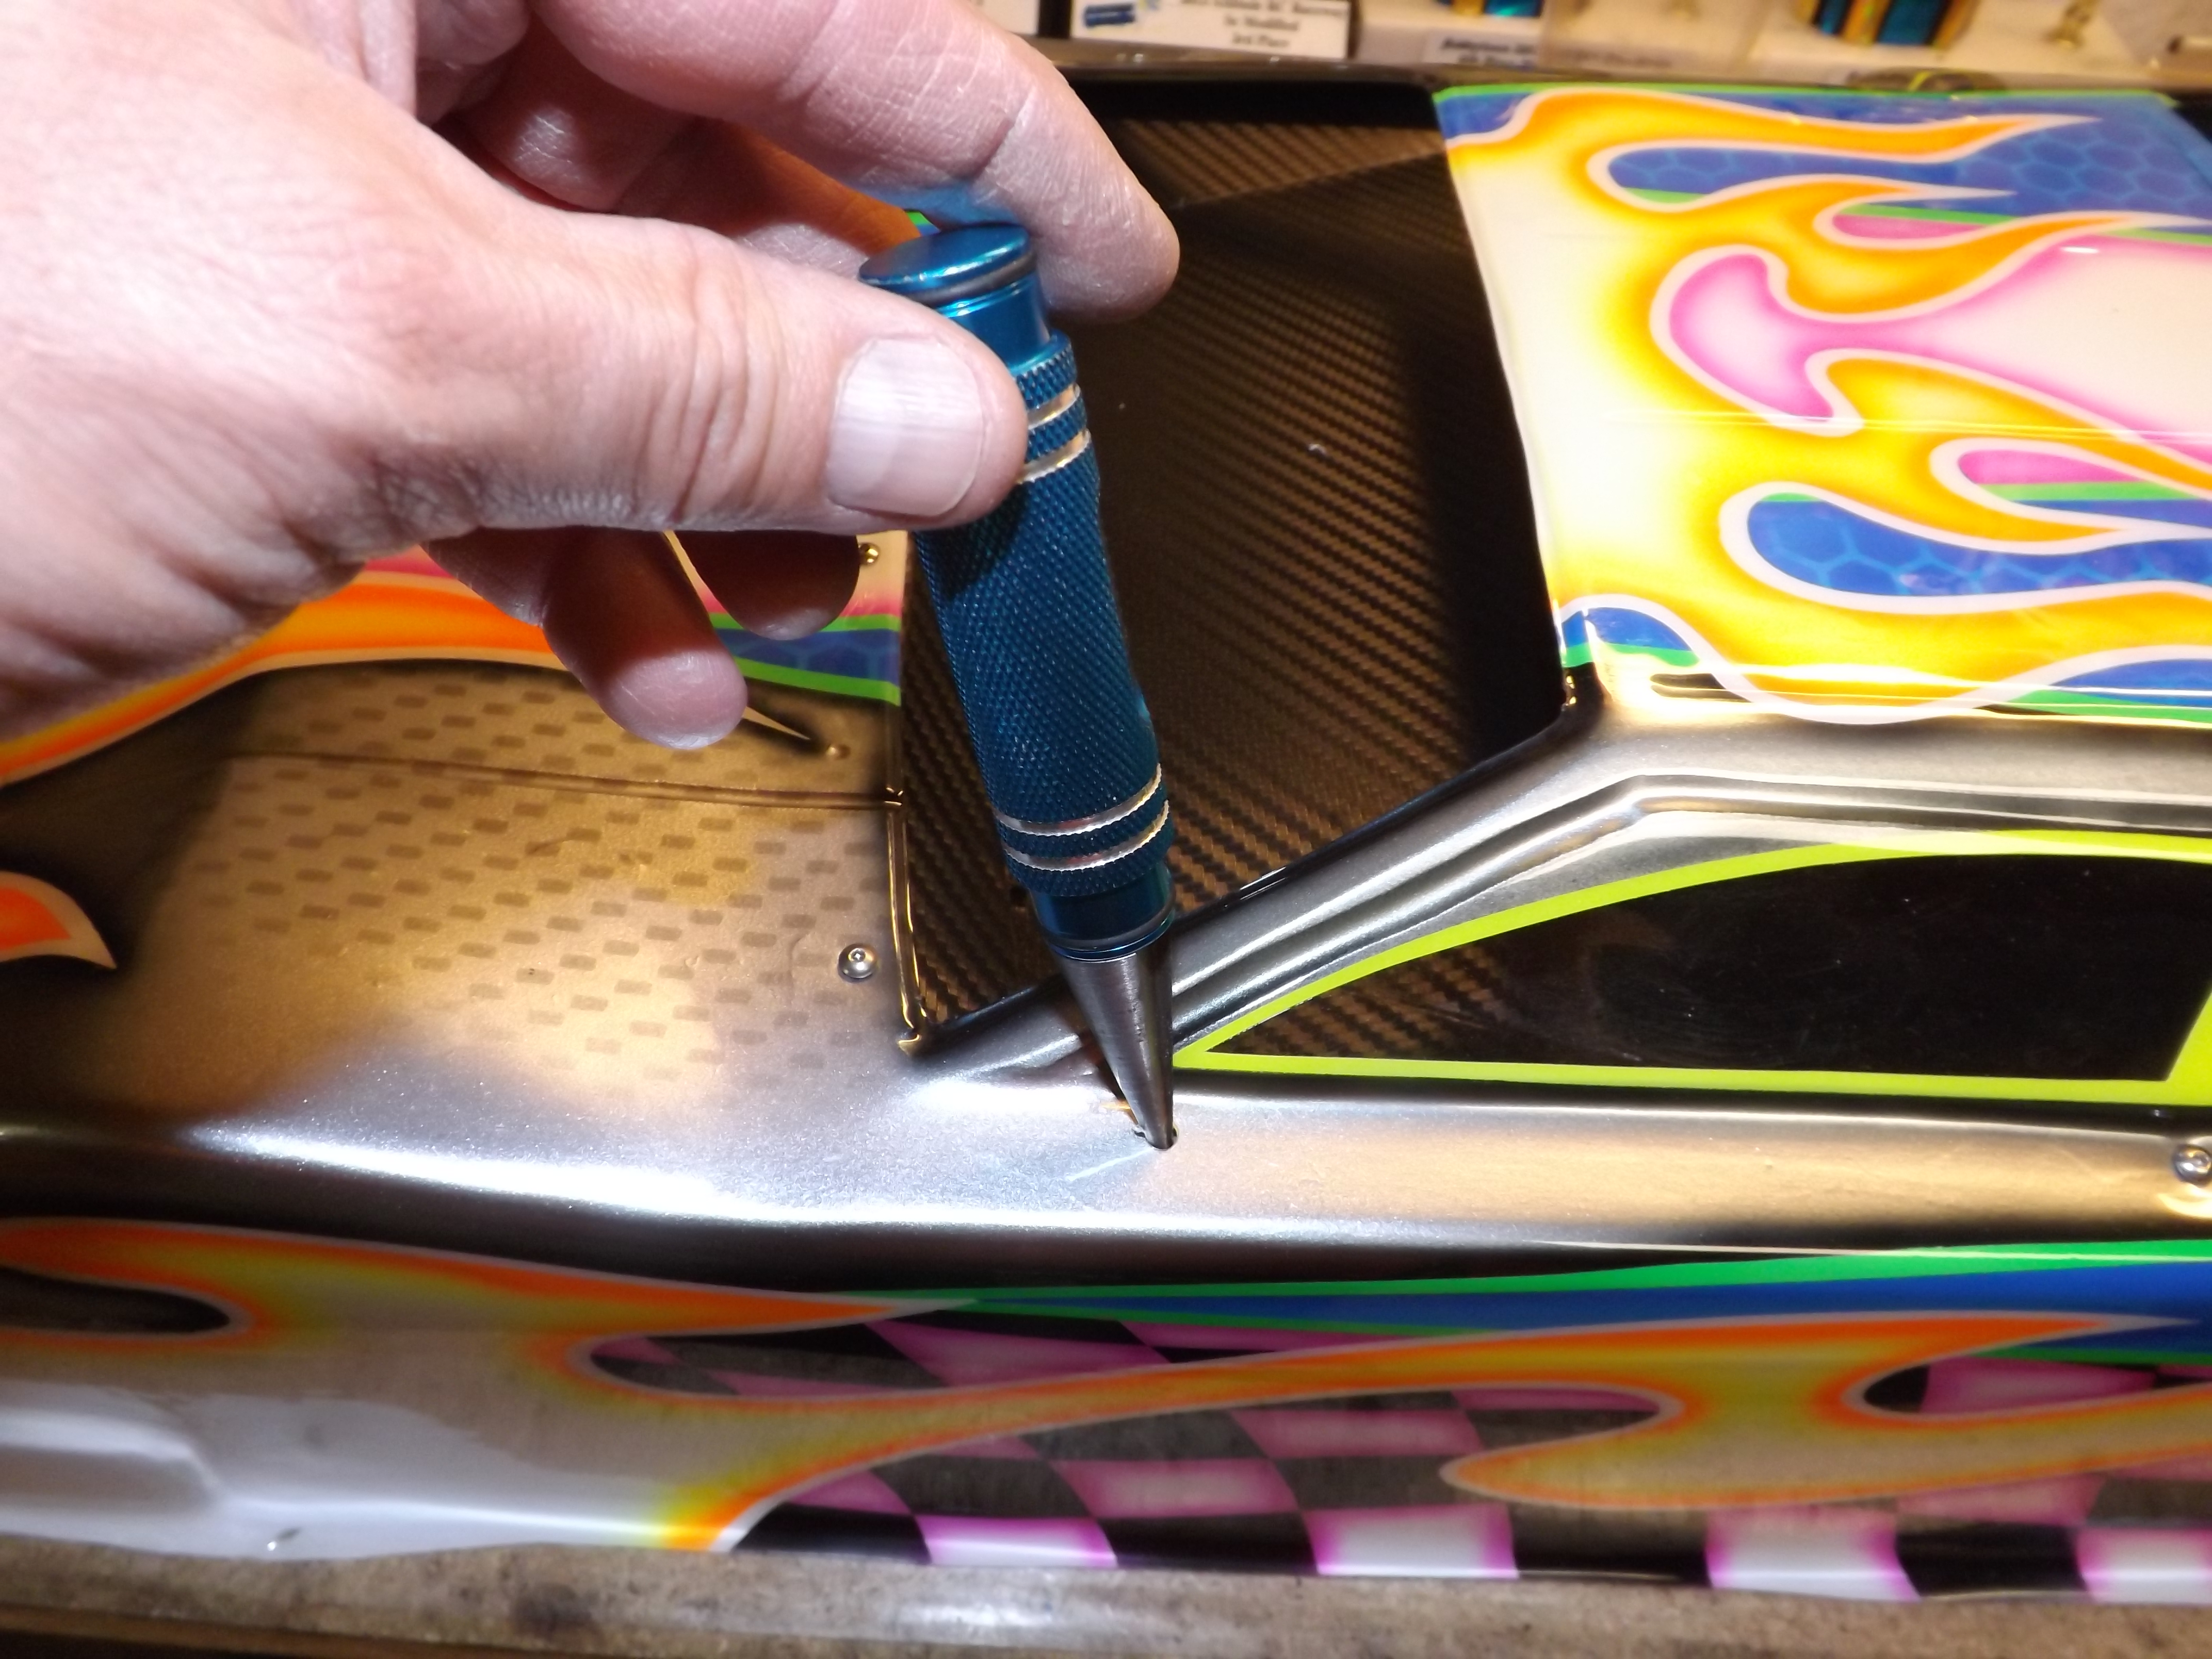
Insert a 4/40 or 6/32 screw thru the hole in the body and interior and back it with a nut.
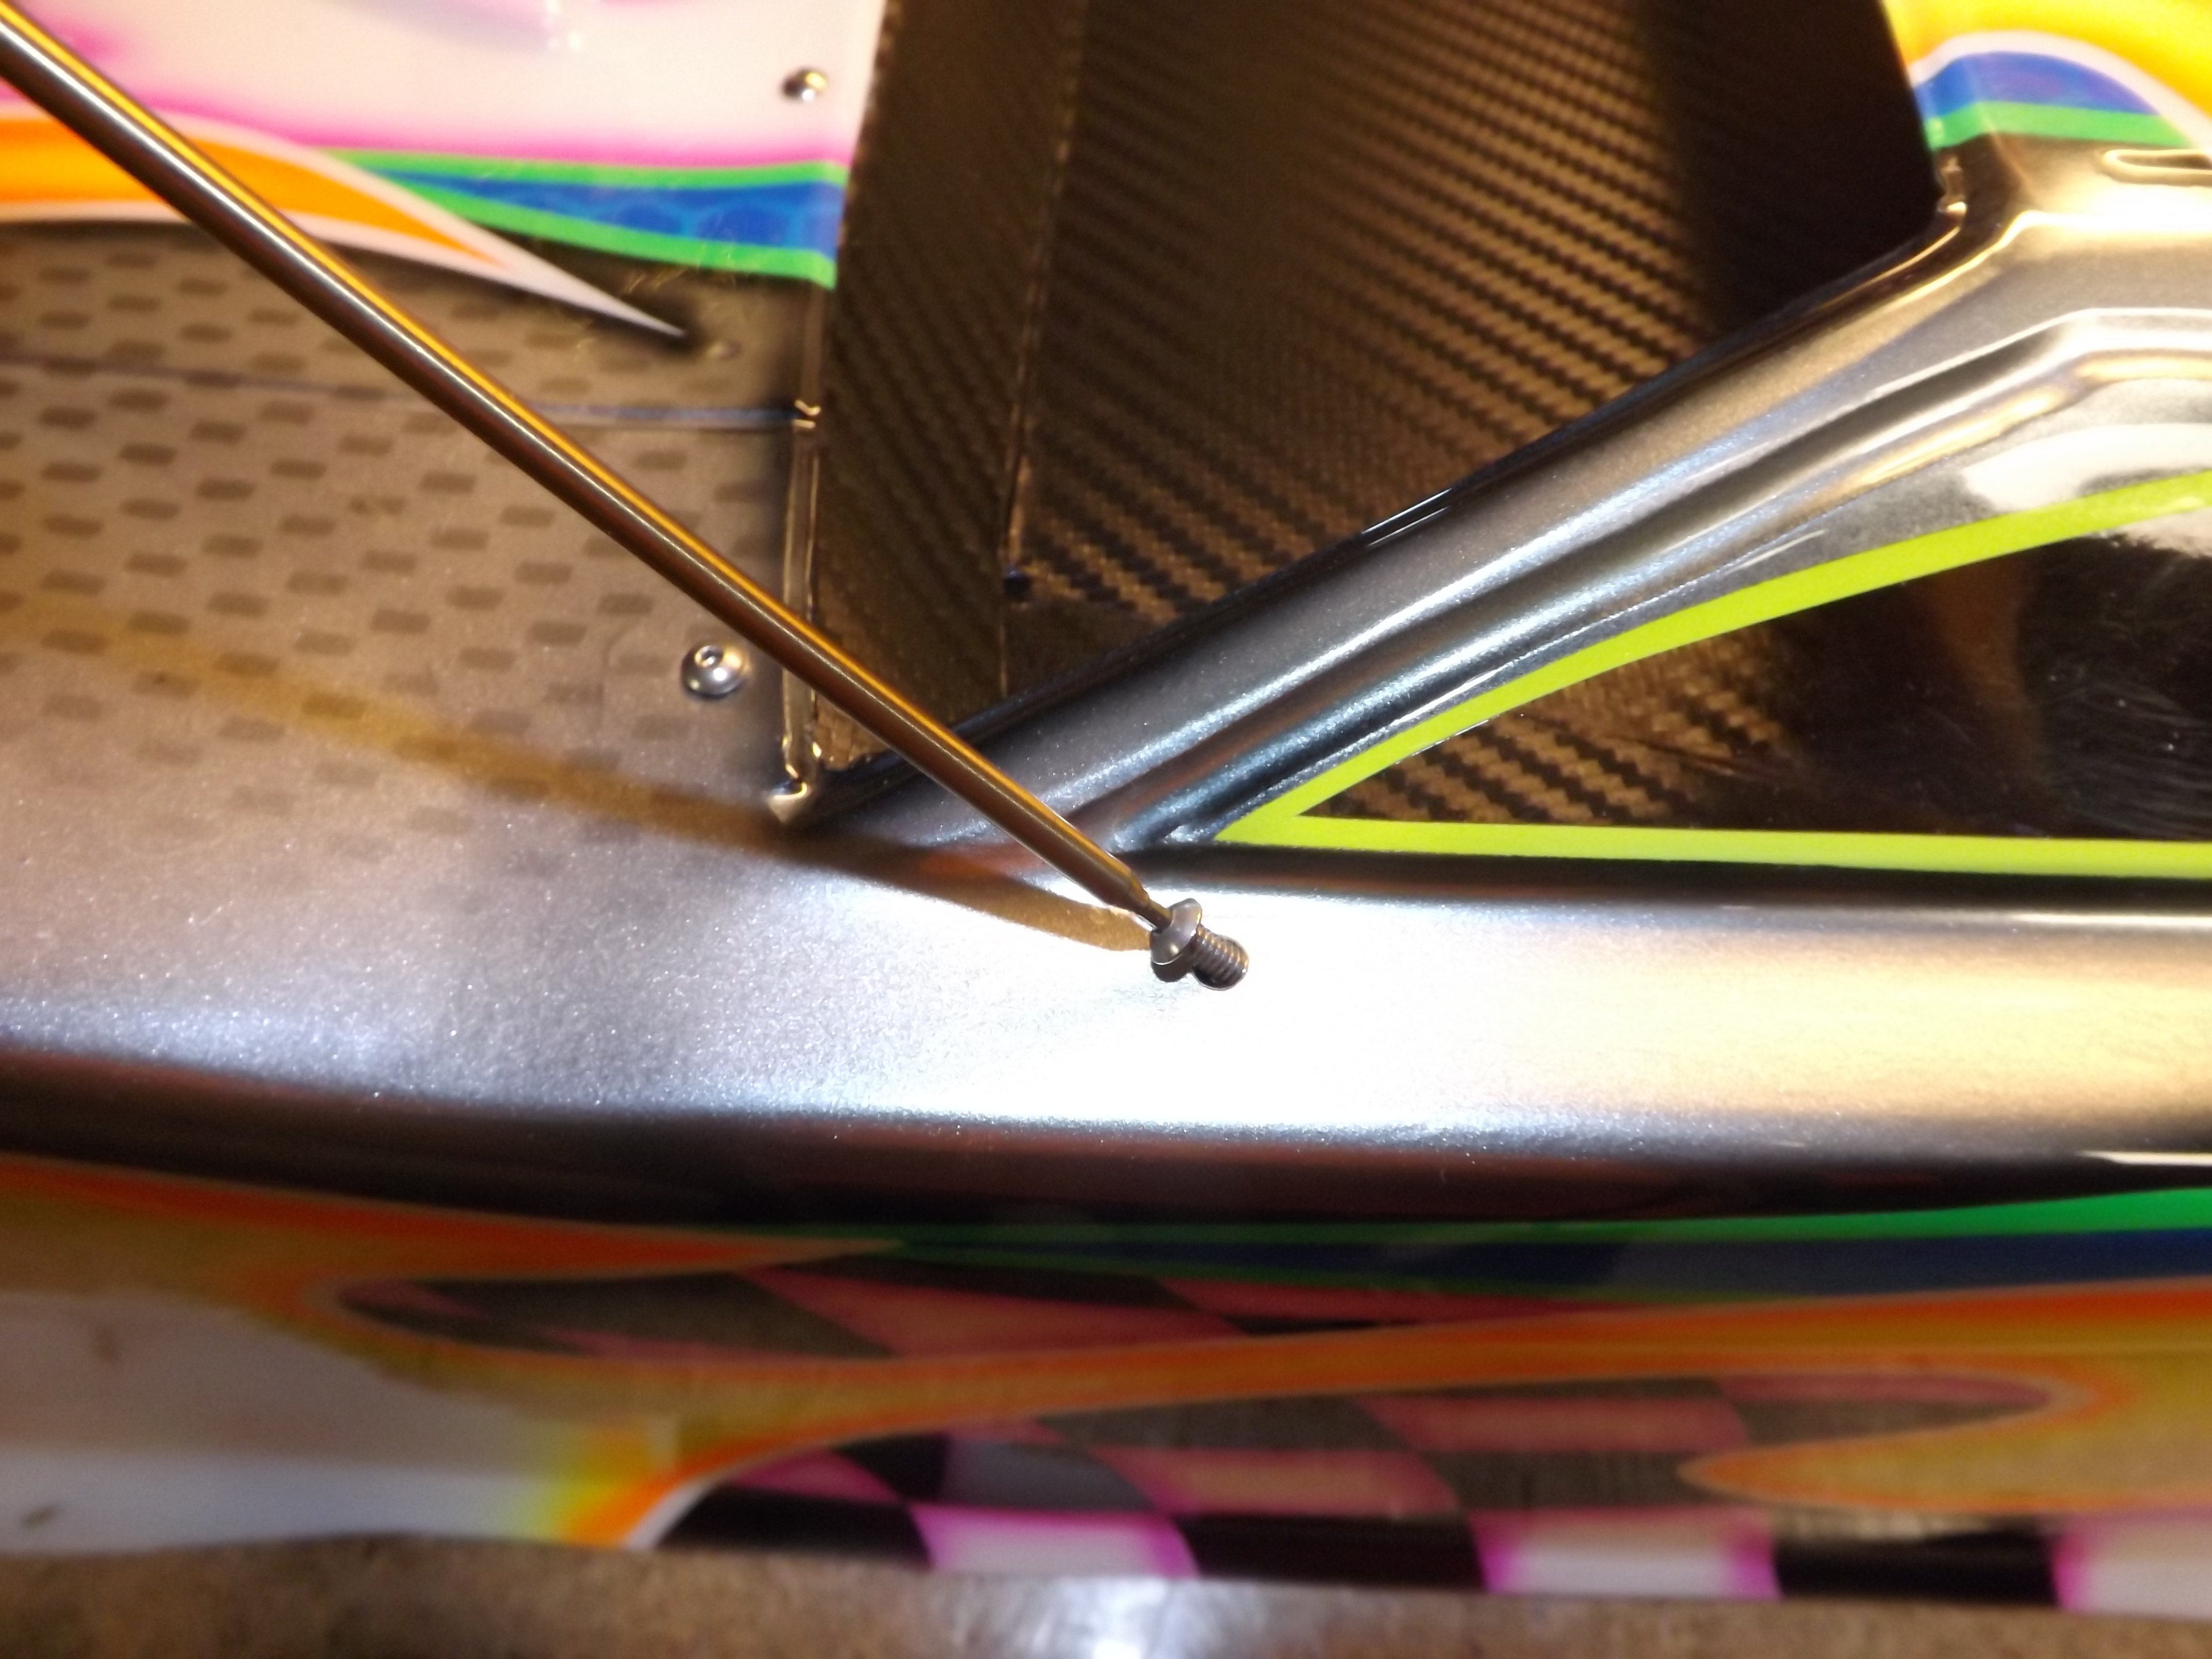
Here is a close up of the screws holding the decking to the body and a close look at the carbon fiber vinyl.
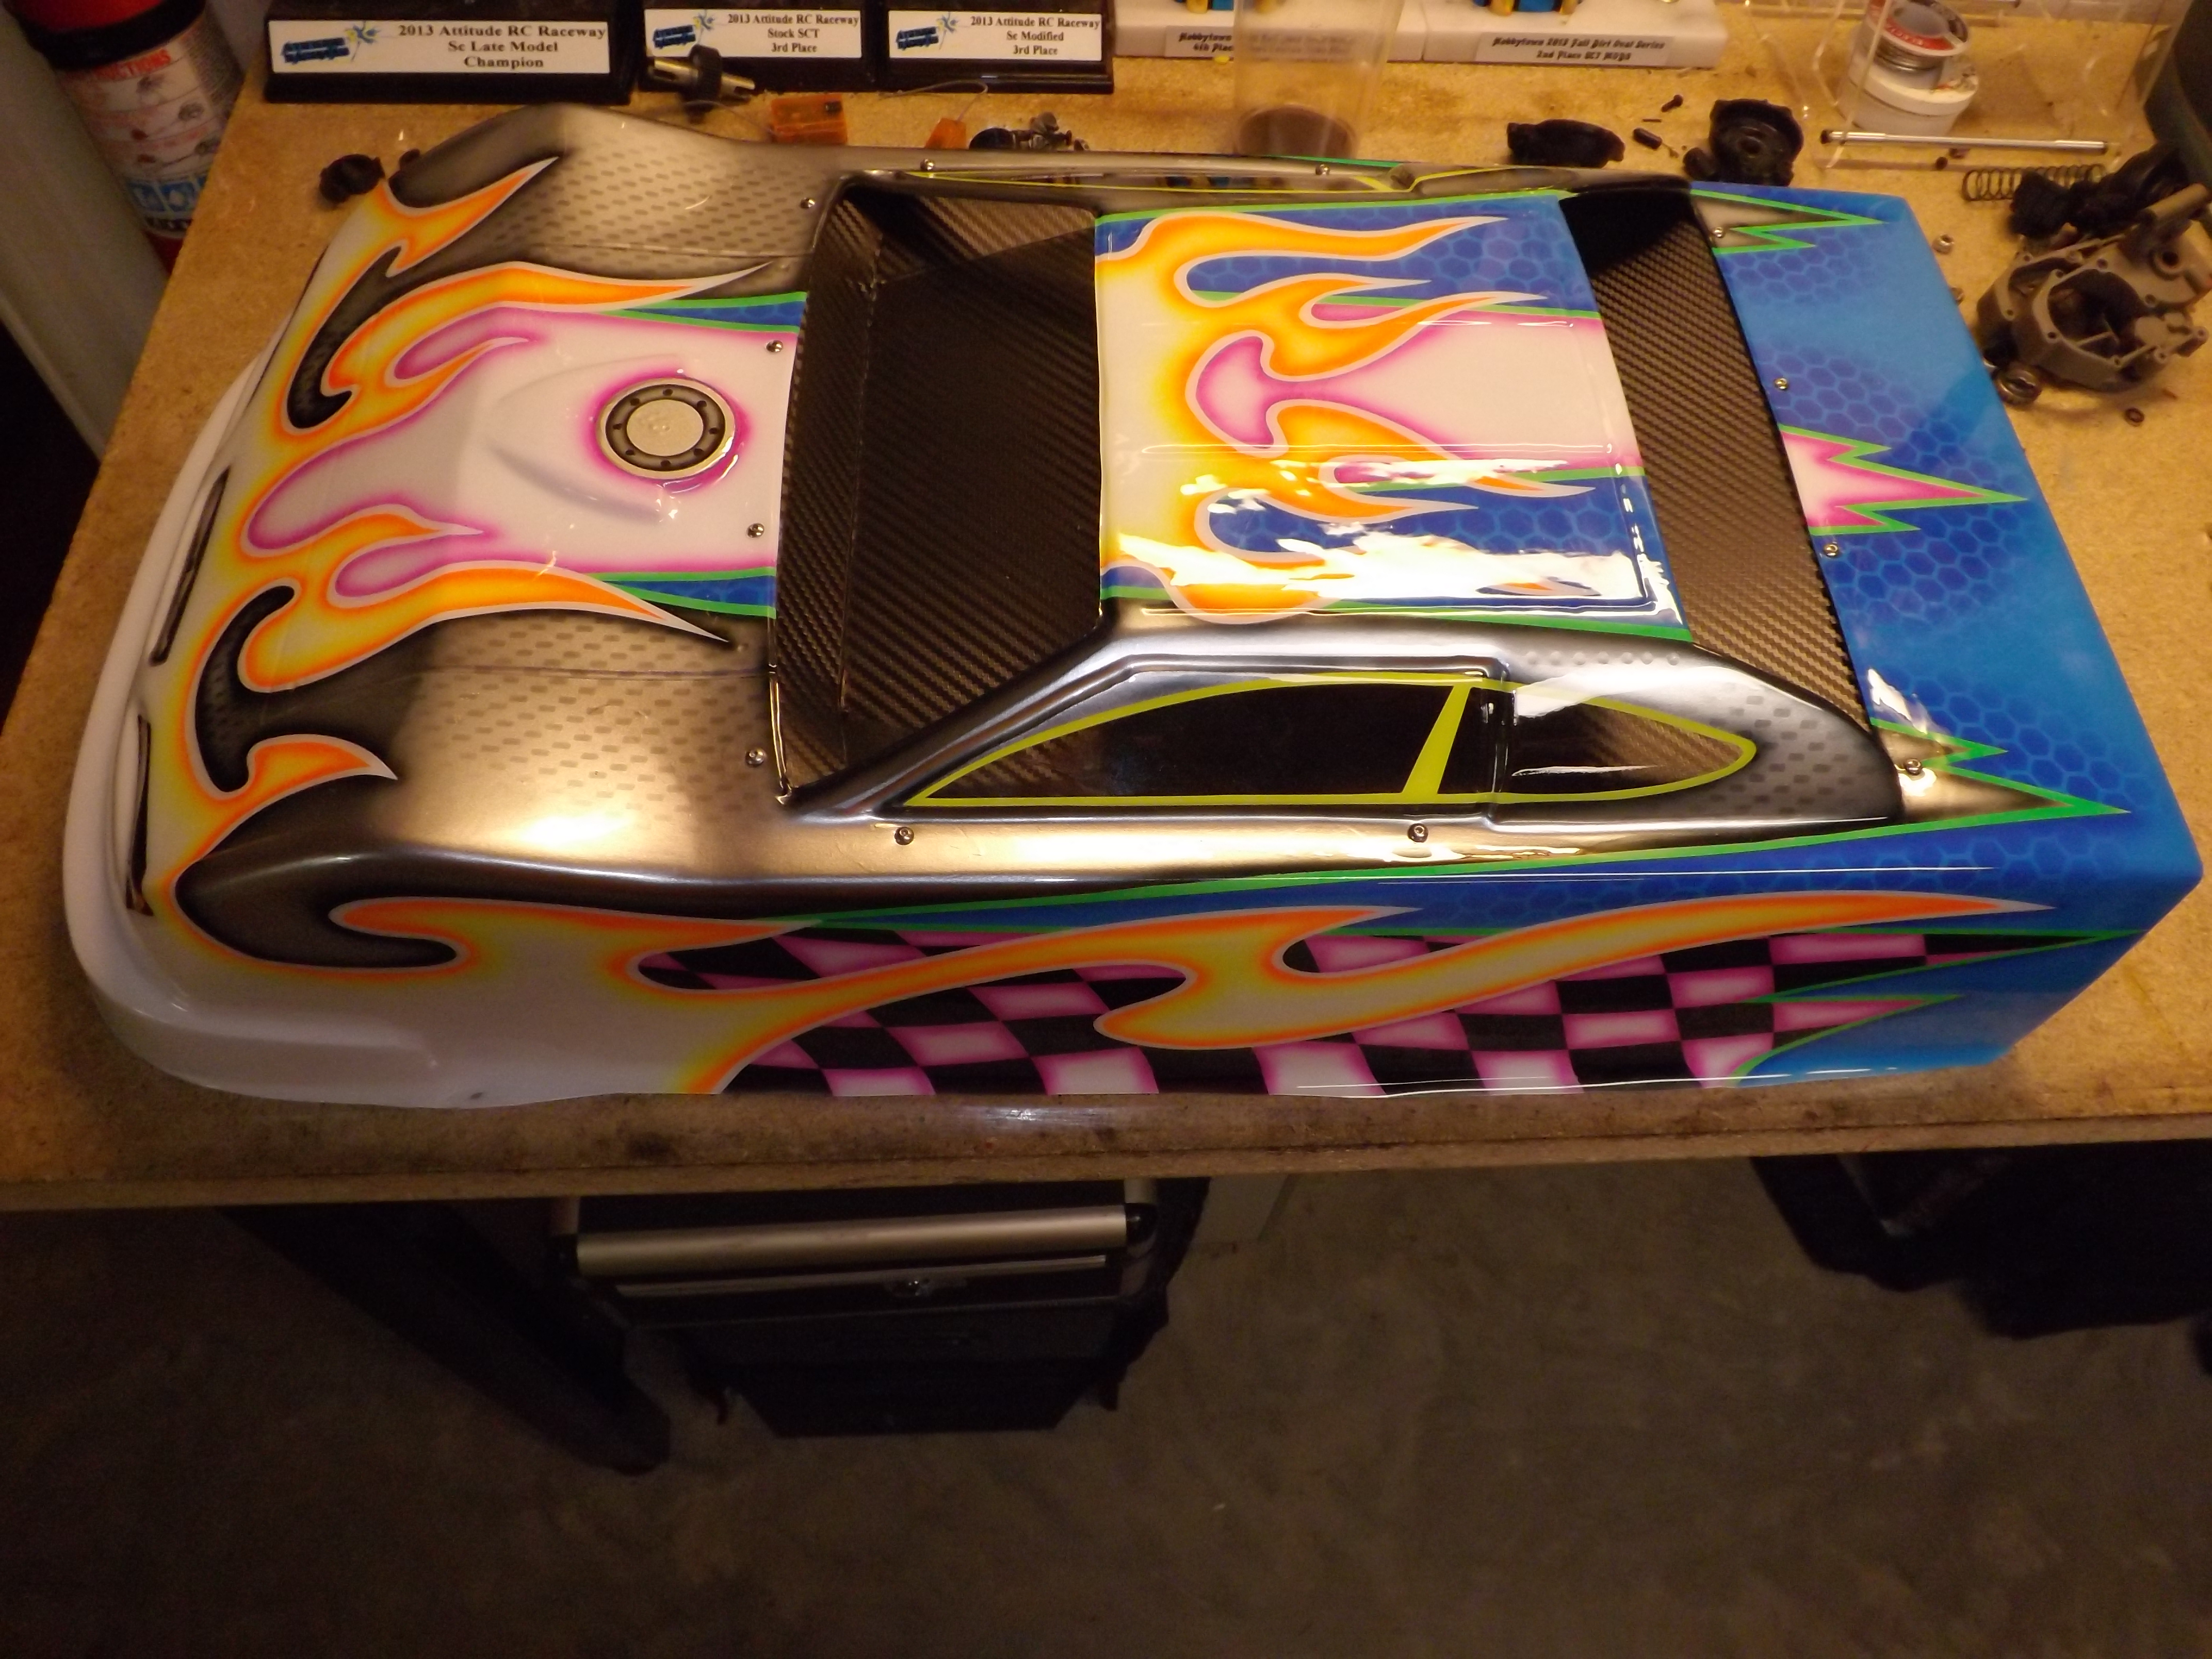
Below is the finished decking…. pictures do not really show the detail in the interior as well as how it sits in the body.
My next post will show how to decal the body and a few tricks on mounting the body .
 Posted in
  Tags:
Tags:
Great tips Paul, nice write up! Only thing I do differently is for the holes, I find using a Cordless Drill and Drill Bit work well also….so I guess its personal preference…..look forward to your next post!!!
This is a very helpful tutorial and I will be decking all my latemodel bodies now. Thanks for the detailed instructions and picture. Makes a person want to deck other Rc cars as well so they look more realistic.
nice write-up Paul. I had good luck using a Dremel tool with a cutoff wheel to cut the windows out of my late model body. Look forward to your next article!