

 December 19th, 2014
  Paul Peterson
 Let me start off with this…… Have you ever gone to the track and seen all those cars with cool looking numbers and sponsors on them? When you go to the parts counter and buy parts, all you see are those generic looking numbers and you just wonder where those other guys get their numbers from. Well, you can create some really cool custom looking numbers too! Just go to the RacingGraphics.com web site and you will be able to make your own.
I will show you a few shortcuts to create your own graphics and along the way I will give you a few pointers so you can make your own one of a kind decals.
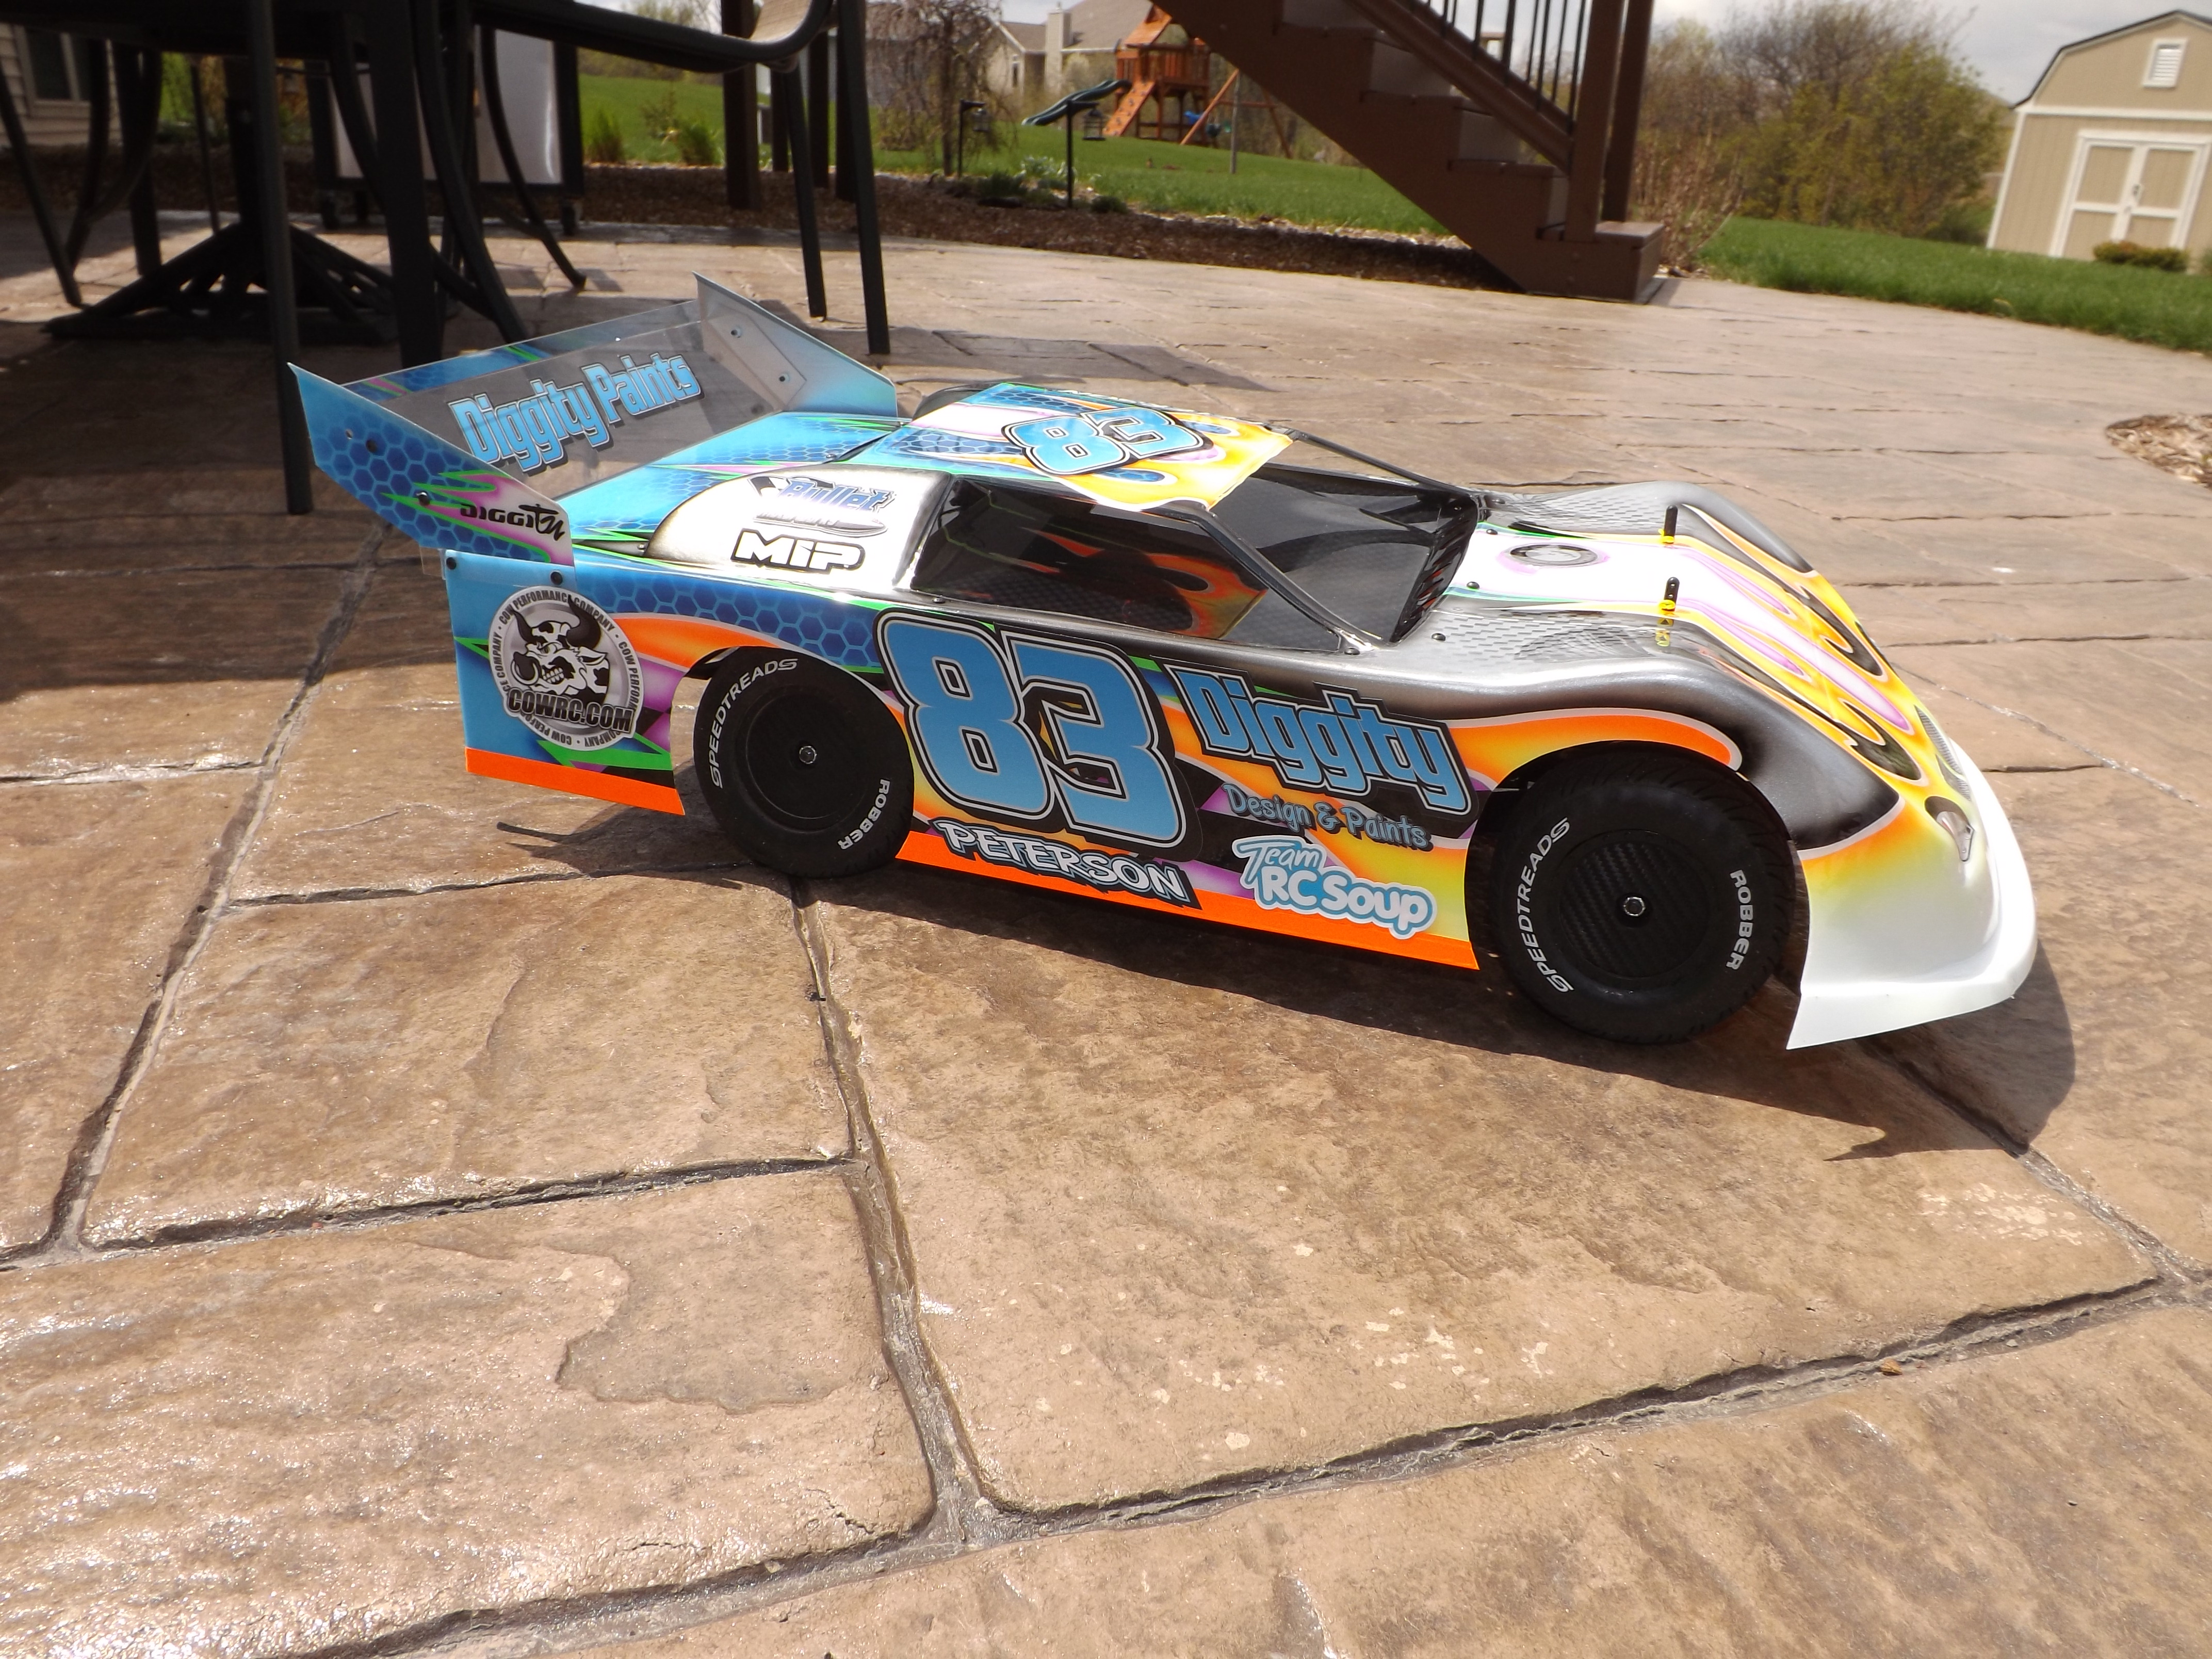
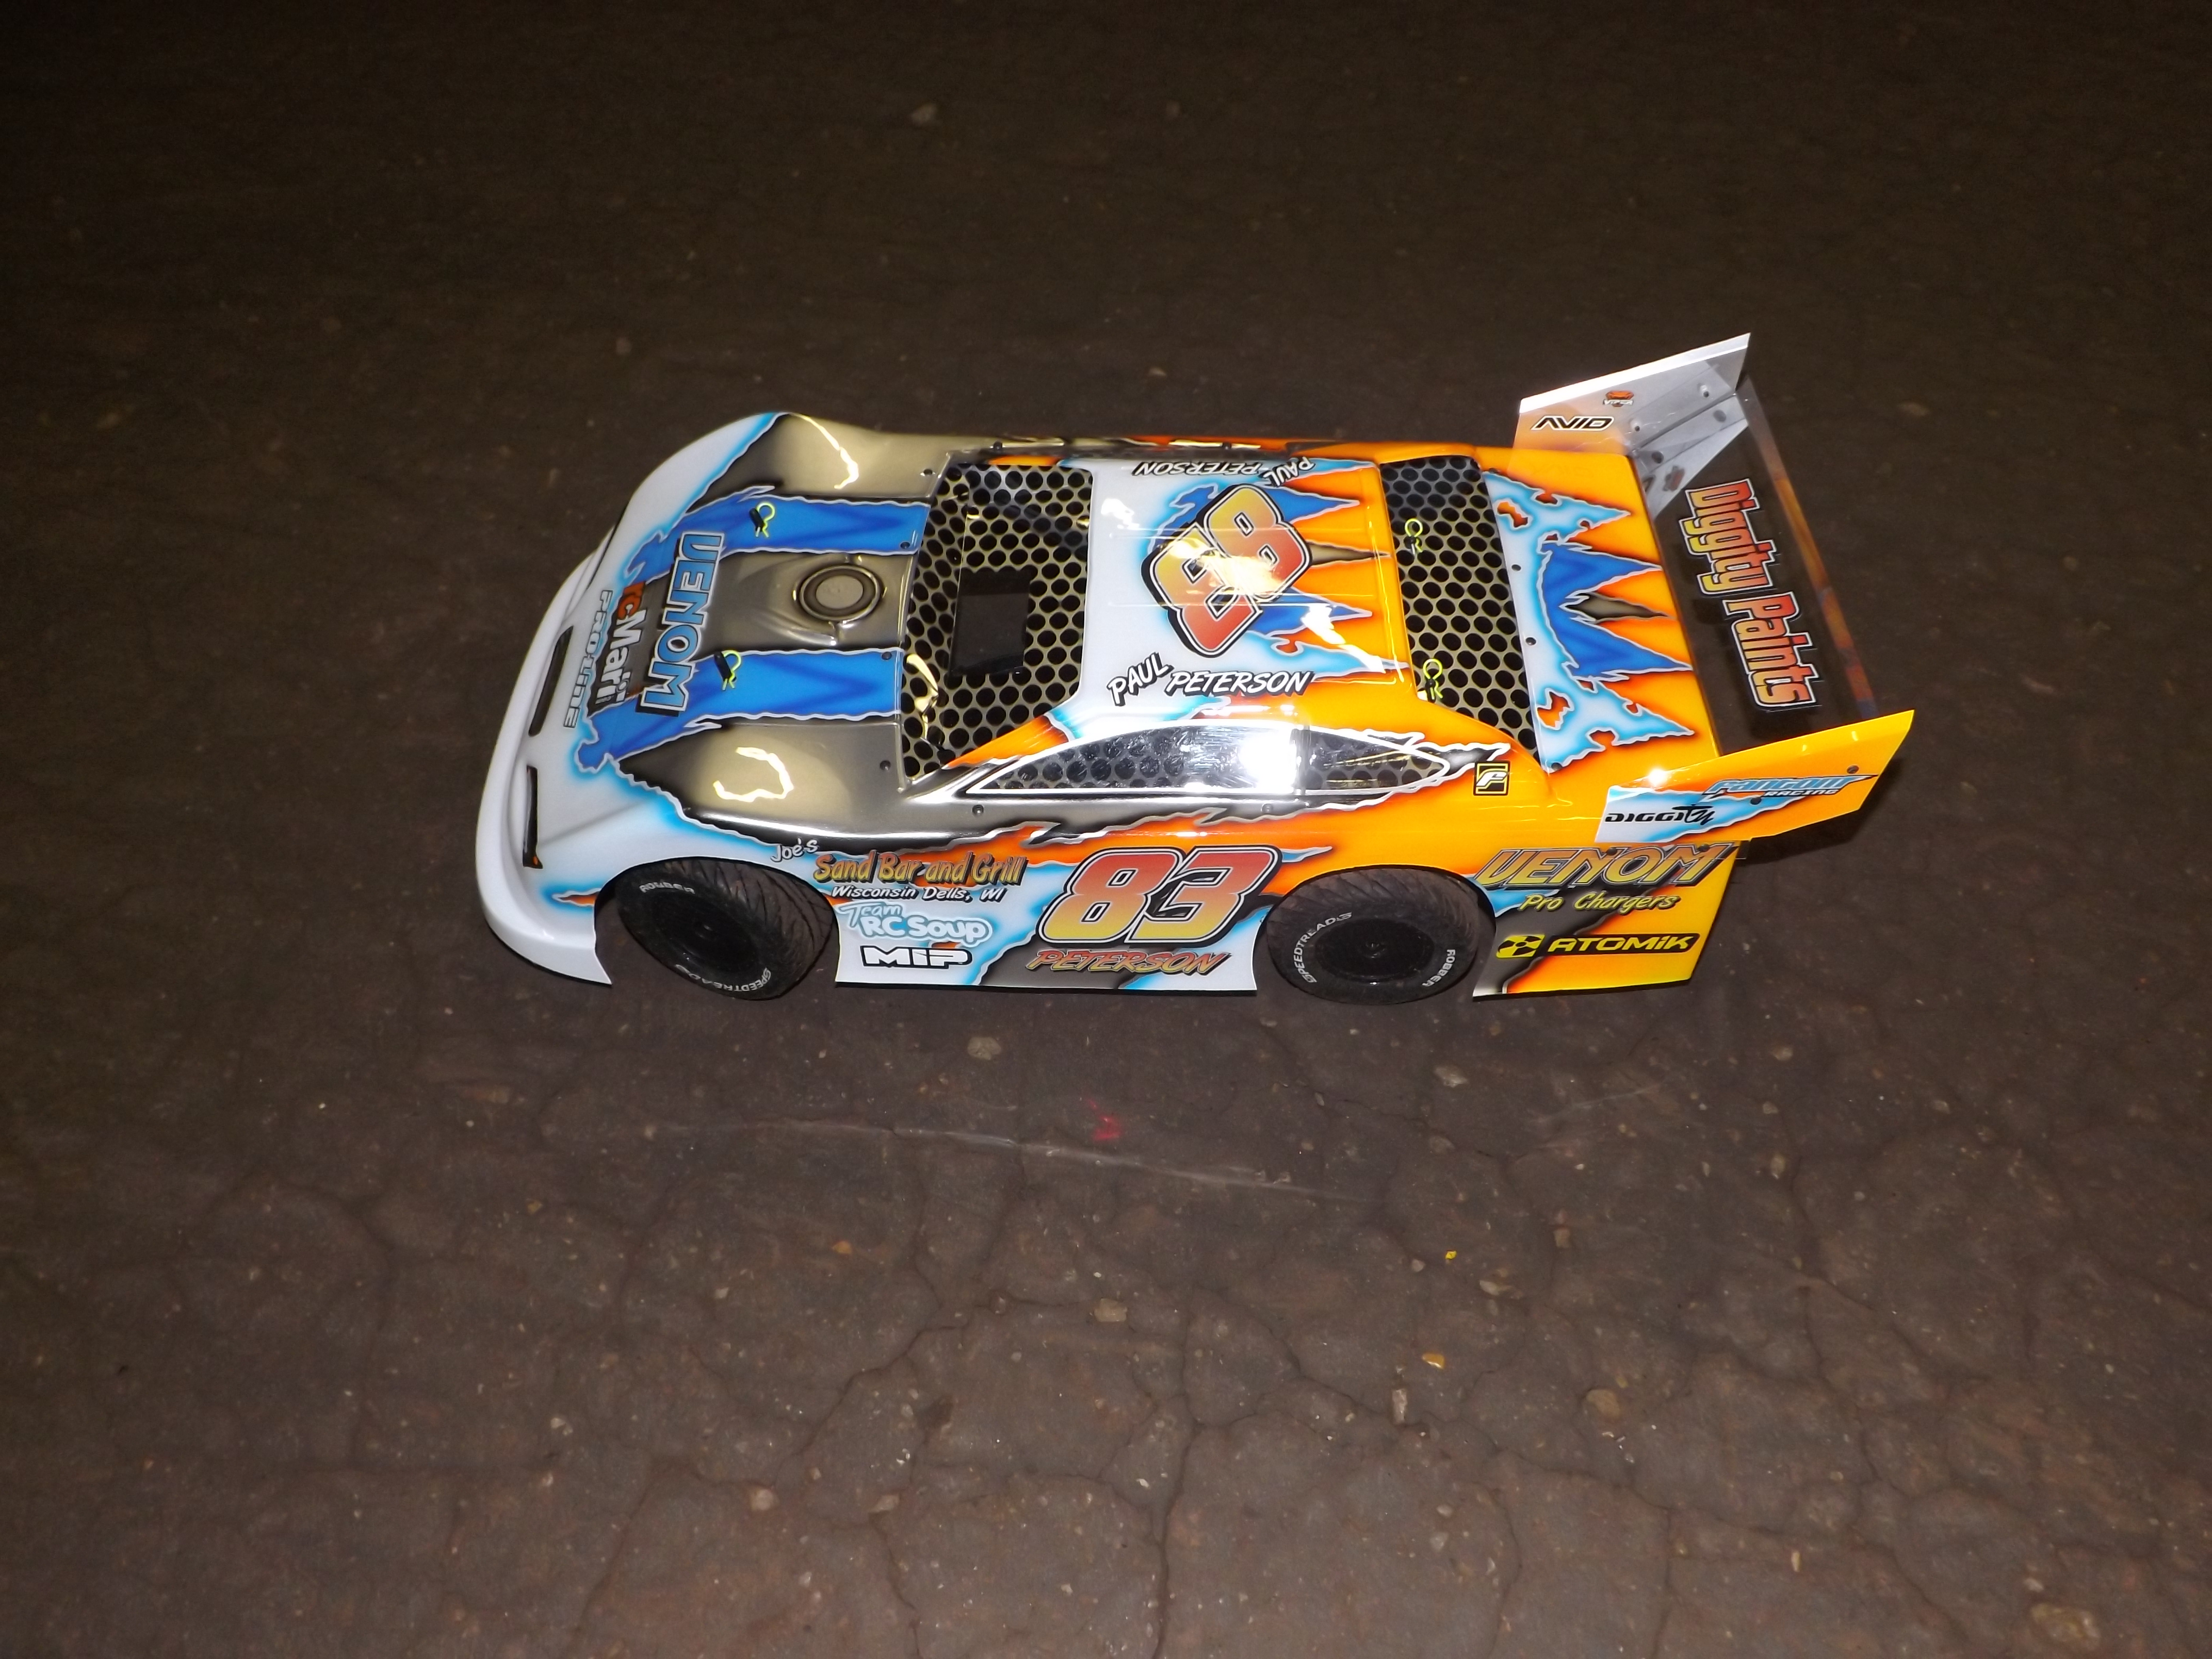
Above is a photo of my C&M Atomic SC Short Course Late Model body that I race car Attitude RC Raceway in Waupun, Wisconsin. Some of the graphics are already team decals, but the numbers, the name and the word Diggity designs were actually created by me on the Racing graphics.com web site. Once you get to the site you will have to register. But once you do, you will have a constant record of all the images you have ever created. This will help save time in the future. It is as fast as a few clicks of the mouse to make yourself a duplicate graphic.
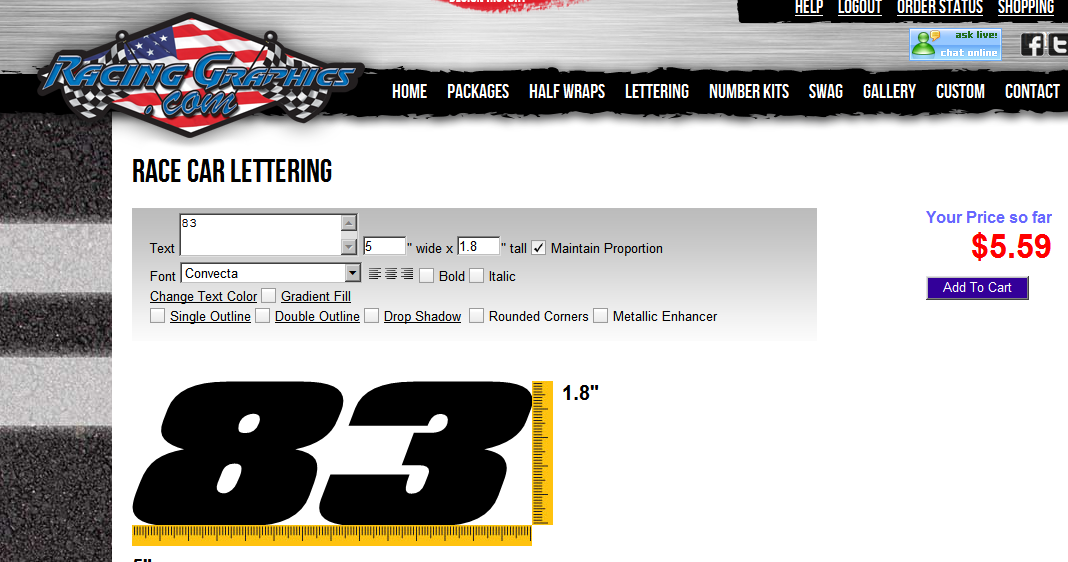
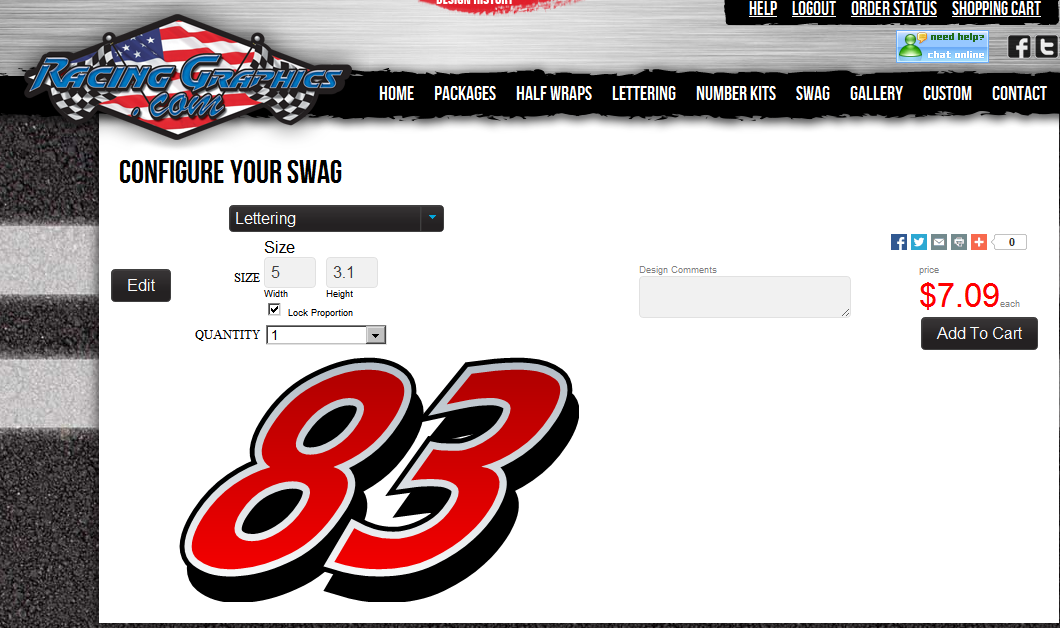
So now you logged in and entered all your registration information. There are a few different ways to create your numbers or lettering.. I always click on the lettering tab and then the design now tab, but you can also click on the number kits tab as well.. One of the hardest things to accomplish is getting the correct size of your graphics. I had to do this the hard way and work thru figuring out sizes…. I will save you the hassle and help you out and hopefully get you in the ballpark of the size you are looking for. I normally use a 2 digit number, like the #83 you see above. You may want to decrease the width a little if you use a single digit number. This will help your number so it doesn’t appear too fat and unnatural looking, but also don’t just go half the size either or your number will look a little skinny…. So for a 2 digit number I go about 3″ for the height and 4.1″ for the width. This will fit a 8th scale Dirt Late Model door pretty well….. if you want buggy or trucks or even 1/10th scale cars you will have to make those dimensions a little smaller.

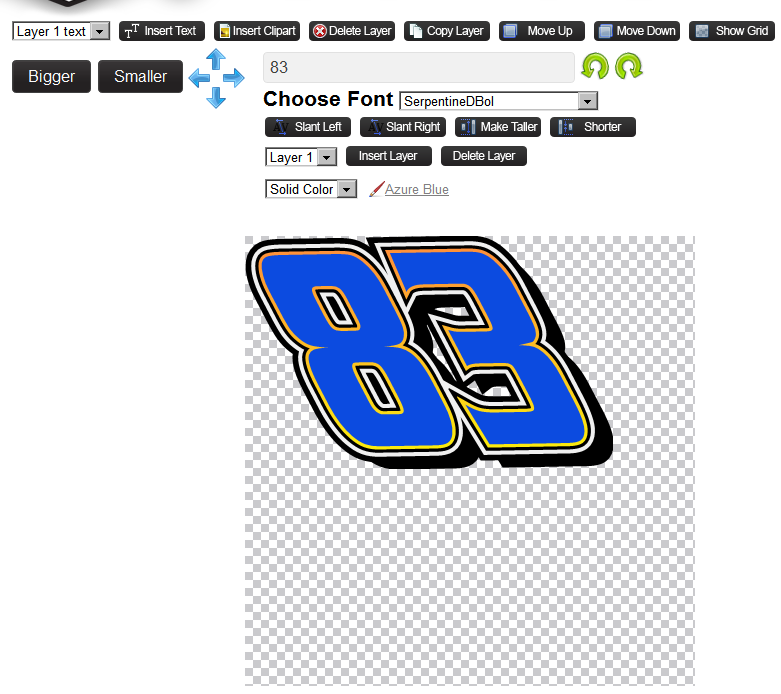
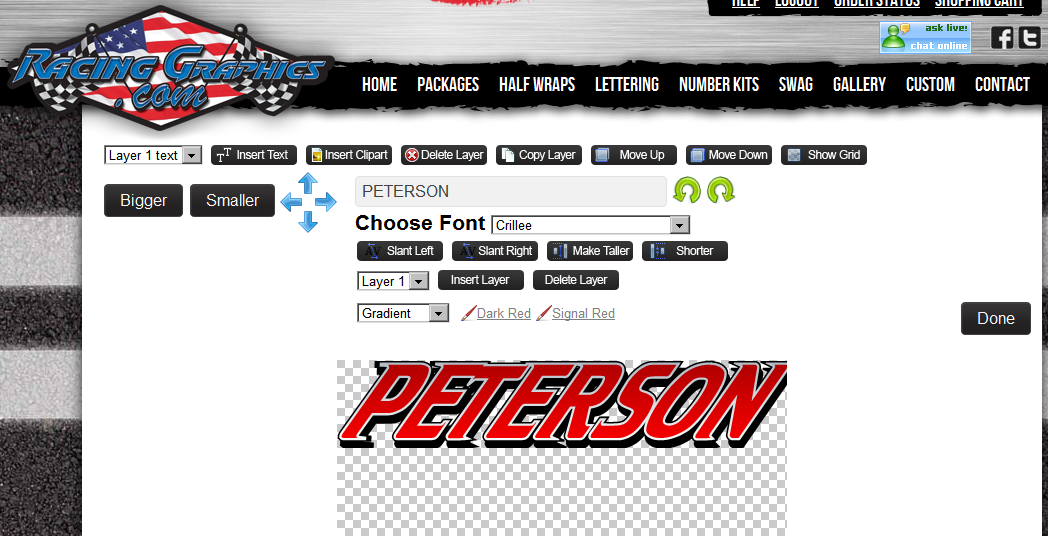
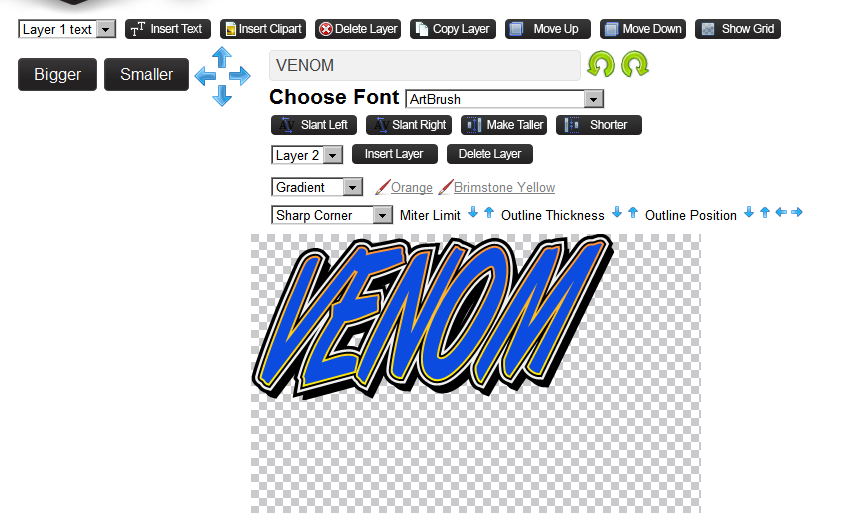
Once you enter your number or the lettering you like in the window above the choose font, you can click the down arrow and this will let you change the type of font you like… as you can see I have place the number 8s in mine. Also slanting the number right or left will give you the correct lean you are looking for,. This is achieved by clicking the slant left or slant right buttons multiple times, the number swill slant mo in the direction you choose with each click. By clicking “add a layer” will add to the outside of the number to create a more 3d affect. If you want to make a layer thicker or skinnier you can click on the down arrow where is says “Layer 1” this will take you to each layer and the colors that you chose in this layer. Making the number taller will stretch the number and making it shorter will decrease it and make it fatter. Gradient will allow a 2 color blend or you can just click “No Gradient” and that will leave you with a sold color number. To change the number color , just click on the color and it will pull down a color pallet to pick from various colors.

You can then click done and it will take you to the next step which is to size the number. Keep in mind that creating these number does take time and practice. You will only get the results you are looking for by trying things and learning in the process.
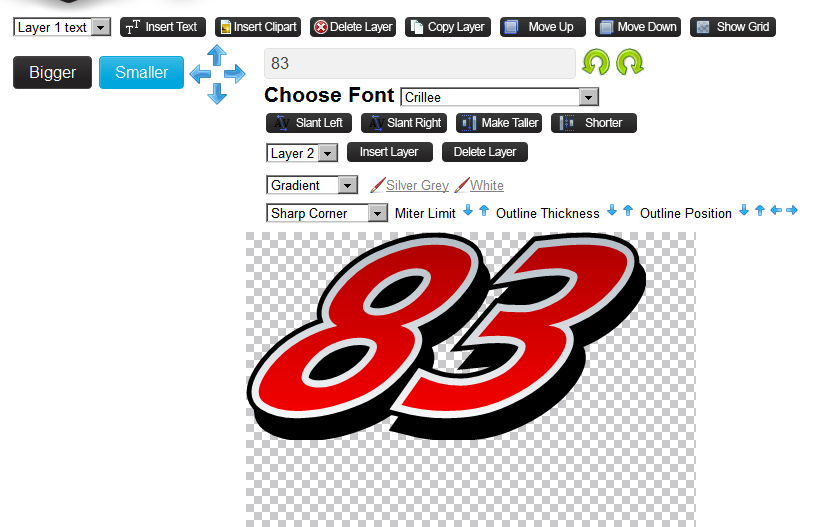
I added another number so you can see the difference you can create with solid colors and different layer colors.
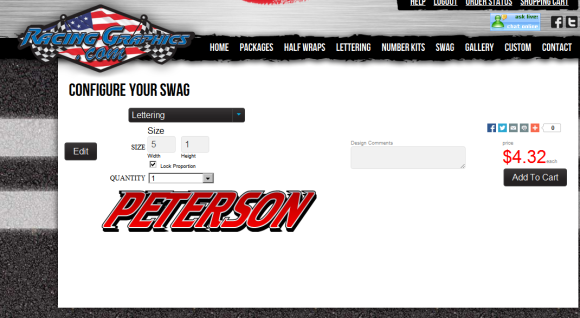
Another example of what you can create. The next step is the resizing of the graphic.
As you can see in the example above you will be able to size the number however wide and tall you would like… but sometimes you may have to go back and edit your number and click on the “make it bigger or smaller” buttons.. Remember you don’t want to stretch a number too much that it will loose it’s shape too.
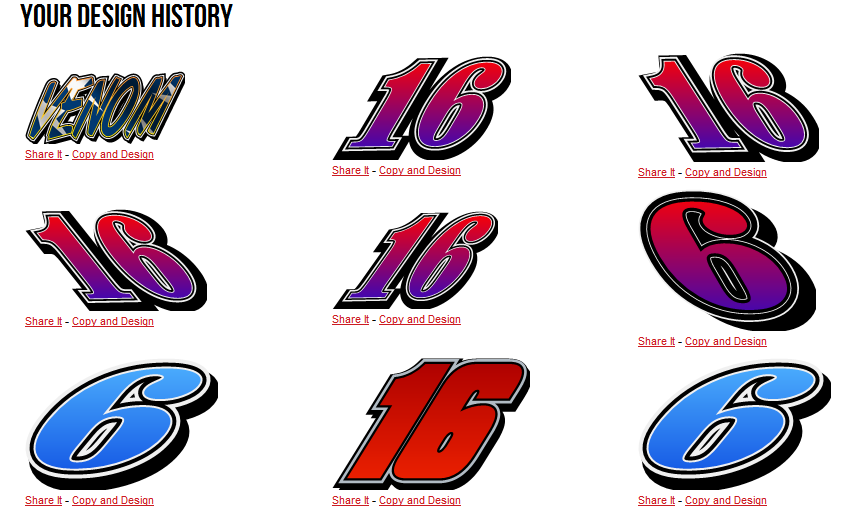
Once you save your number and add it to your cart, you will be able to go into the design history where all your previously created numbers and graphics will be stored for future use or reference. You can then click on anyone of your predesigned numbers or lettering to either reorder or to redesign the lettering. This way you can create a graphic in the same coloring as your numbers. This is used to make uniform looking graphics where your numbers match your letting.
For example above, this is the same font and style as the red number 83 in one of the previous screen shots above.
With the 1/8th scale bodies, I run a fairly large number for the door. When you are creating lettering for the door or rear quarter panels a good size would be 1.5″ or 1″ tall. But like mentioned above, this will take practice. These sizes will work fine on 1/10th scale trucks and Buggies too.. You are not limited to the bodies that I race.. any style body will benefit from the Racing Graphics.com design.
Above is just another option you can create. This screen shot also shows you another size to try as well. Always measure and make sure the graphic will fit into a space before ordering. No one wants to order a number that doesn’t fit on the door.
The Screen shot listed above shows the star graphic in the lettering. To achieve this type of graphic in your lettering, just click on the color to change it . When you click on the color, it will take you to the color pallet where you can change all your colors and you also have options like the stars or even a carbon fiber look. There are many other options to try as well. I have to remind you once again this is a site you need to practice on. The more practice the better you will get at creating new and different graphics. If you think about it, you are the one designing here and you need to be patient and try to learn how to use these features. The Staff at Racing Graphics.com are very helpful to get the most of your deign and a few of them have helped me out as well. So, if you email them mention my name (Paul Peterson) and they will be able to look at some previous items I have ordered and they can really help you out with the size you might need… Remember this site does cater to full scale cars, but as you can see I found a great way to create my RC car graphics on line the way I want them them to look, custom.
Above is a another screen shot that explains a little bit of information if you wanted to just do layers to numbers only.
Just another example of the colors and font that were used in one of the previous numbers listed above.
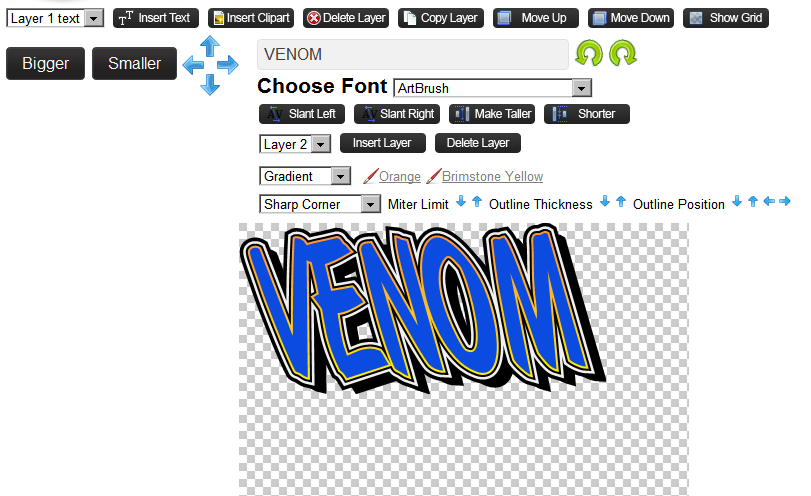
An example of taking the graphic and slanting it to the left a little
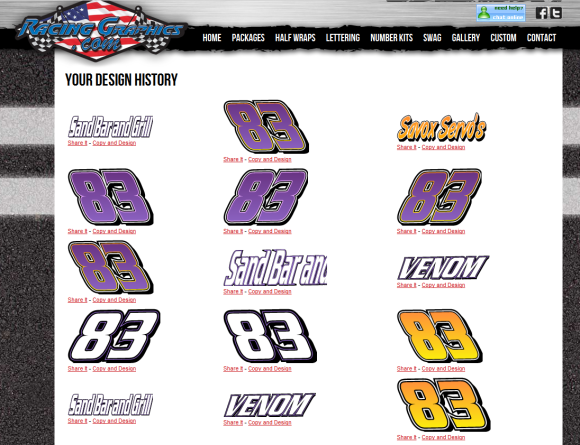
One more example of a design history page. I think I am up to 56 pages now. They are great to go back thru and pick a design and just change colors without having to go thru the whole layer process and building up the numbers. With the design history it is just a click to start a new number or to add a sponsor in a color you currently have on your car. Contact Racing Graphics.com and they would be more than happy to help you out. A side note. Racing graphics.com will help out with custom designs and they also do Tee shirts, sweatshirts, window decals, race magnets and many other items to personalize yourself.
Just another one i worked on to show you a few more idea’s
Remember, you didn’t learn how to race RC cars in one day, so this might take a little bit of time to learn. But driving your own RC car/truck/buggy with graphics you designed yourself is extremely rewarding. The best part is when one of the other drivers comes up to you and asks where did you get that lettering and numbers and your answer is, I did it myself.
 Posted in
  Tags:
Tags:
another great write up Paul! Thanks for turning me onto the Racing Graphics website, it was fun creating my own decals. You’re right, the more you play with the site the easier it is to use.
Very Cool Paul, I’ve also noticed that the pricing of the Graphics has been far less expensive this way,than taking it somewhere and having them done. A little time and effort goes along way, plus I have total control in what I want to create. Thanks!