

 August 28th, 2014
  Kevin
Kevin So if you read the lengthy introduction, you’ll have learned that the Tamiya M-05 is configurable in 3 different length wheelbases. Which one you run is determined by the body you choose. The Short wheelbase is 210mm, the Middle one is 225mm, and the Long option is a whopping 239mm. Wheelbase has a lot to do with handling. It’s common knowledge that a shorter wheelbase will have a tighter turning radius and therefore have a faster reaction/steering time. It will also be a little bit twitchier when compared to the long wheelbase version. Which one is best? Well that really comes down to driver, and ultimately the one you run will be dictated by which body you run (or the body will be dictated by the wheelbase you want).
For our build, we are going to run the Long wheelbase because the Mini JCW Coupe body has the 239mm wheelbase.
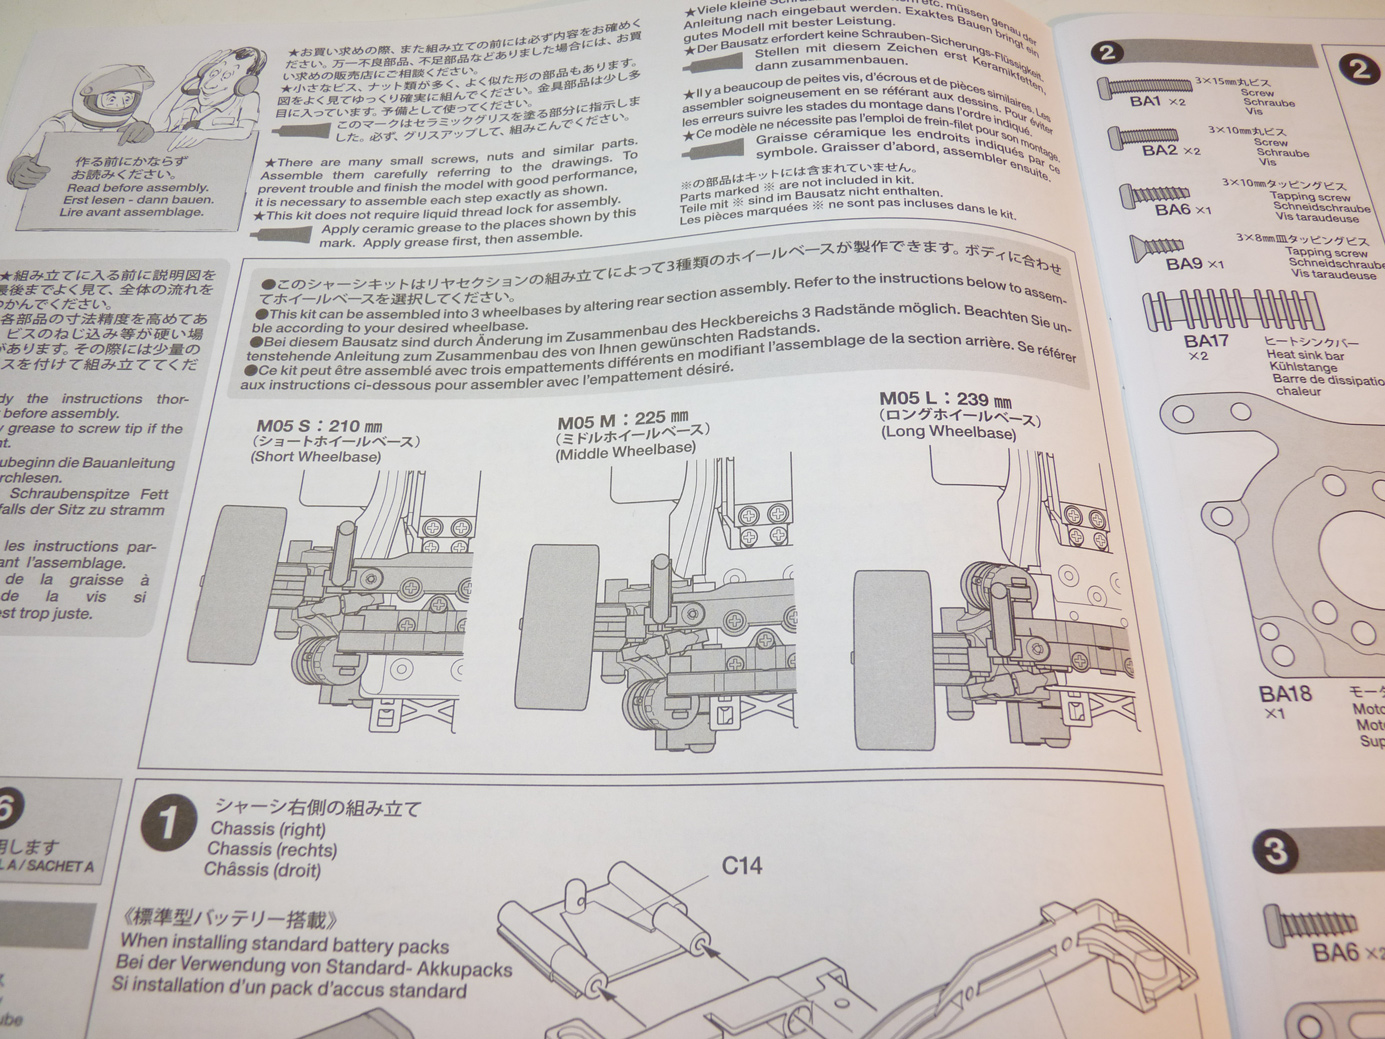
Shown above are the 3 different configurations for the different wheelbase options. What is awesome about the M-05 (and the M-05v2) is that no extra parts are needed to switch from one to the other. It’s just a matter of moving things around on the chassis.
Another choice you will have to make in your build is your battery choice. The original M-05 is made for nimh and nicad “stick” packs. This means to run a lipo you are restricted to running some of the less powerful “sport” type lipos that simulate this style pack and have a rounded profile. The most common choice when using this type of pack is the Peak 45C 4200mah 2s Lipo. It’s only $30, but some folks may not want to buy a “specialized” lipo for a specific car.
The V2 now allows traditional rectangular packs which opens up a huge door for power options. Now you can run your 150C MaxAmps packs if so inclined. Will you need all that power in a 21.5 Brushless class? I doubt it, but at least now the option is there and people can run the same batteries they already have for everything else. I commend Tamiya for this update and adopting to the currently available technologies.
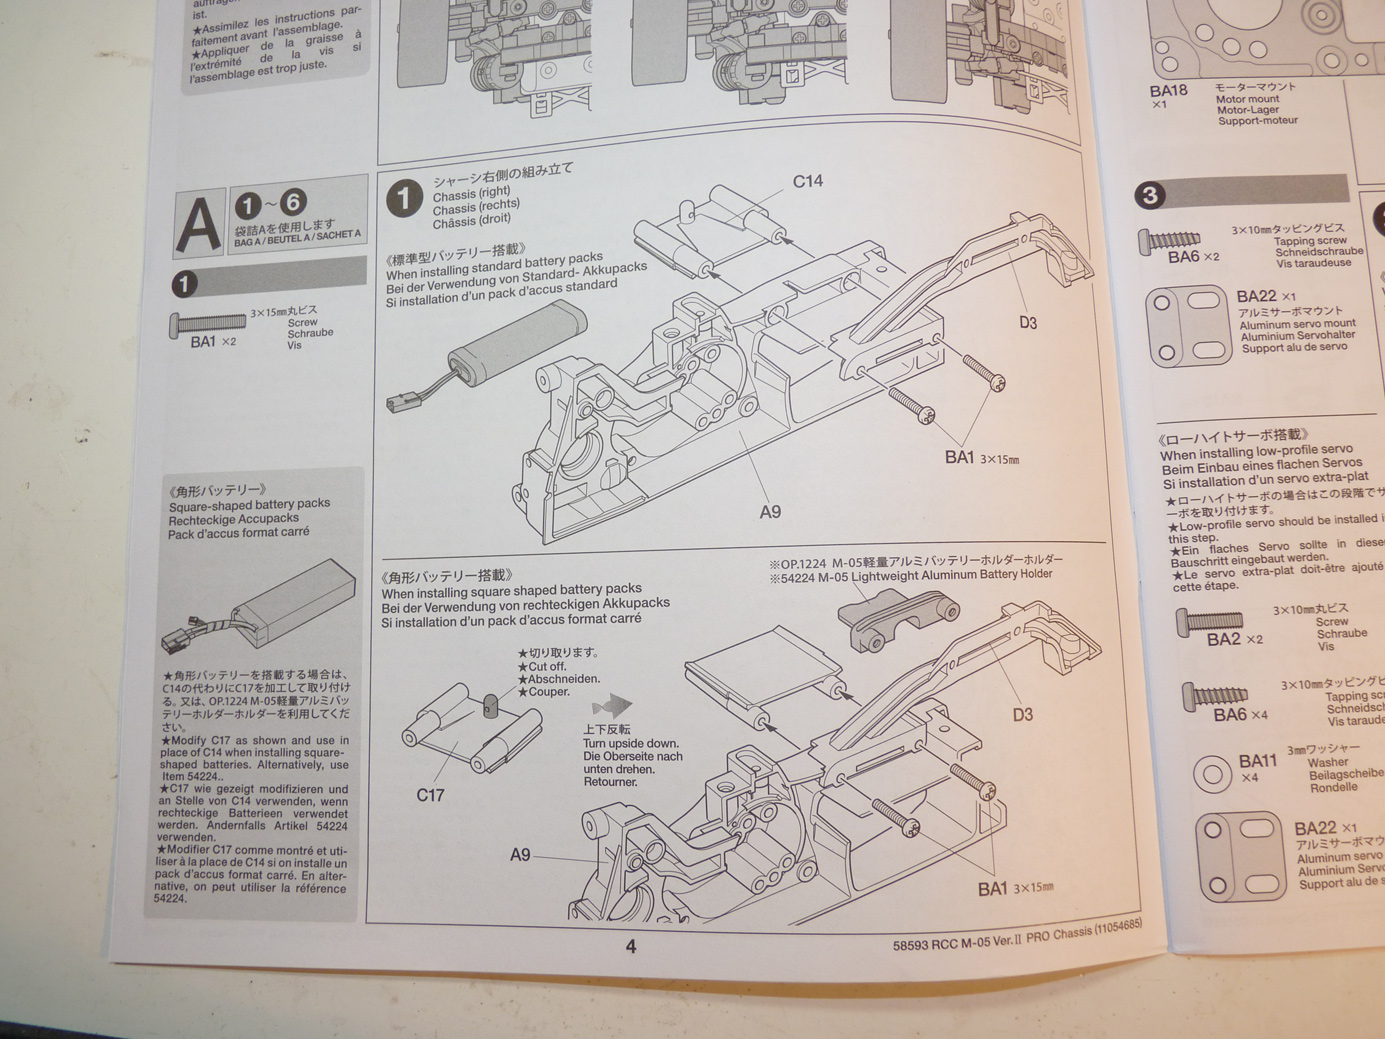
When building the kit, you setup your M05v2 for square or round edged lipos. Choosing one or the other is required as they each have their own method of keeping the battery in place.
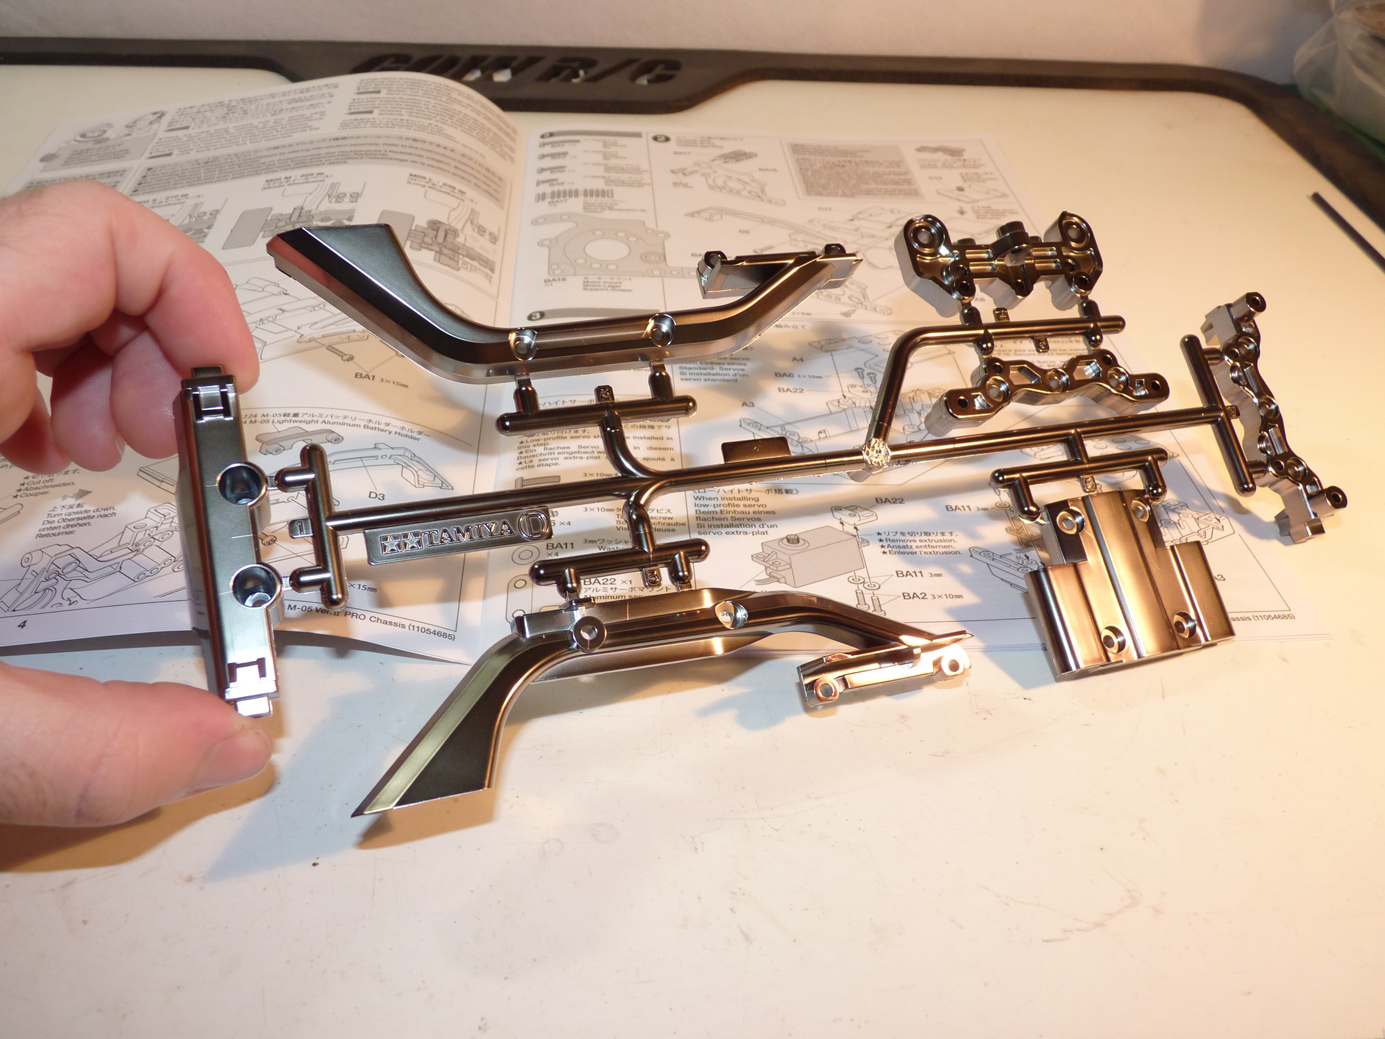
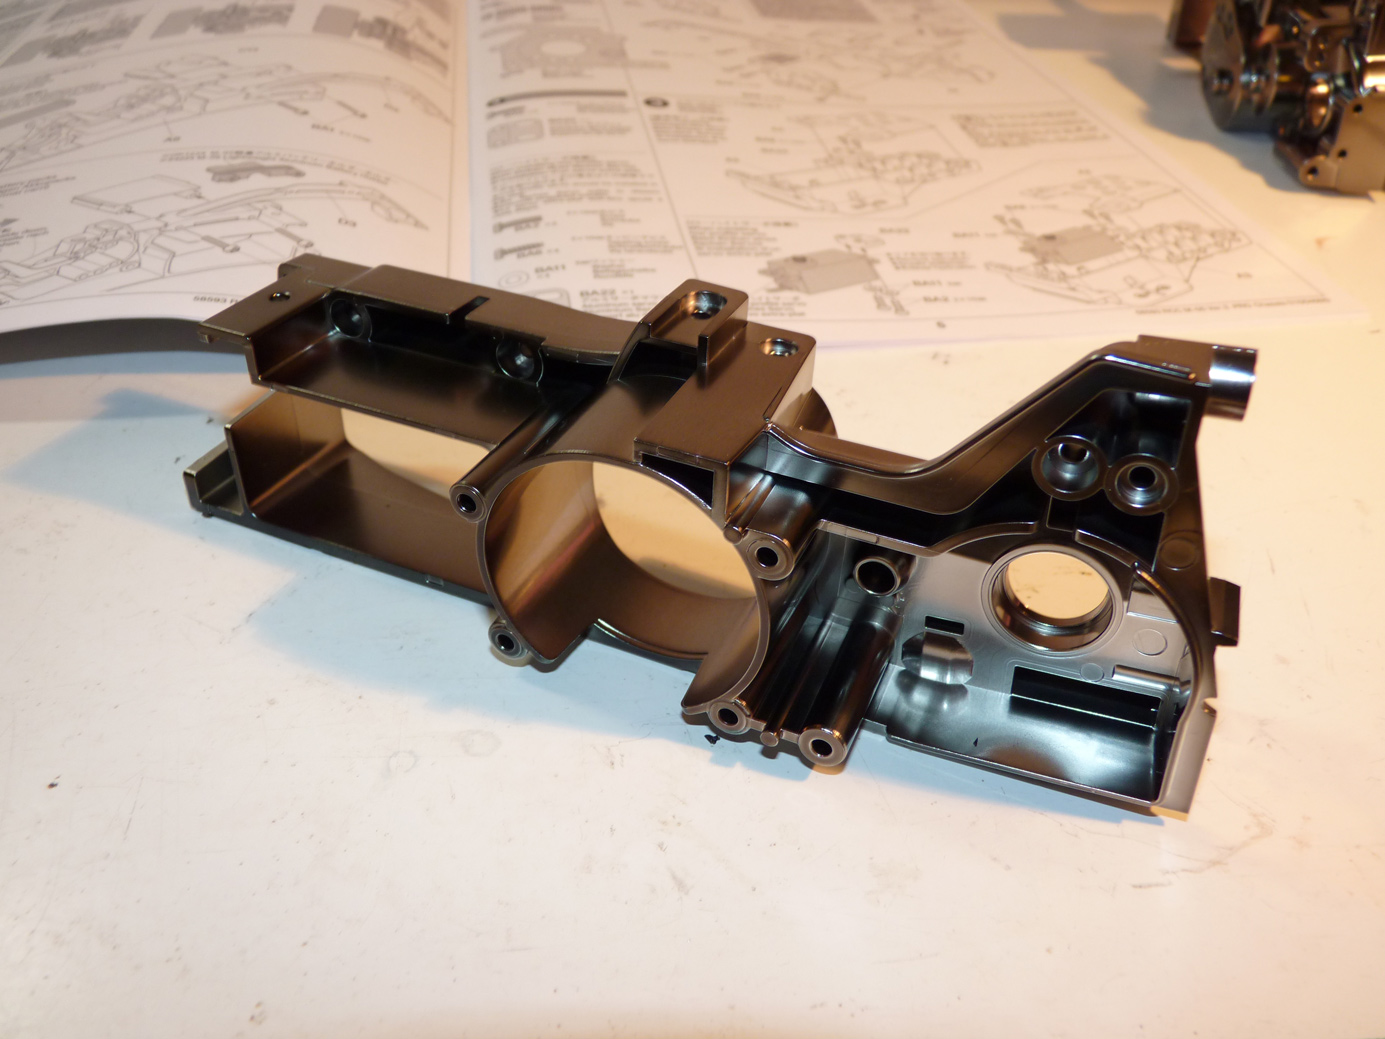
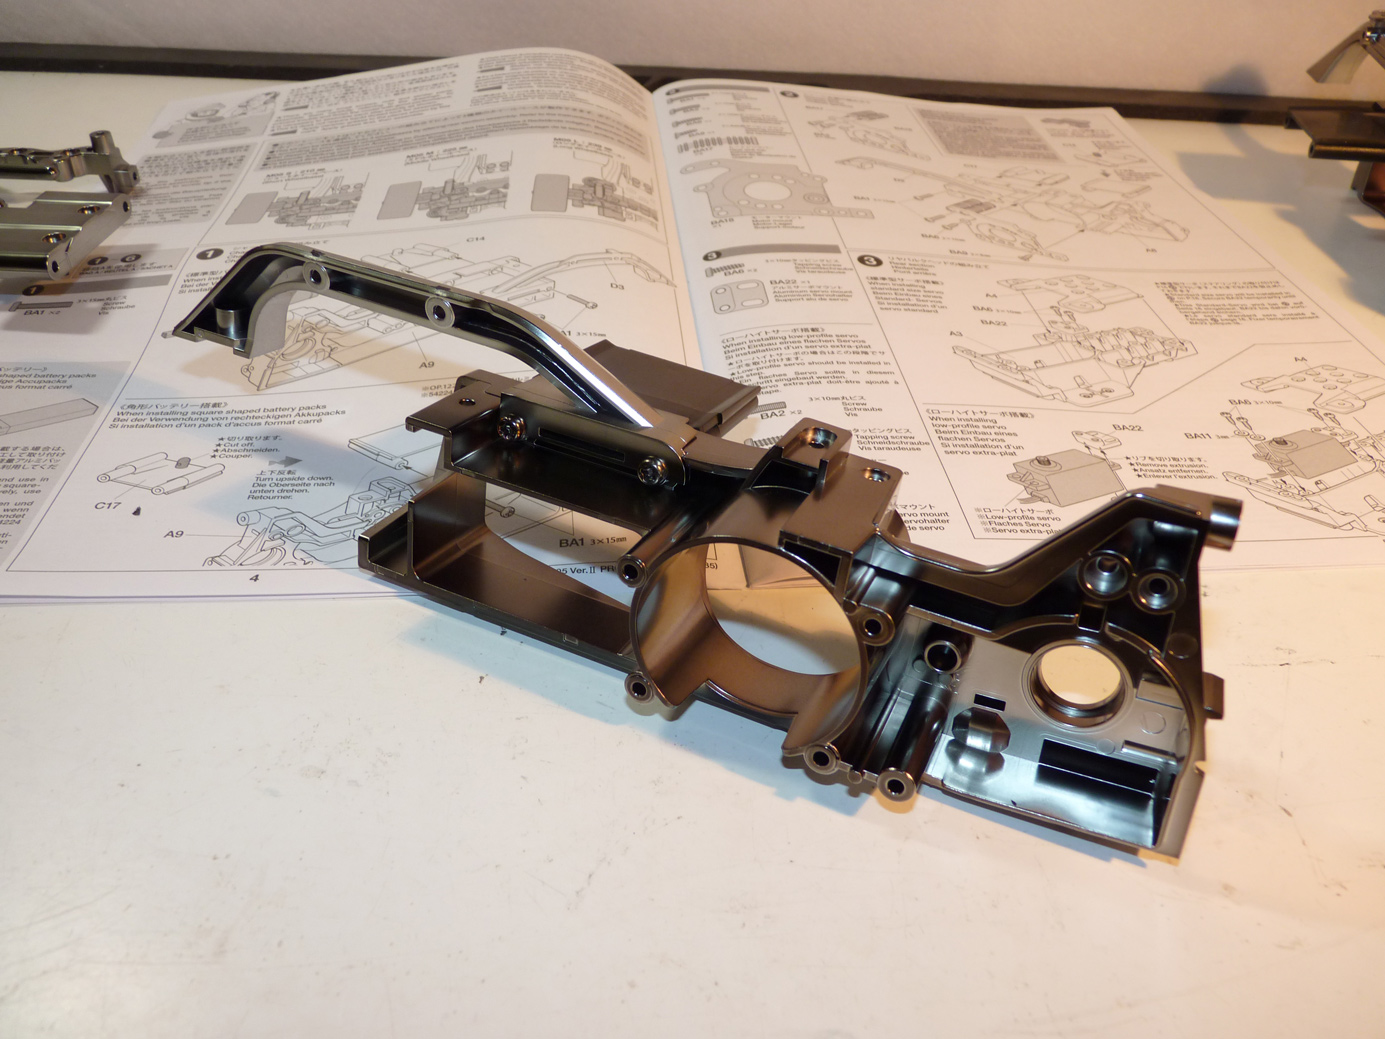
The special plating on the M-05V2 Pro is unique. It’s almost like a gun-metal shade of “black chrome”. It’s actually quite hard to photograph with my camera. It is quite awesome looking in person though.

We start off with the “A” tree. If you’ve ever build a Tamiya kit, you’re familiar with how parts come on “trees”.
You’ll want to have a hobby knife, dremel tool with sanding bit, or nail clippers handy during building so you can remove all the little burrs on the parts left by the tree.
It’s a simple and quick process to de-burr each part and makes for a nice clean build.
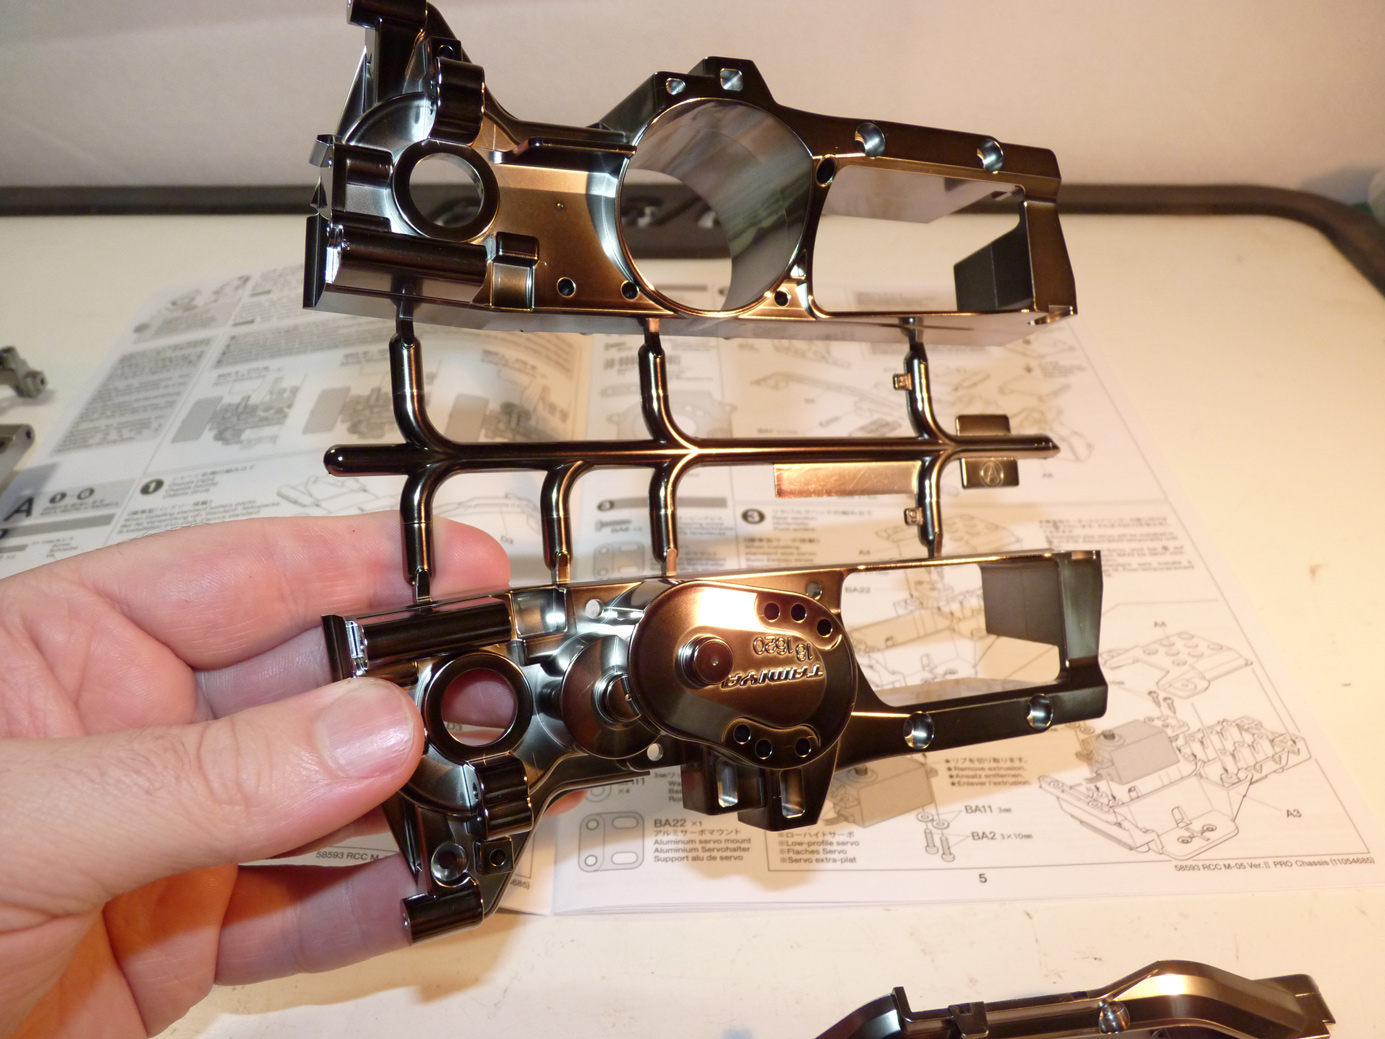
Another shot of that crazy plating. These are the main chassis/gearbox halves.
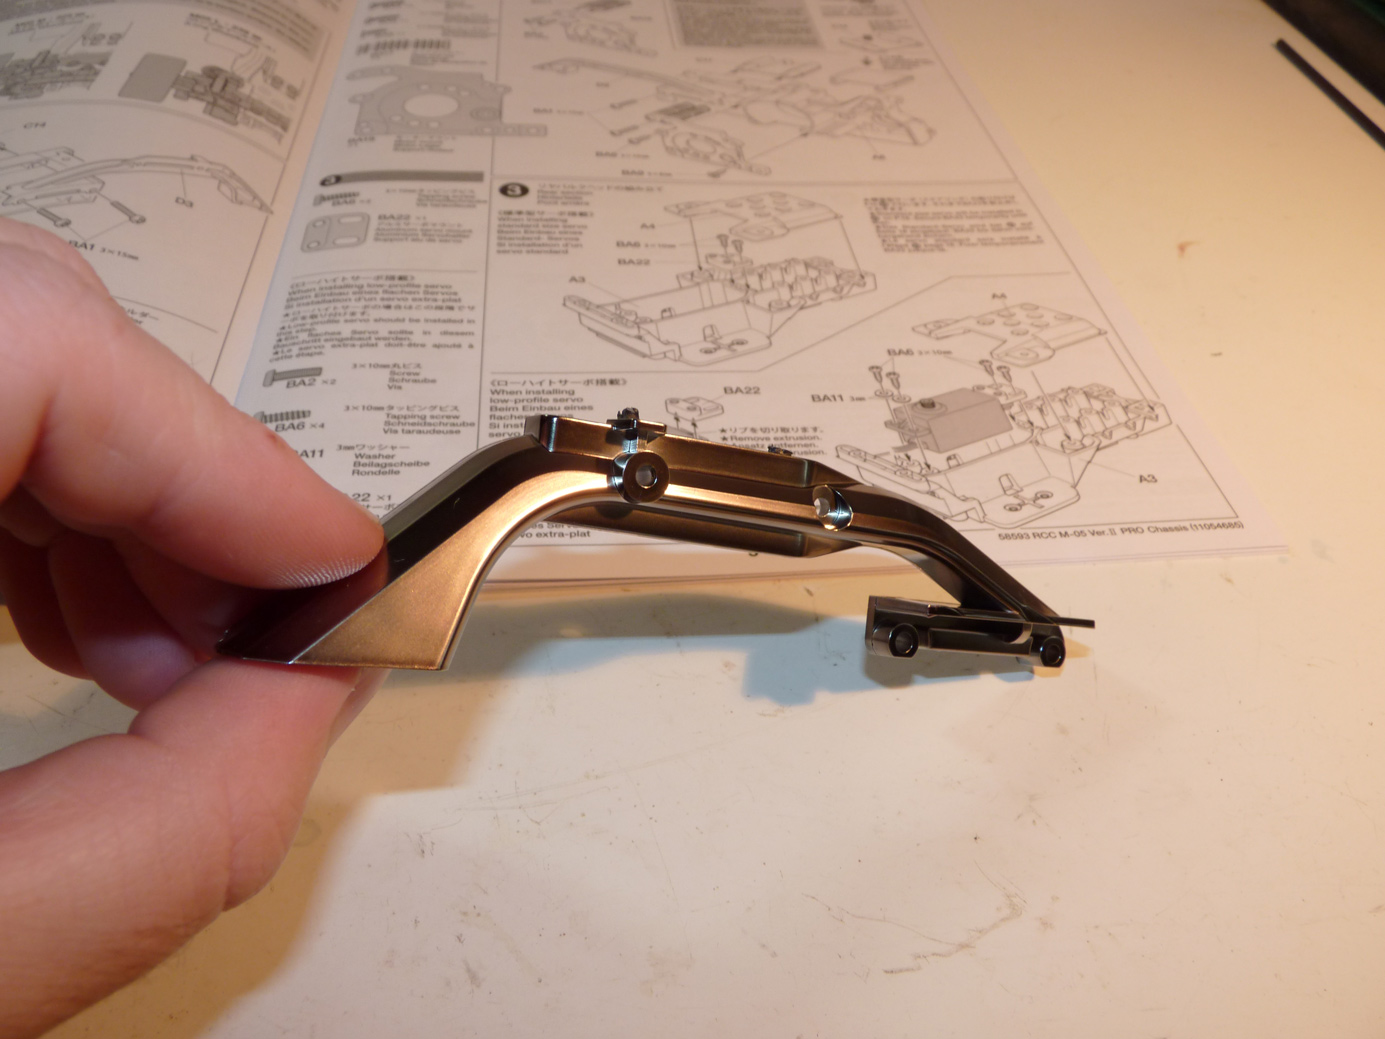
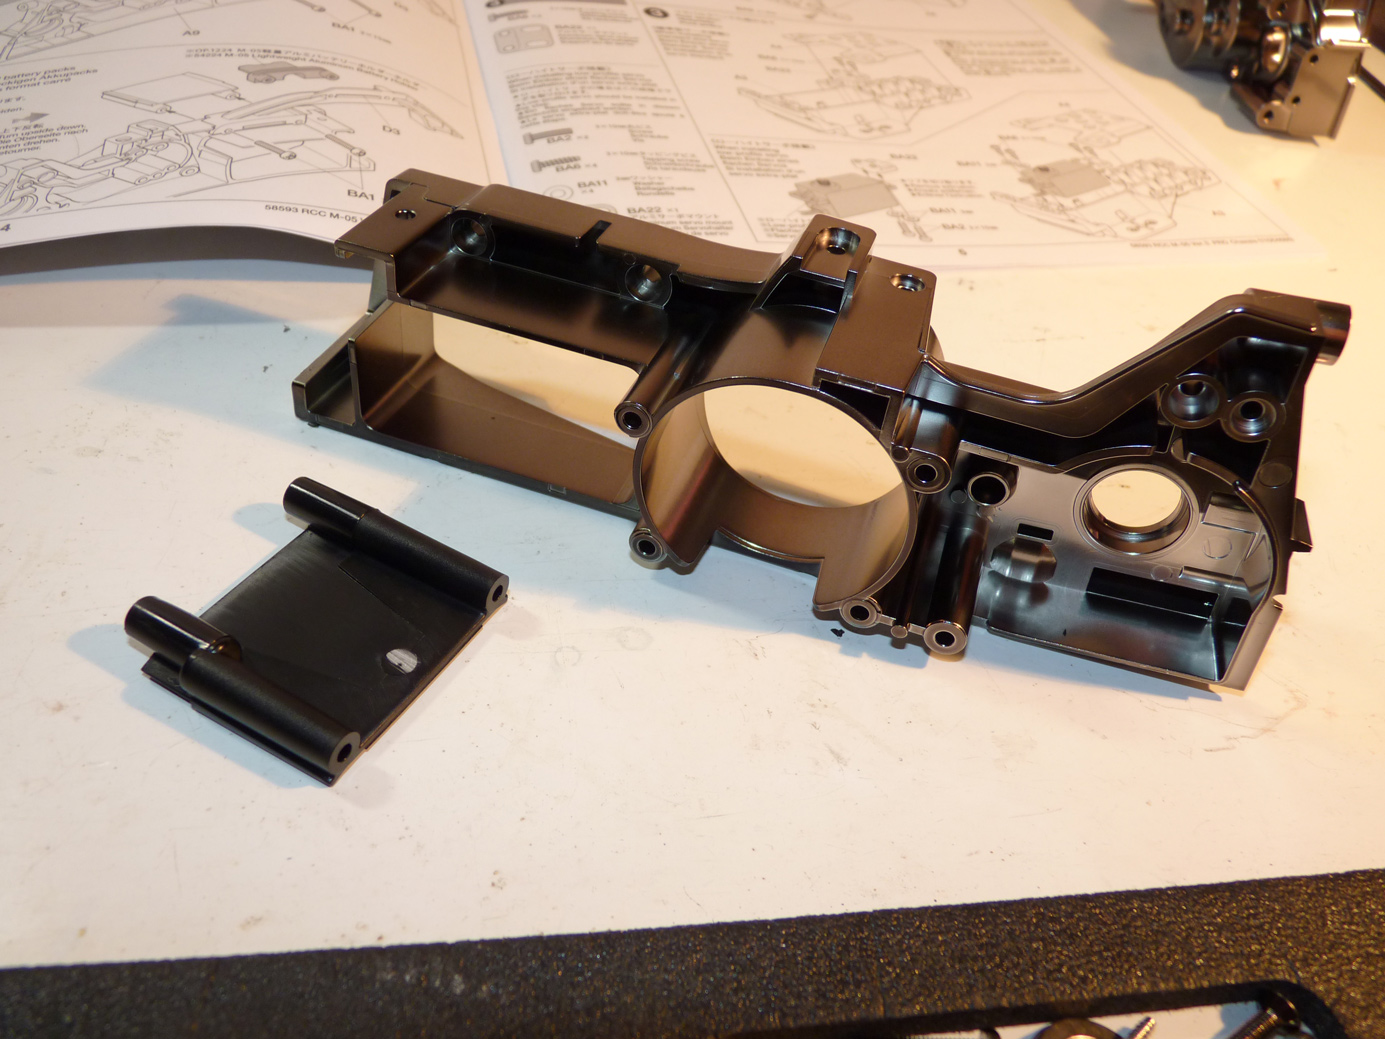
The first step is to install these rails onto the chassis.
Like so.
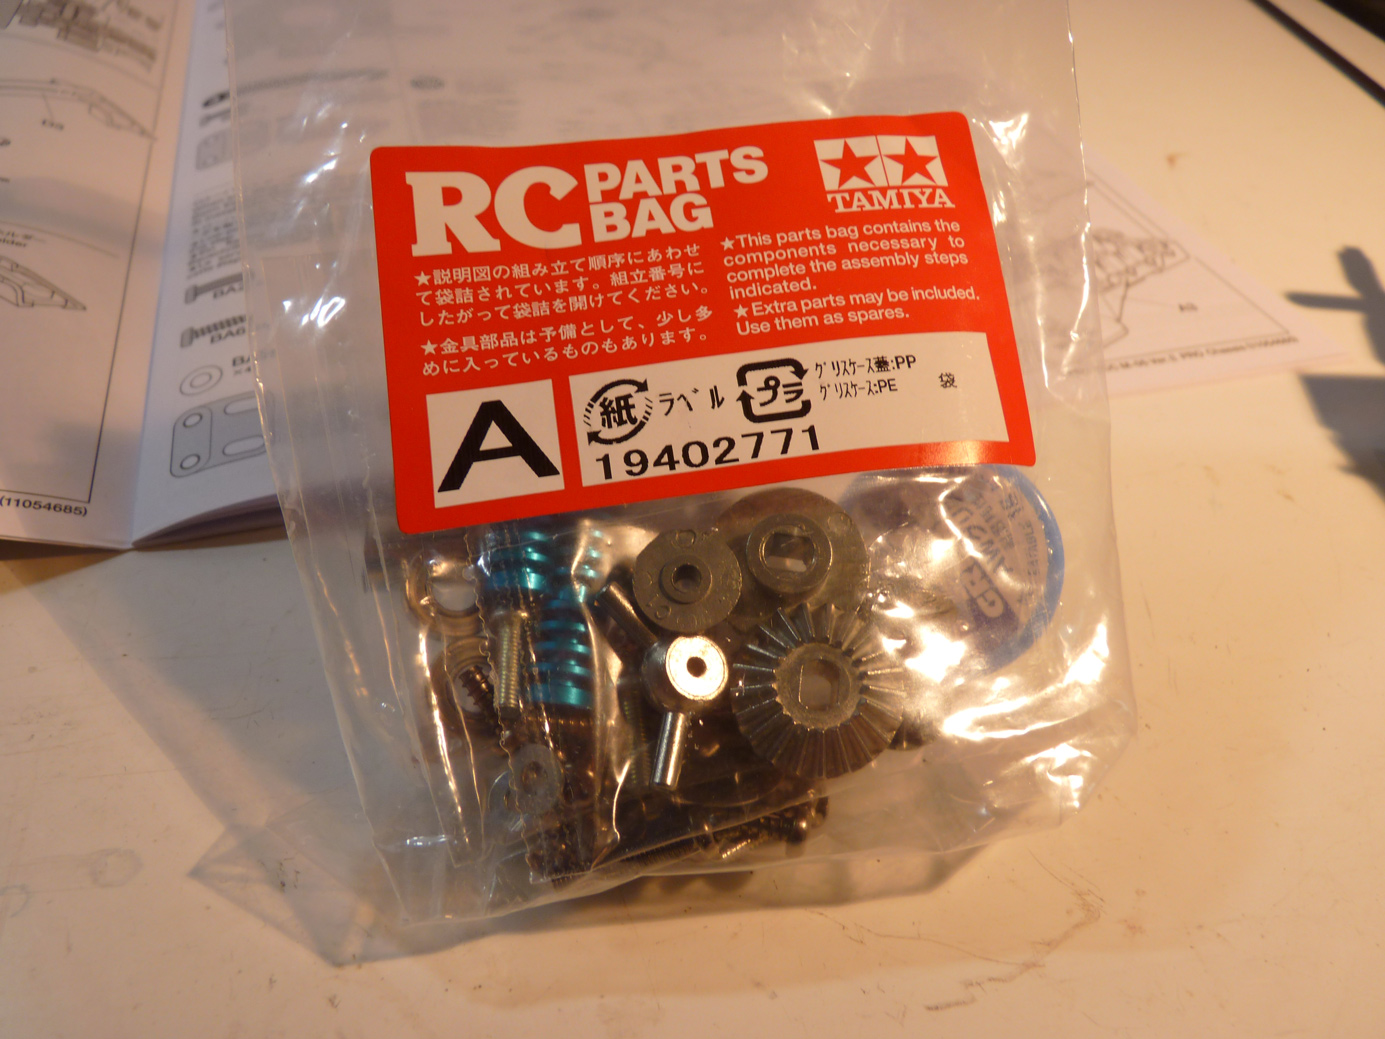
We’ll then start to dig into the hardware bag for Step A.
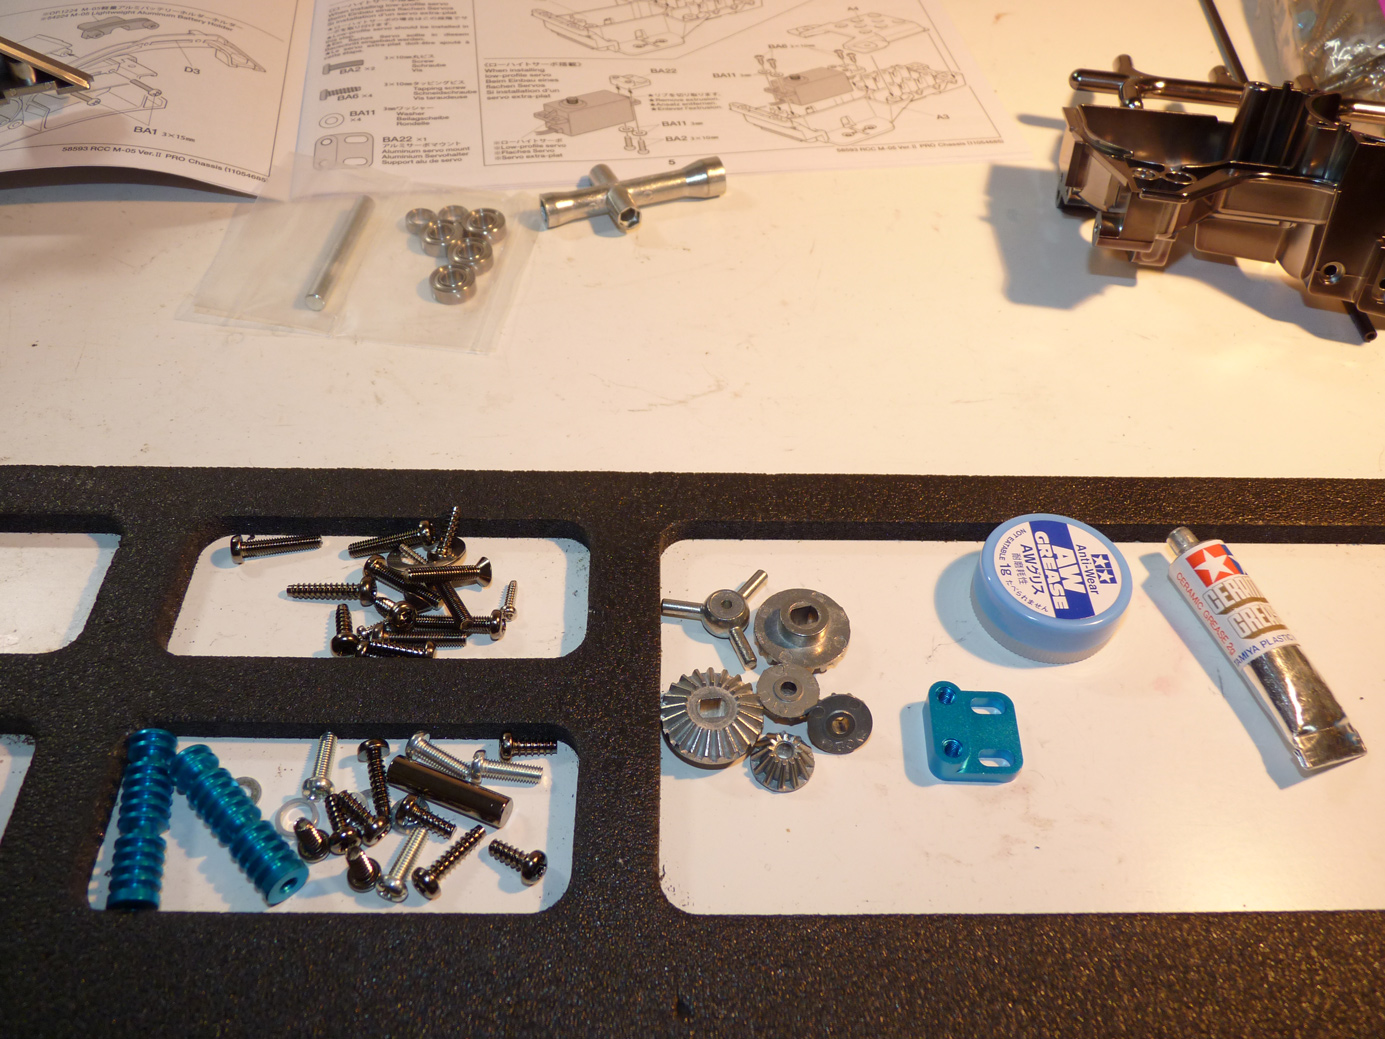
This bag includes the differential gear parts, shafts, servo mount (optional blue aluminum M-05 part), and heat sink bars (optional blue aluminum M-05 part).
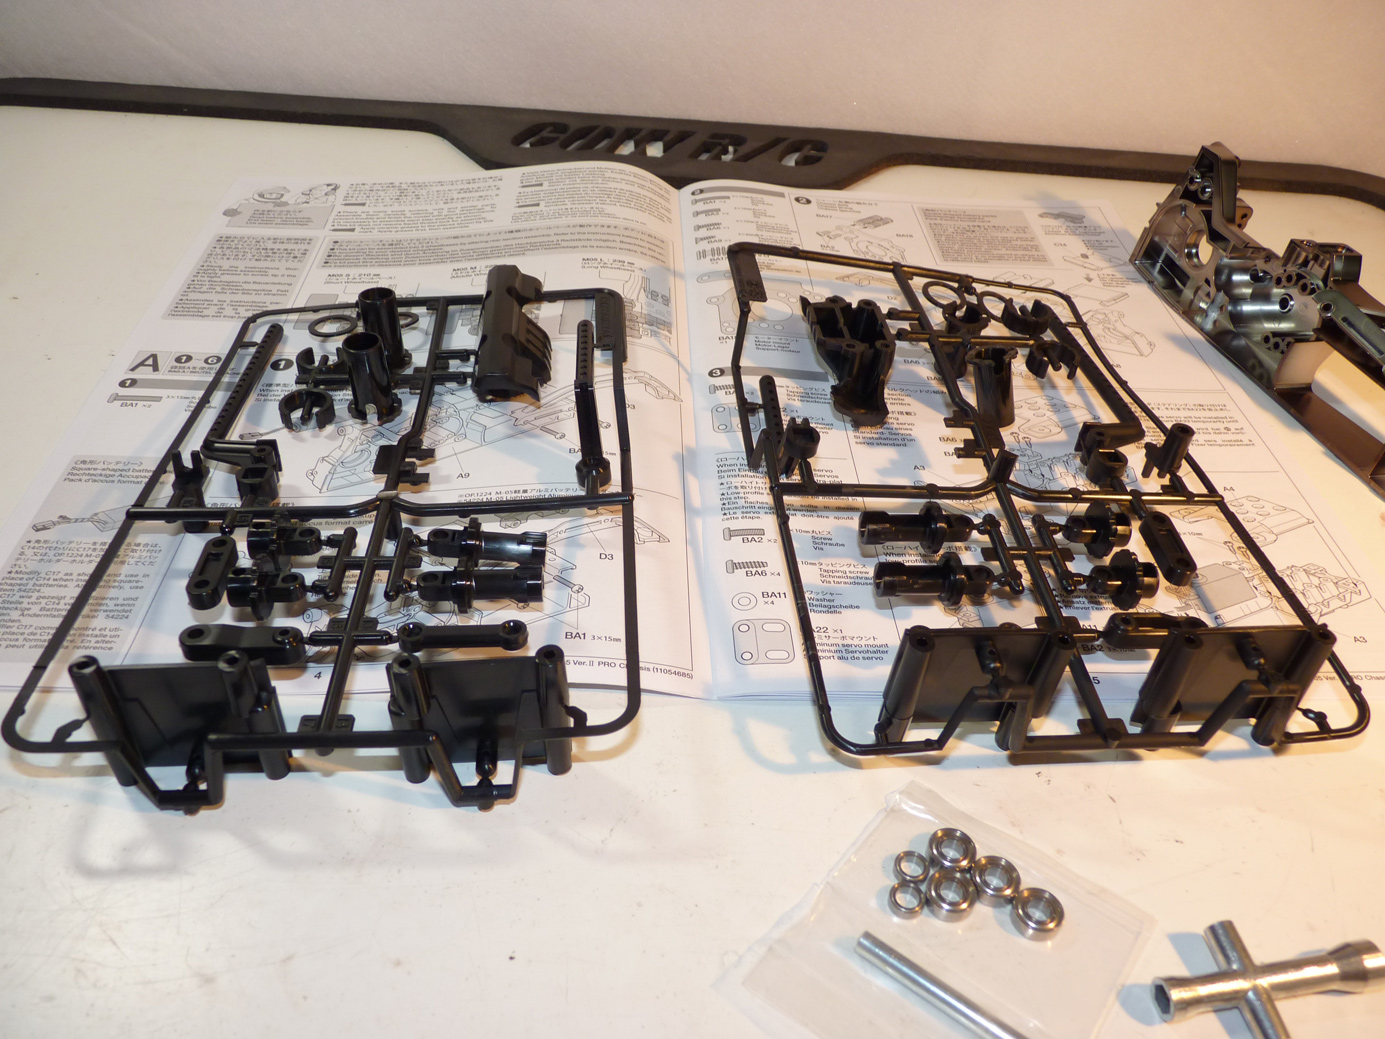
Next we find the battery holder pieces on the C tree.
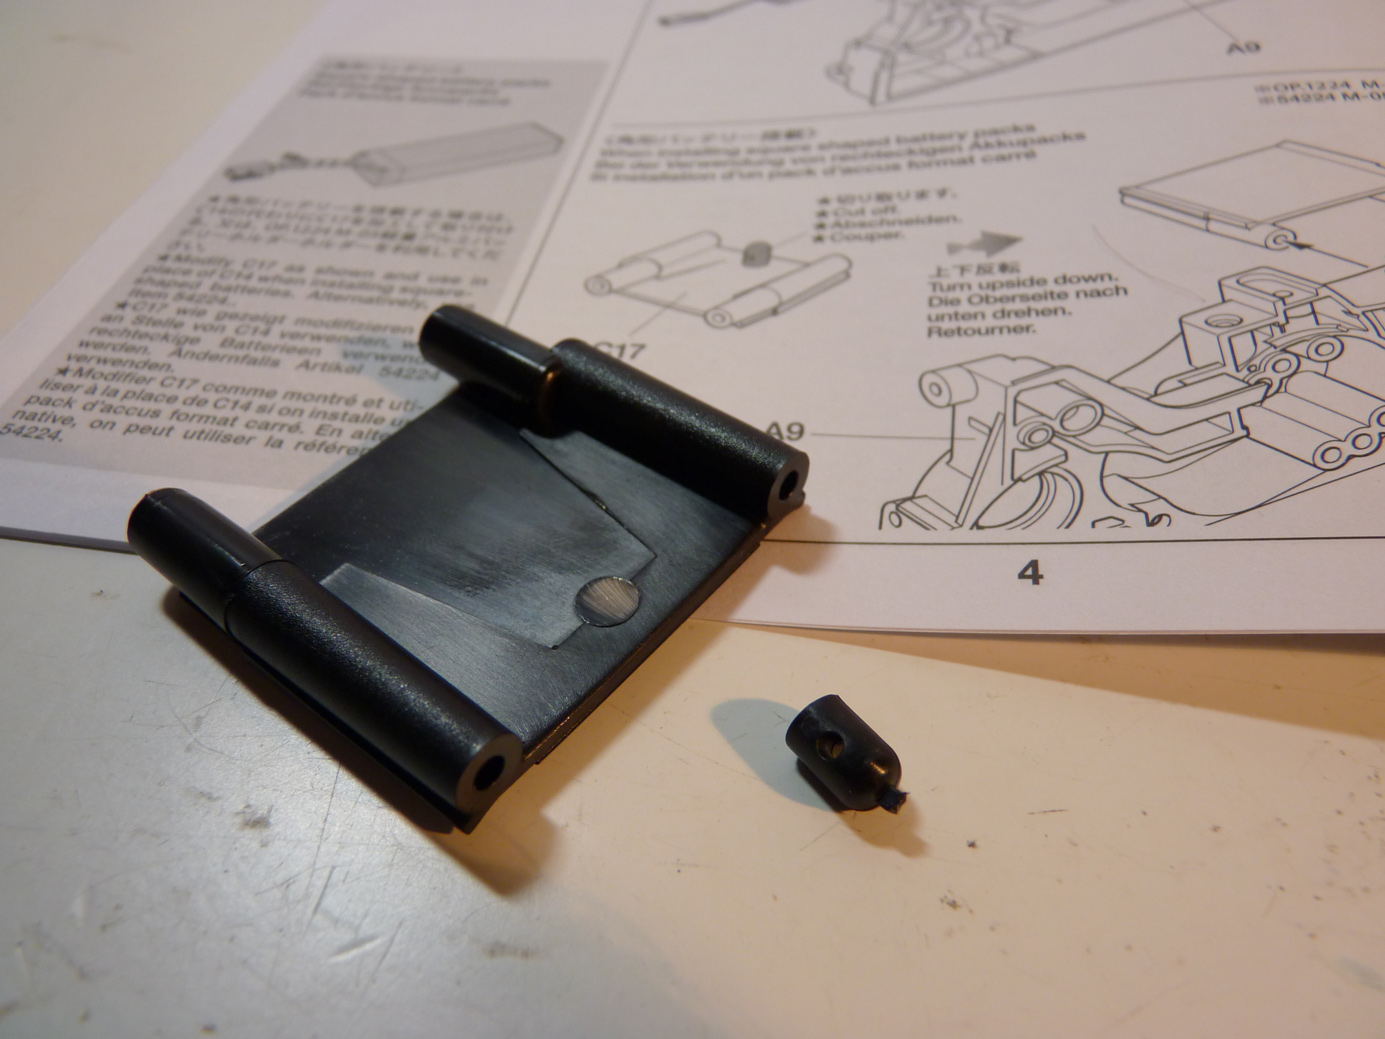
We’re going to run a square pack in this car, so we’ll choose that method of installing. This requires lopping off the body clip mounting post normally used for running round packs, and installing them upside down. I used a hobby knife and a steady hand to remove the mount.
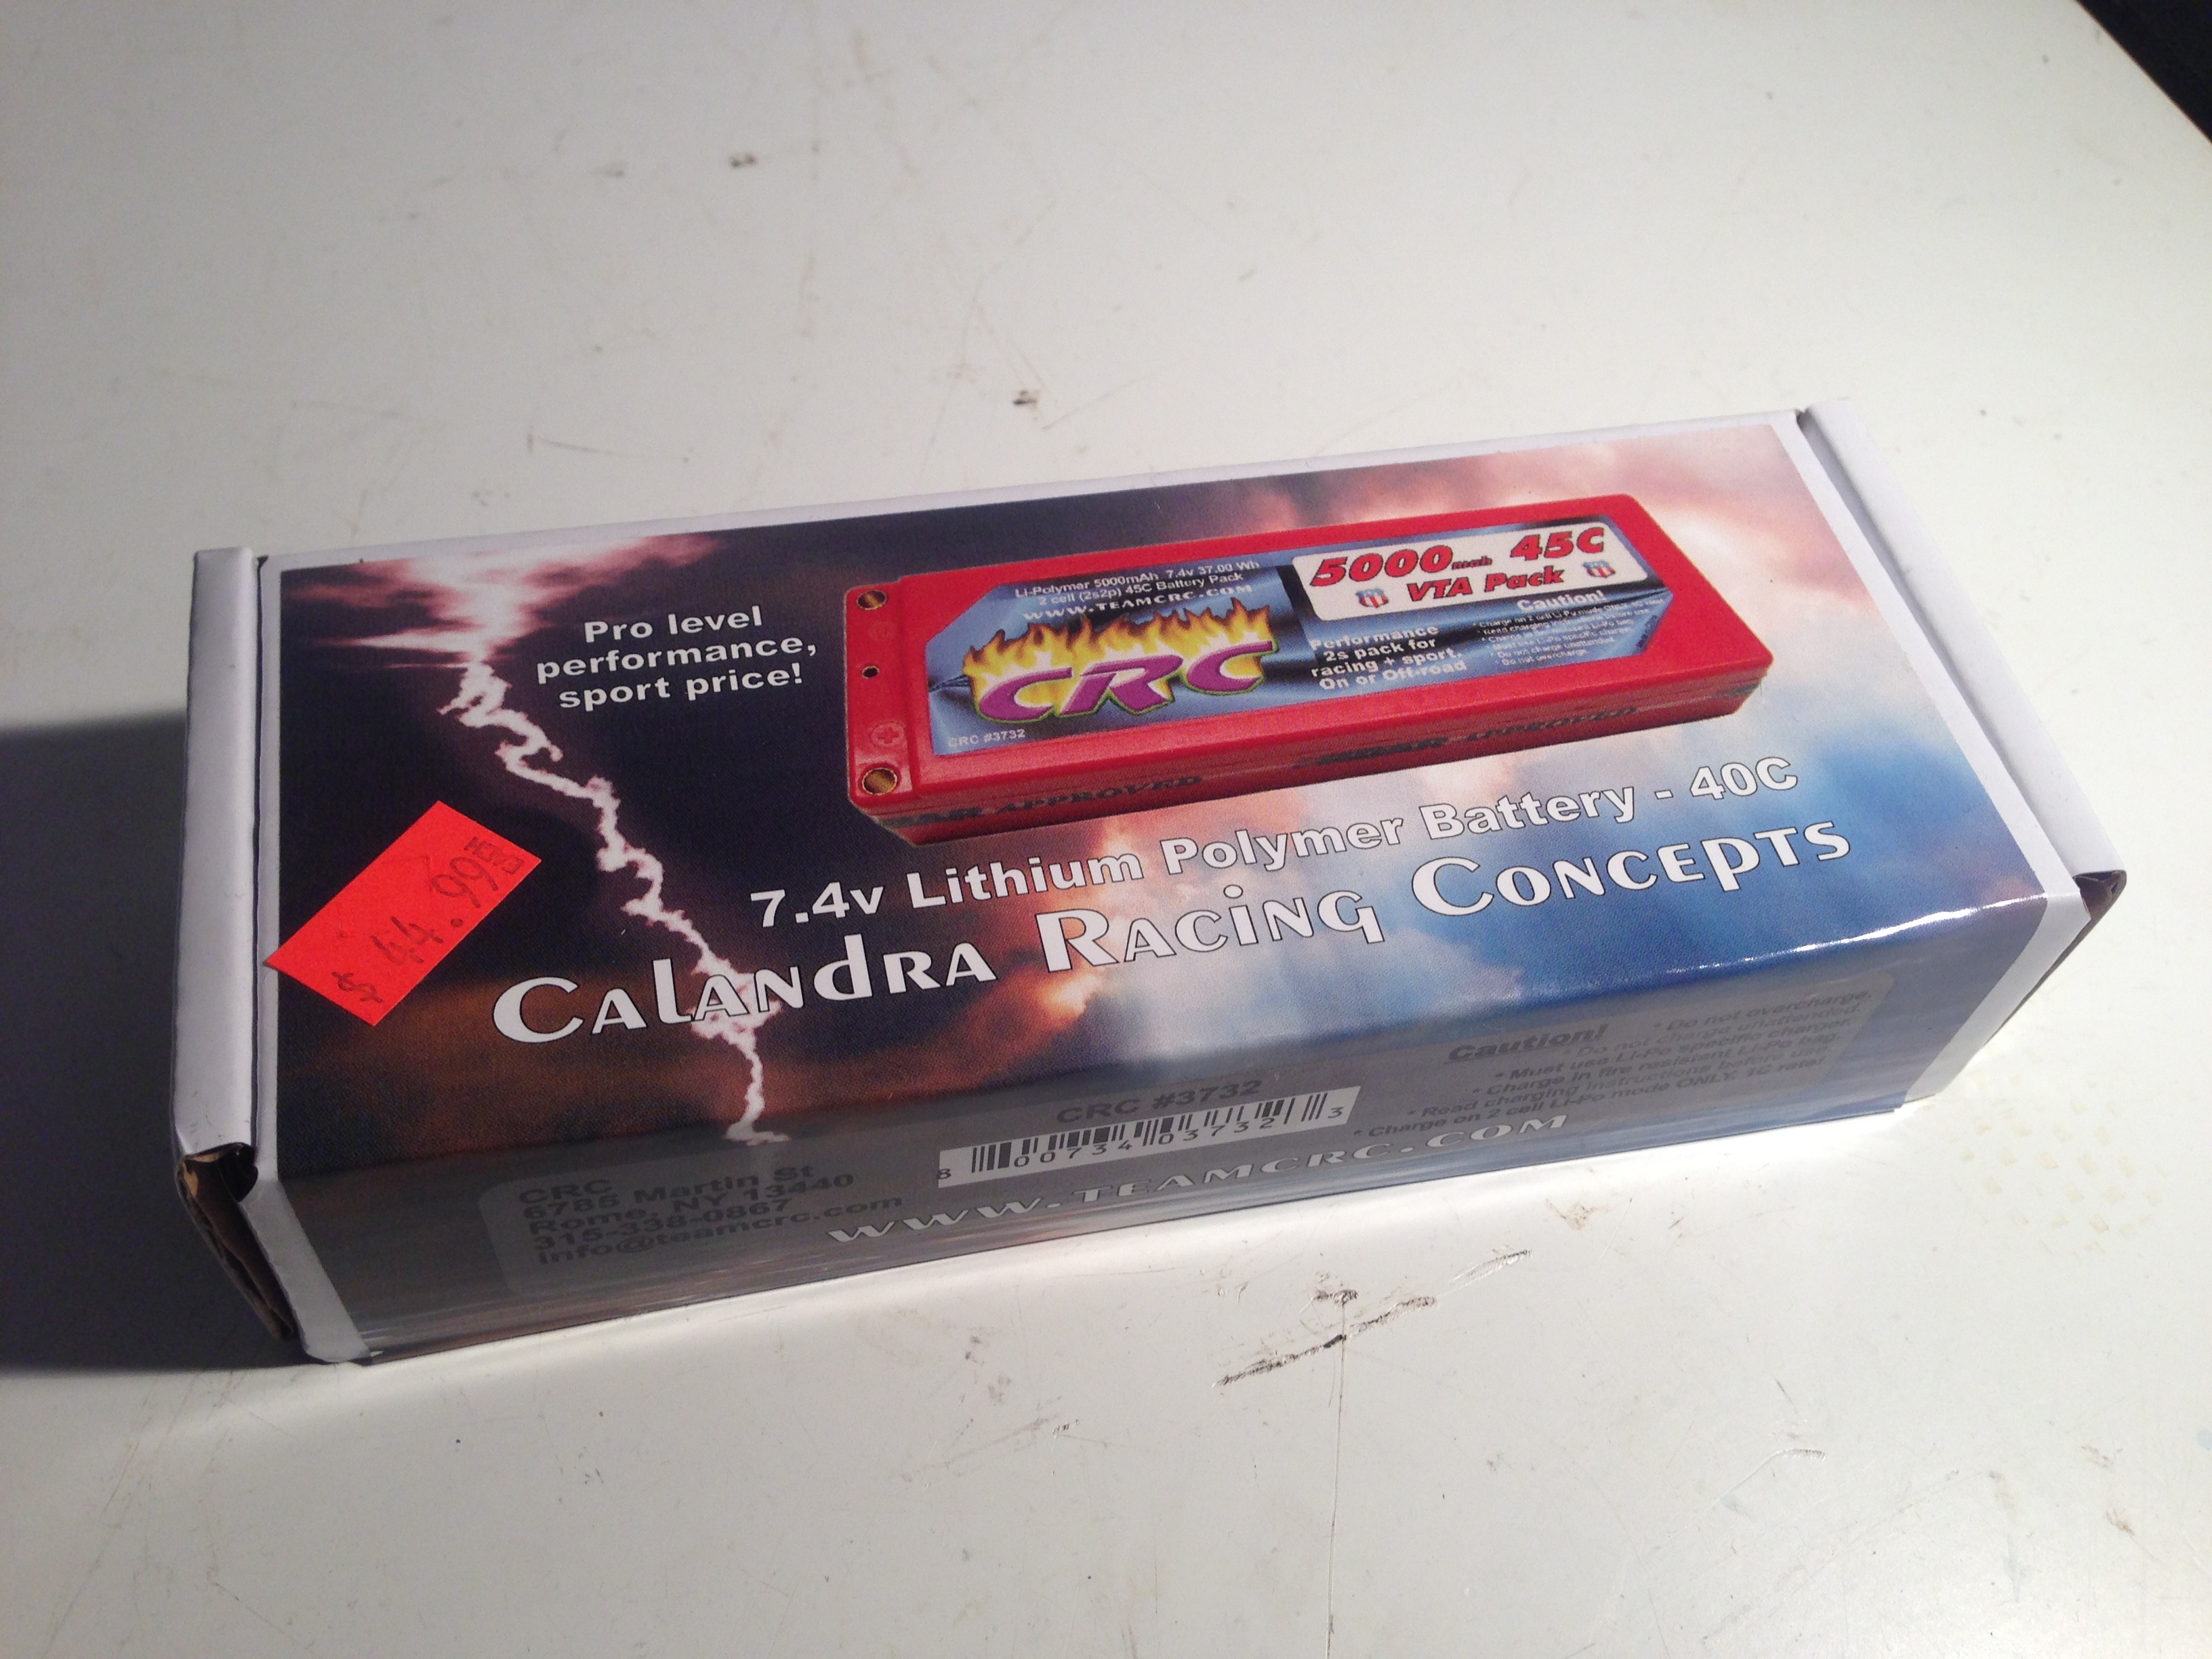
The lipo I’m going to run is the CRC VTA Pack. It’s 5000mah 45C 2s and a killer deal at less than $50. I have higher C rating batteries, but I was due for a new sport pack and this seemed to fit the bill. Most of my local competition are running regular M-05’s and the limited C rating sport packs. I figure this pack will keep me from having an unfair advantage over them, plus like I said, it was cheap.
One side installed. Here you can really see the difference in finish between traditional black plastic and the black chrome plating.
Now we’ll do the other side.
Easy as pie.
Battery holder installed.
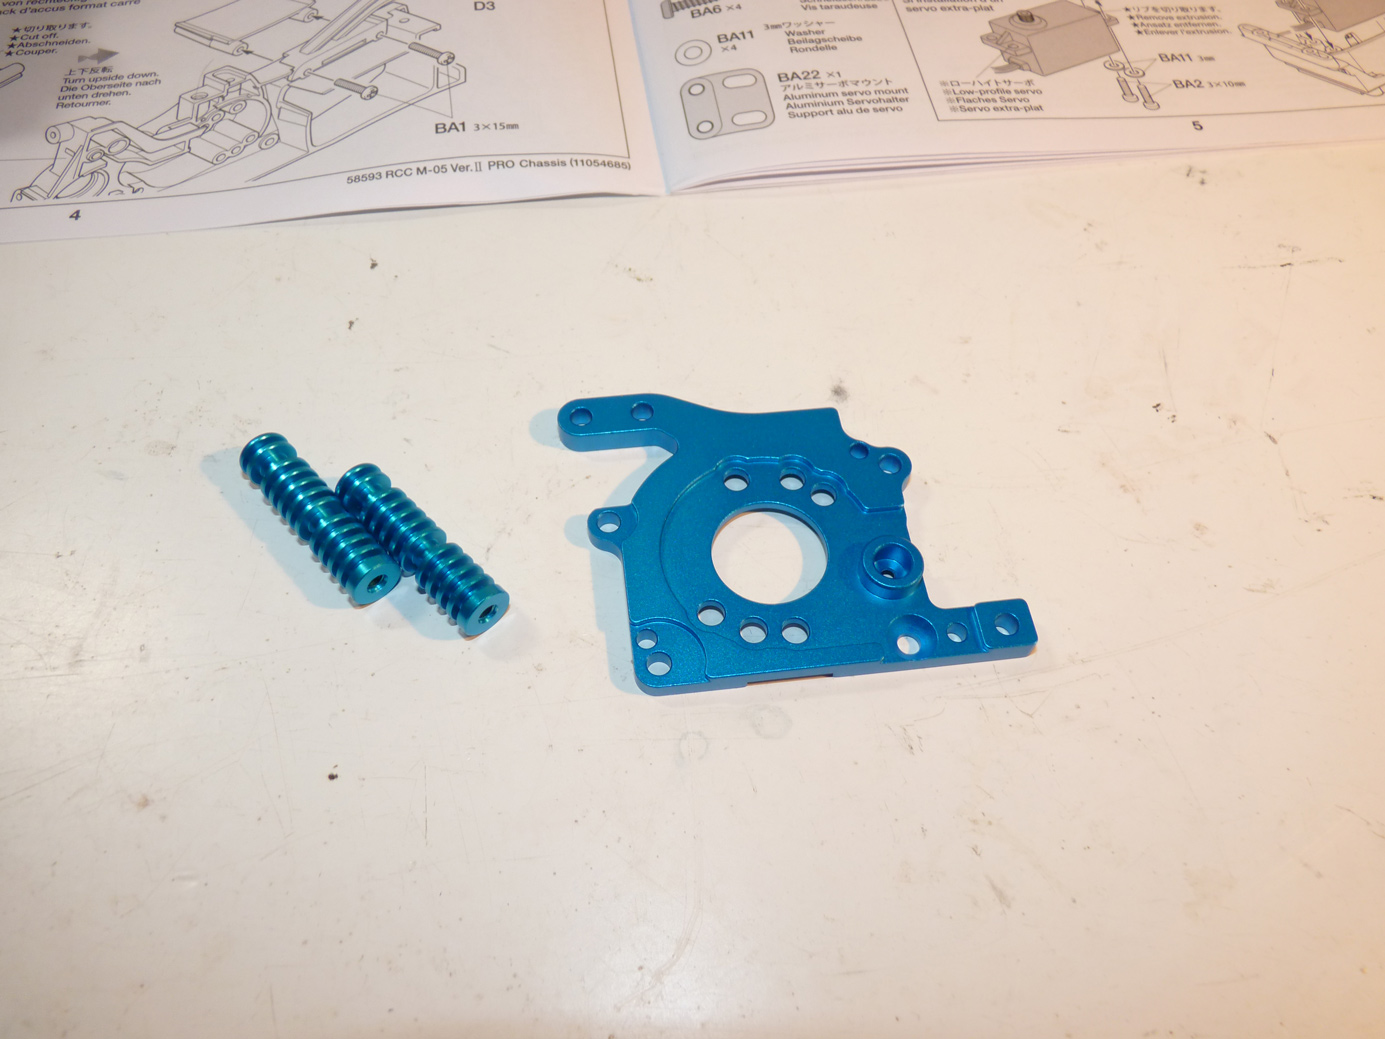
Next up is the motor plate and the heat sink bars. The bars attach to the motor place and act as a heat sink, drawing heat away from the motor.
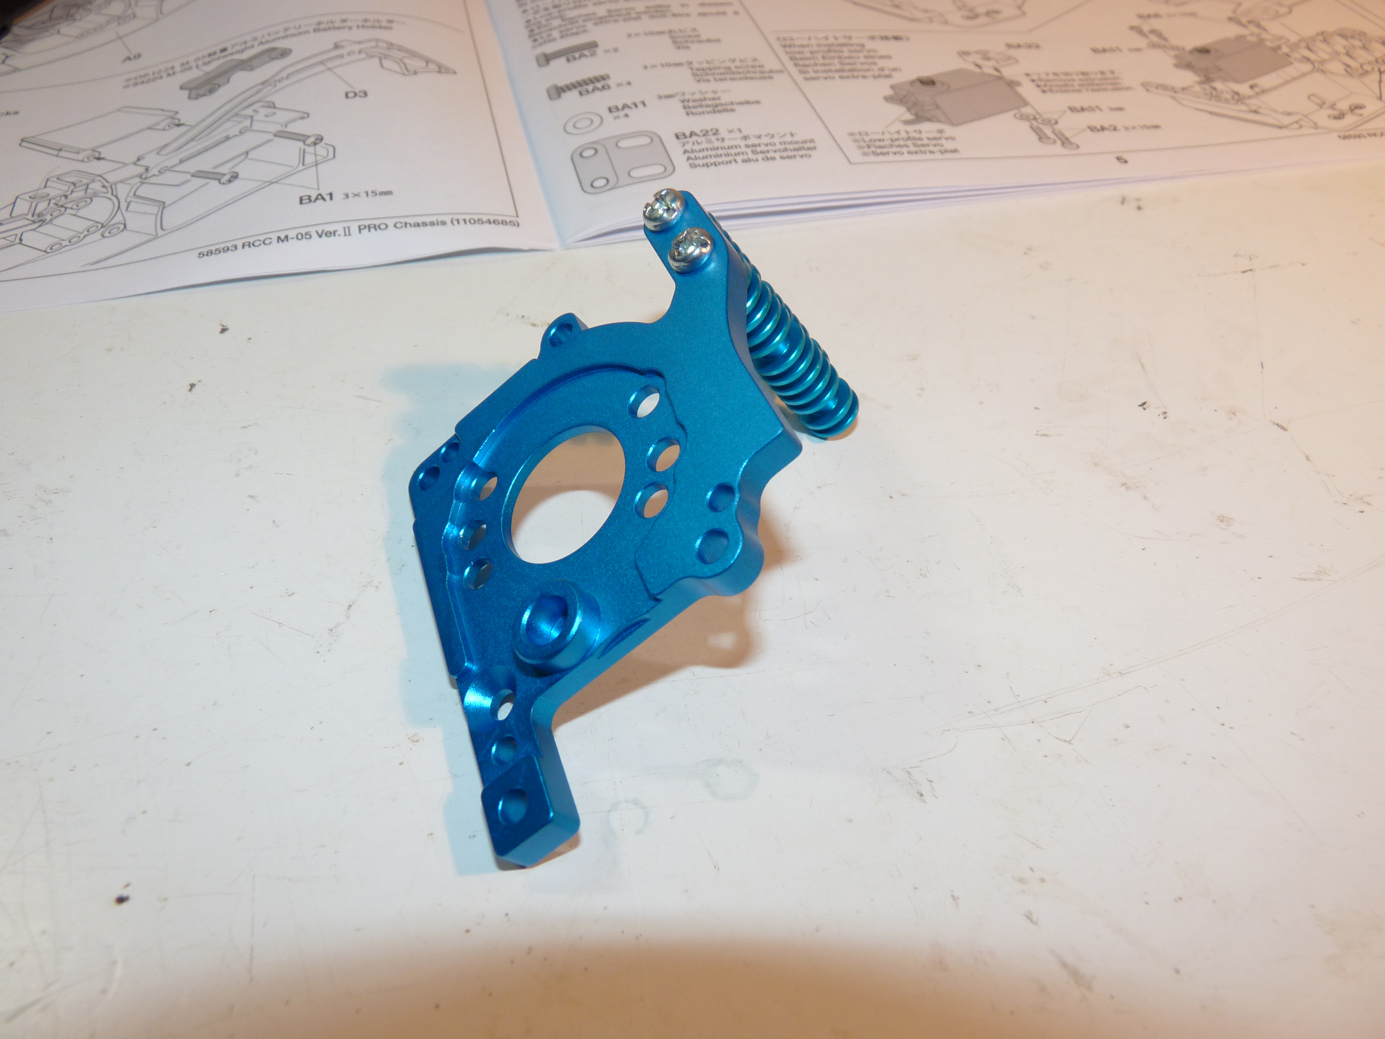
They are simply attached to the plate with screws. I used a dab of blue lock-tite on the screws here and all metal on metal contacts throughout this build.
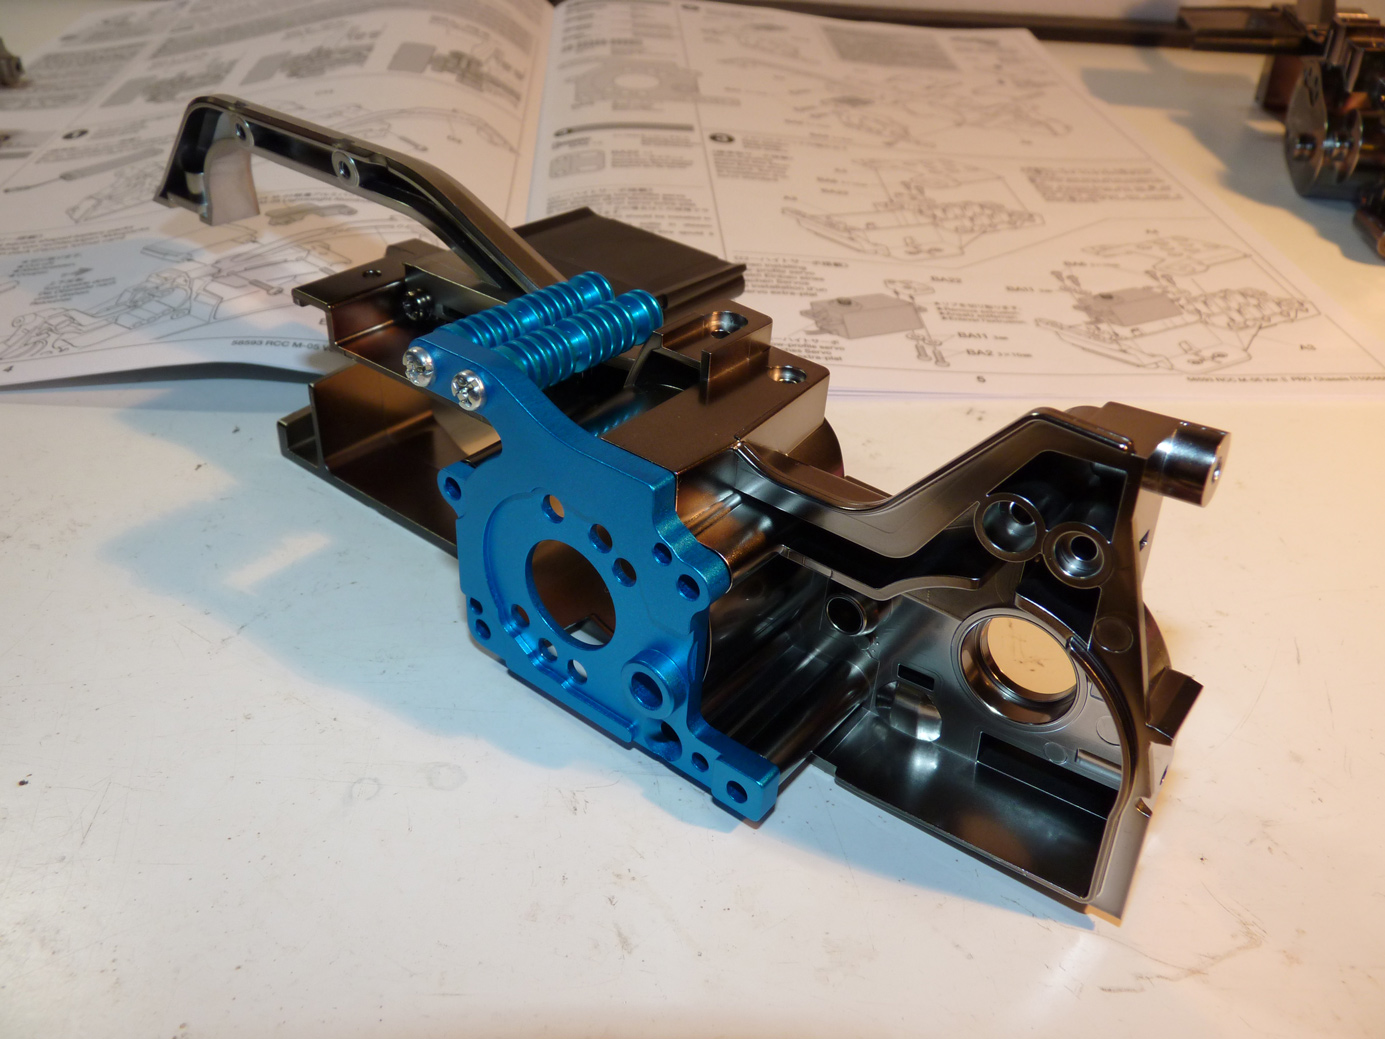
This is how it installed onto the chassis half.
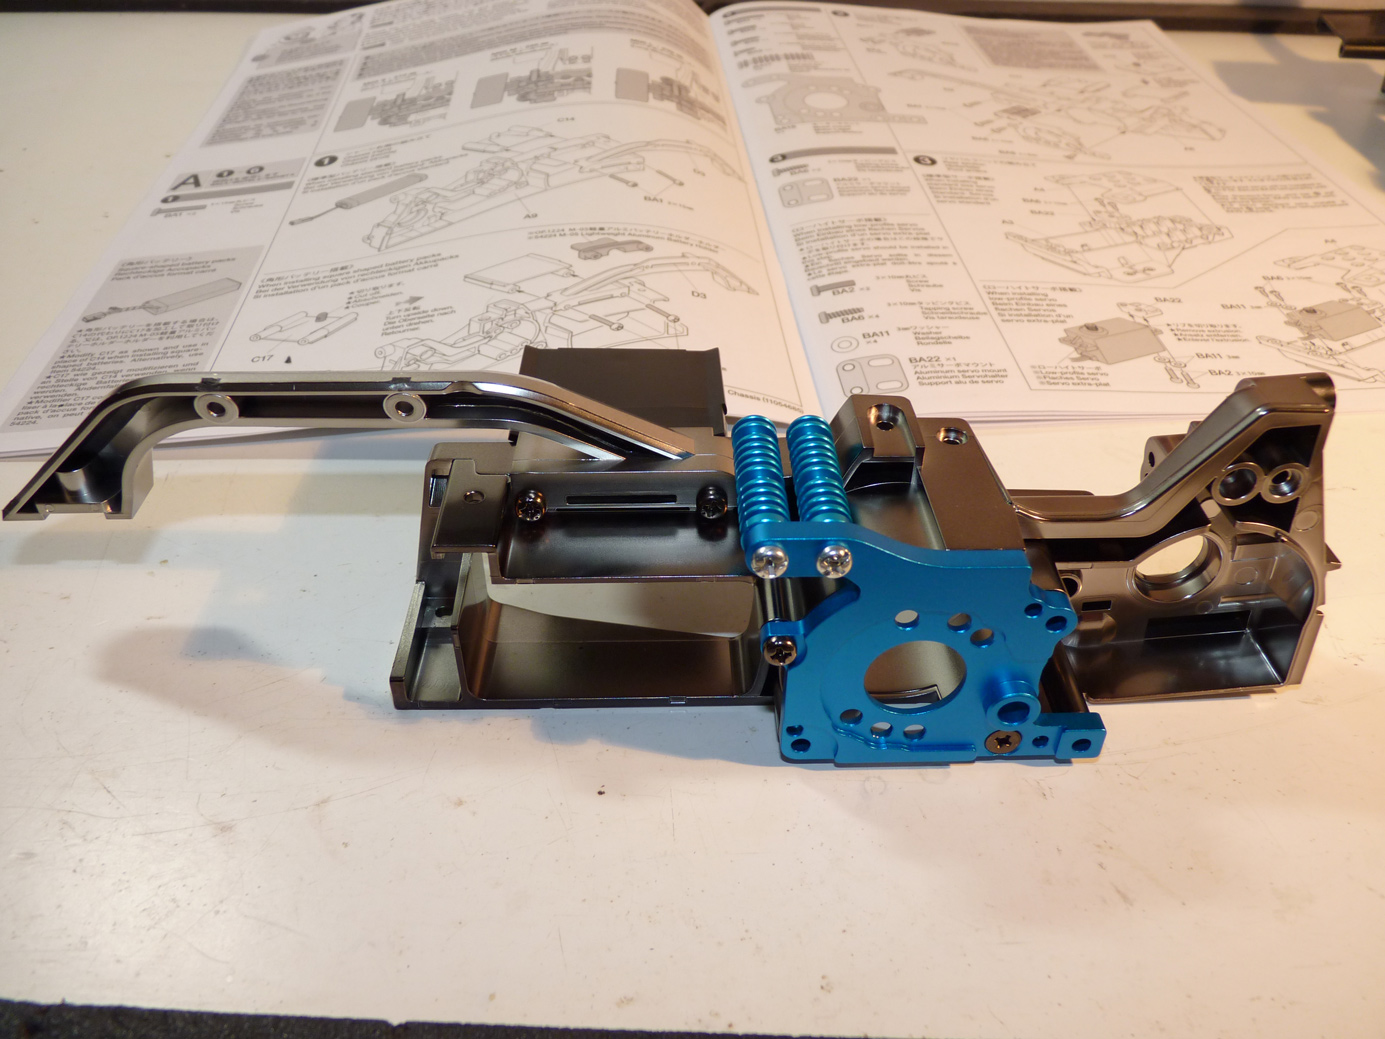
Another angle.
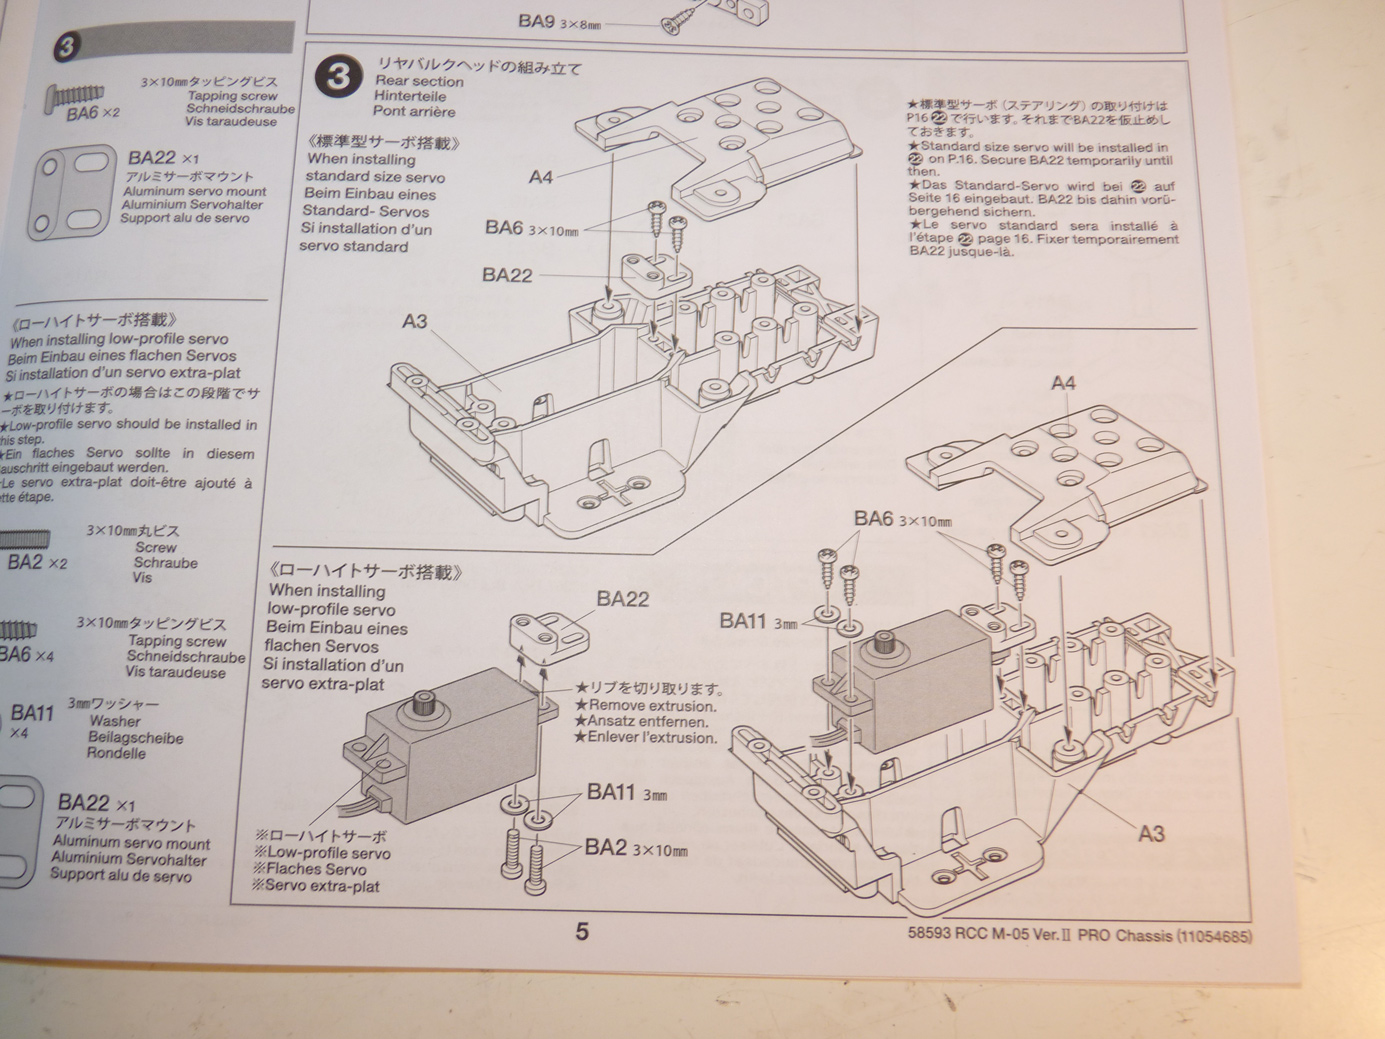
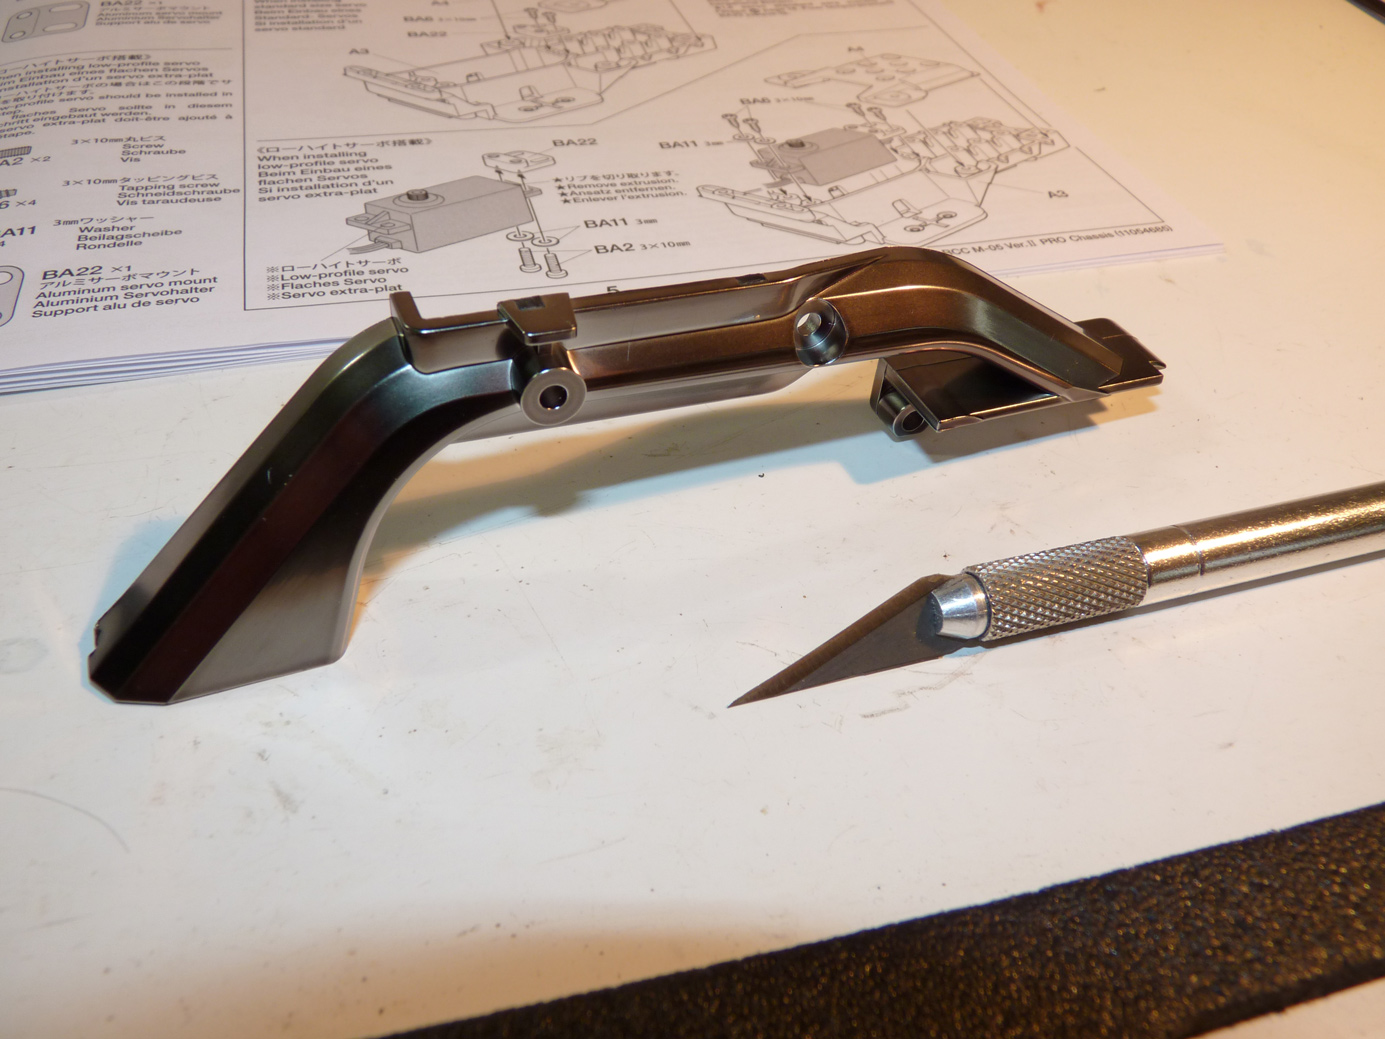
Now we’re on step 3, where we have to make another choice, what style servo we’re going to run. The M-05V2 allows use of a standard or low-profile servo. The Low-Profile servos are often seen used in 2wd buggies where space and weight savings are ideal. The same could be said here, and with less weight, lower, a low-profile servo in this case would offer a lower overall center of gravity. Since it’s an option, I went for it.
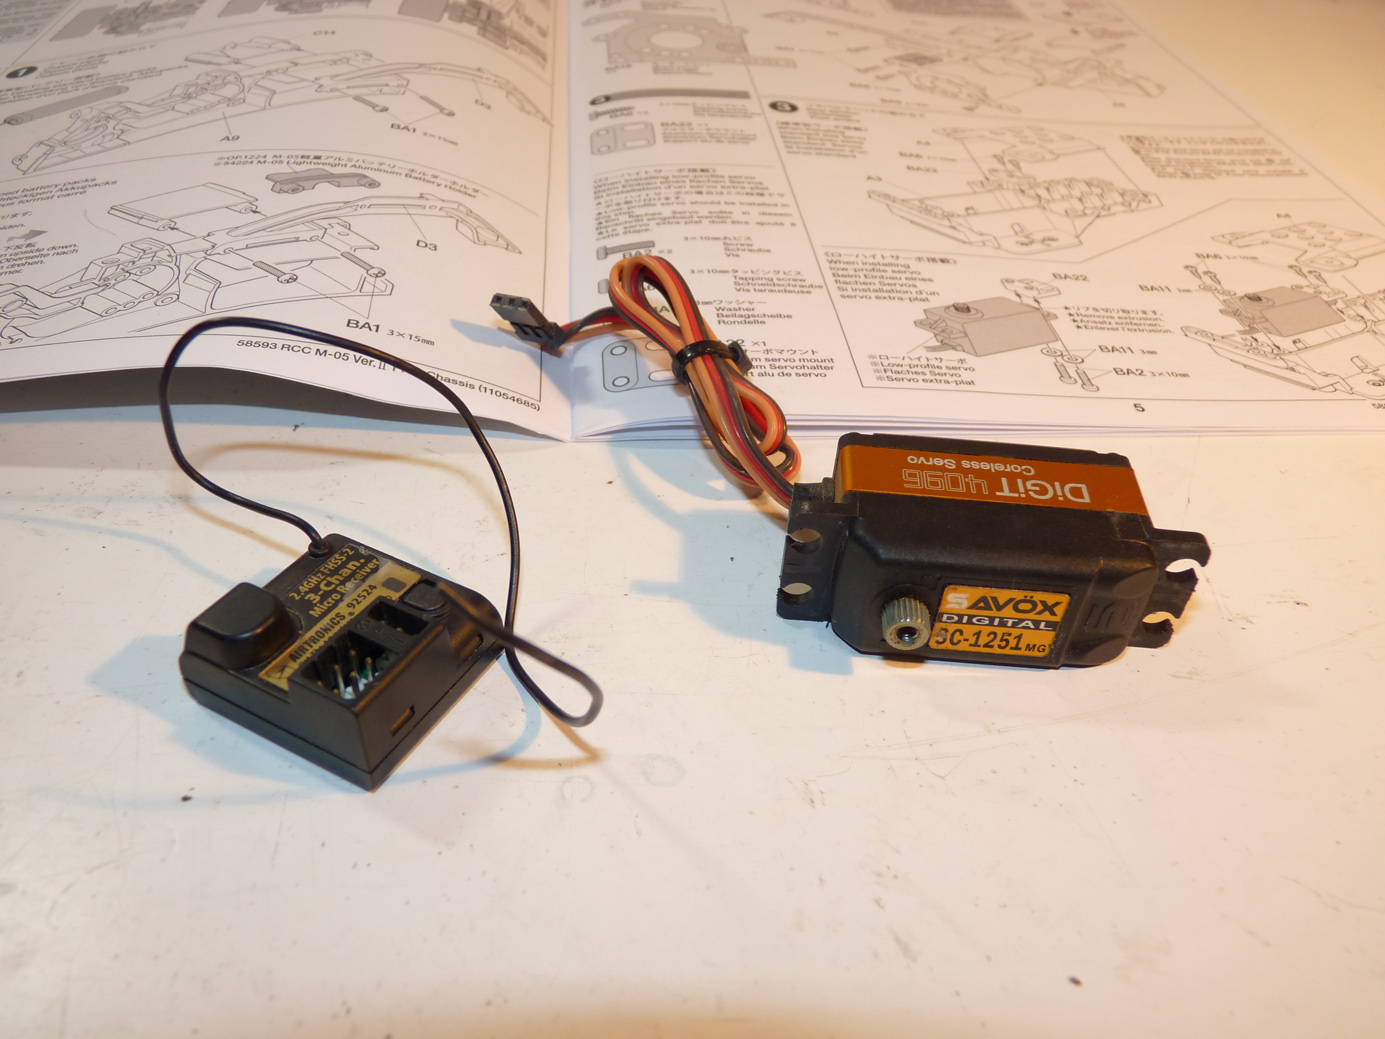
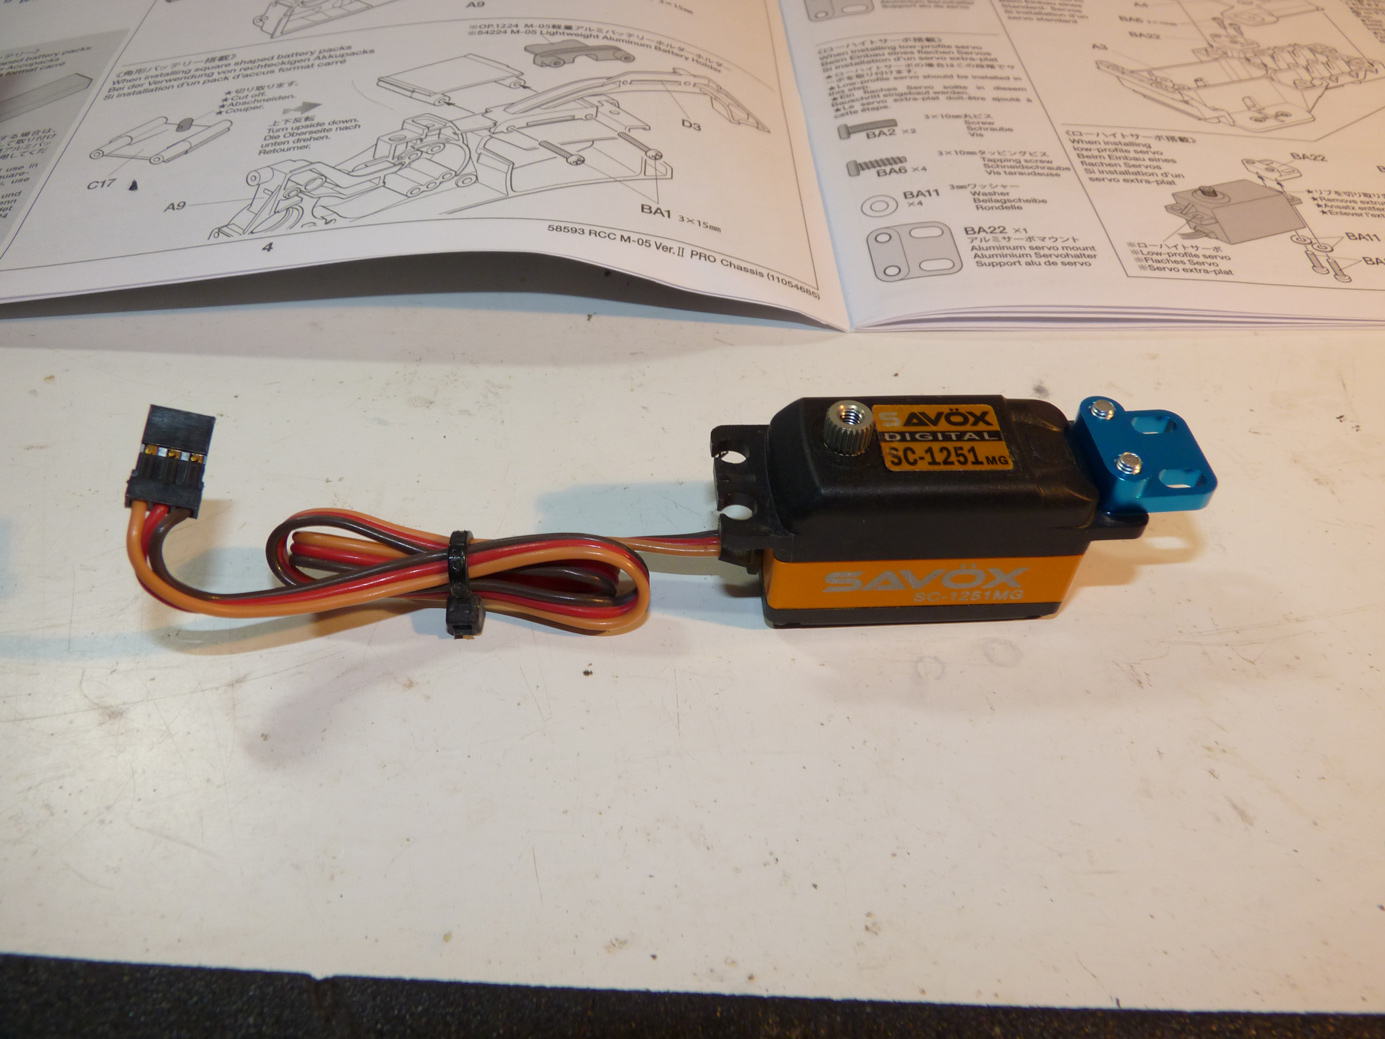
I chose a Savox SC-1251MG low profile servo to run in the M-05V2. It’s plenty fast, has torque to spare for this application, and is metal geared. Also shown above is the basic Airtronics 92524 receiver I’ll be running in conjunction with my MT4 radio. The receiver is small and lightweight as well making it an ideal choice for this car.
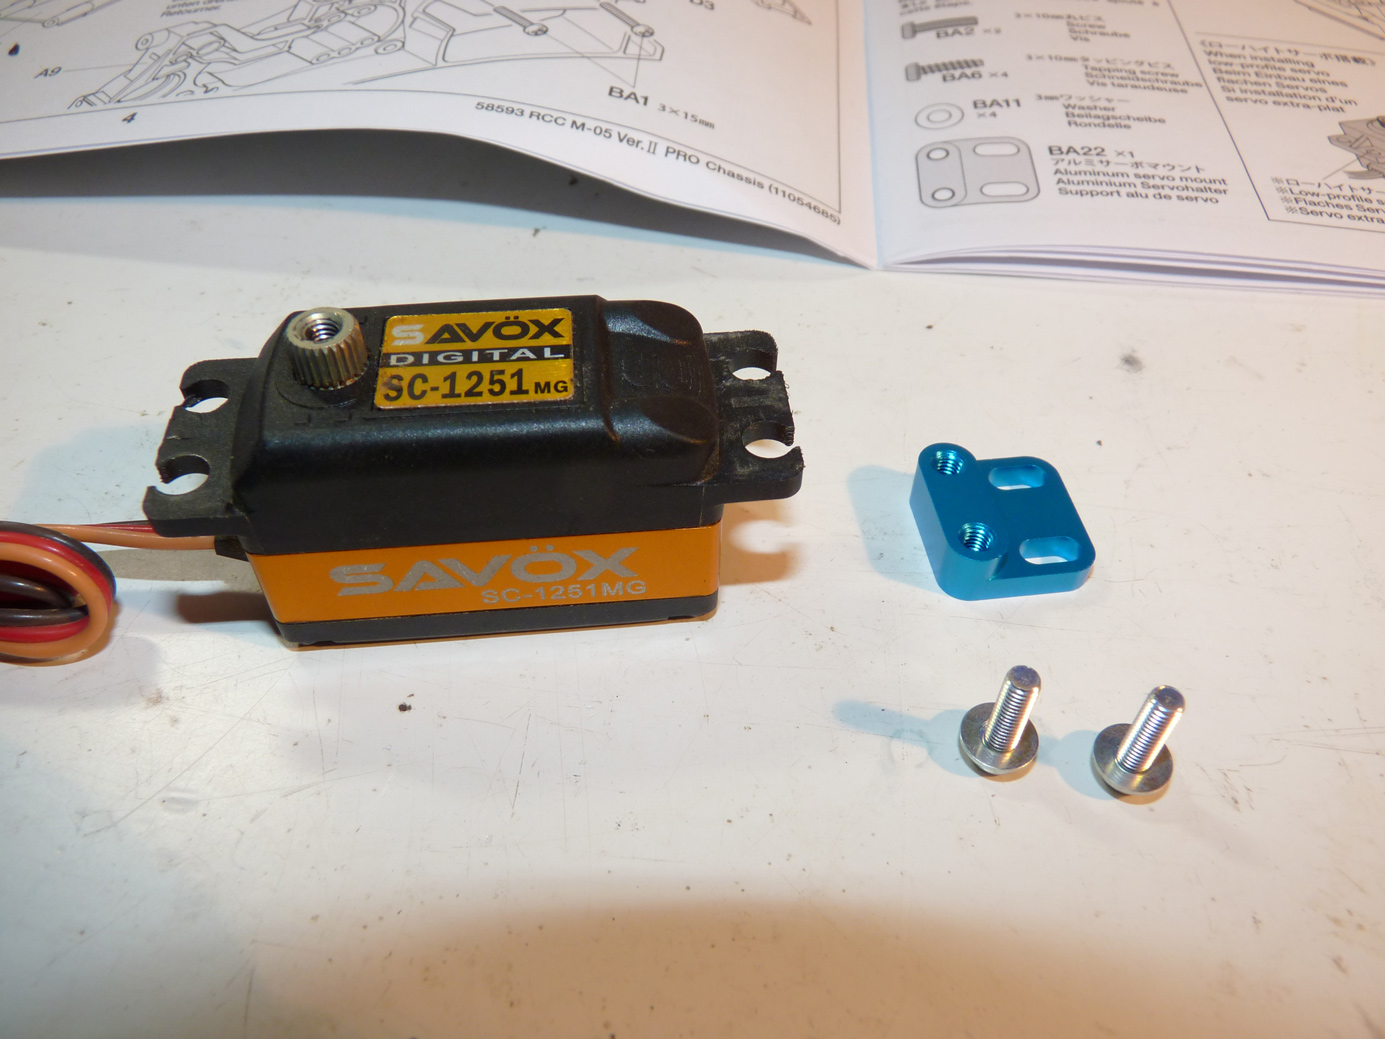
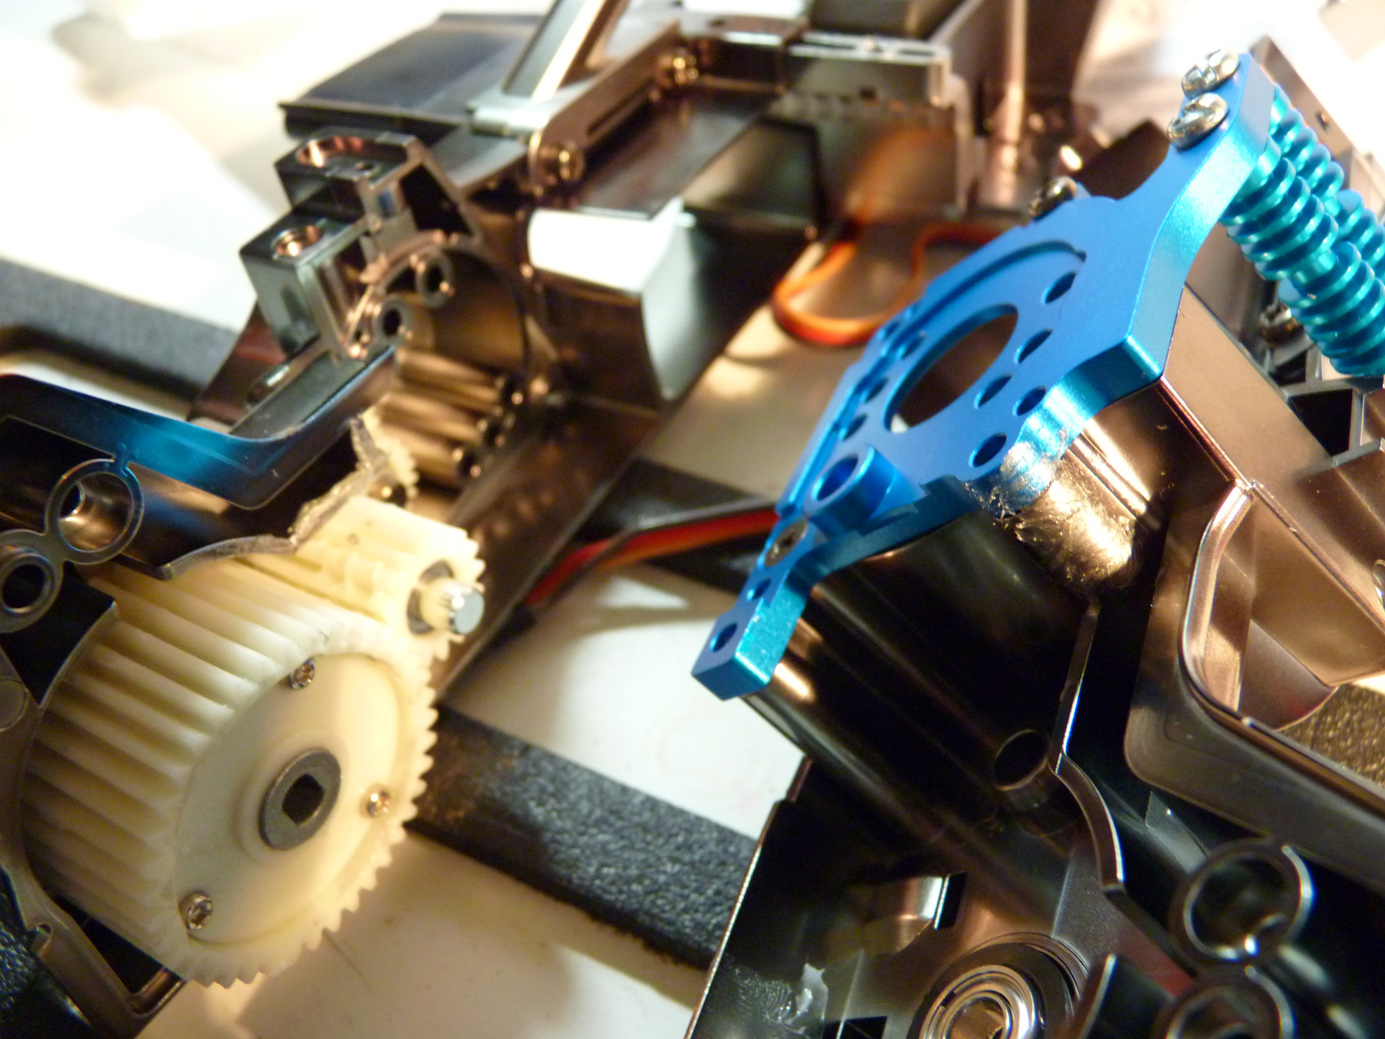
The Savox servo is shown above with the blue aluminum mounting bracket.
The bracket is straight forward to install.
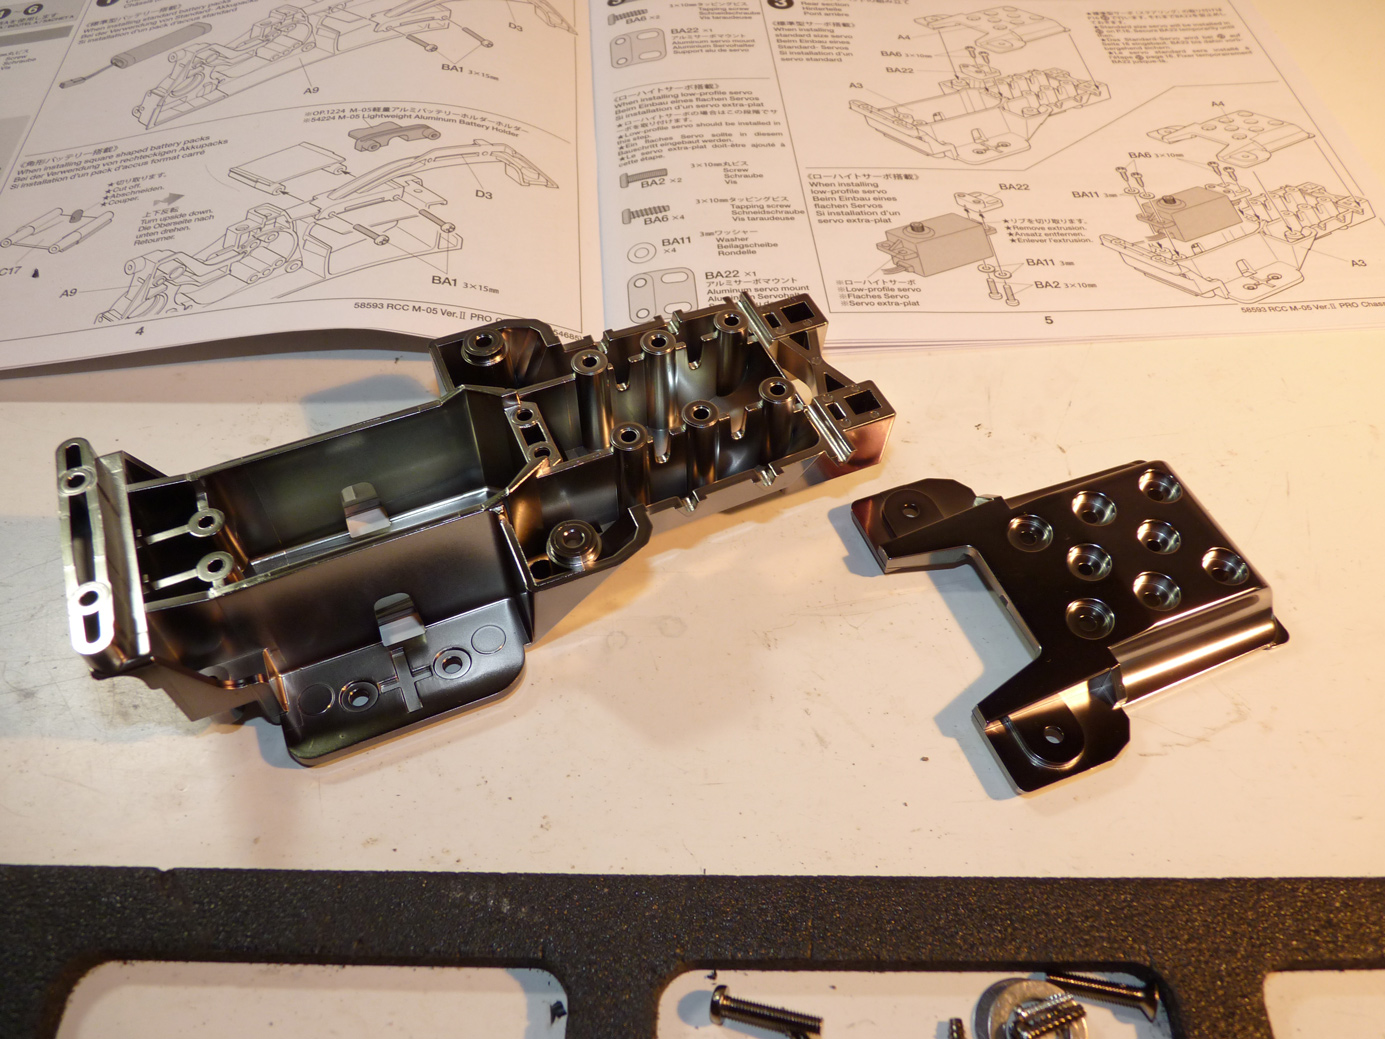
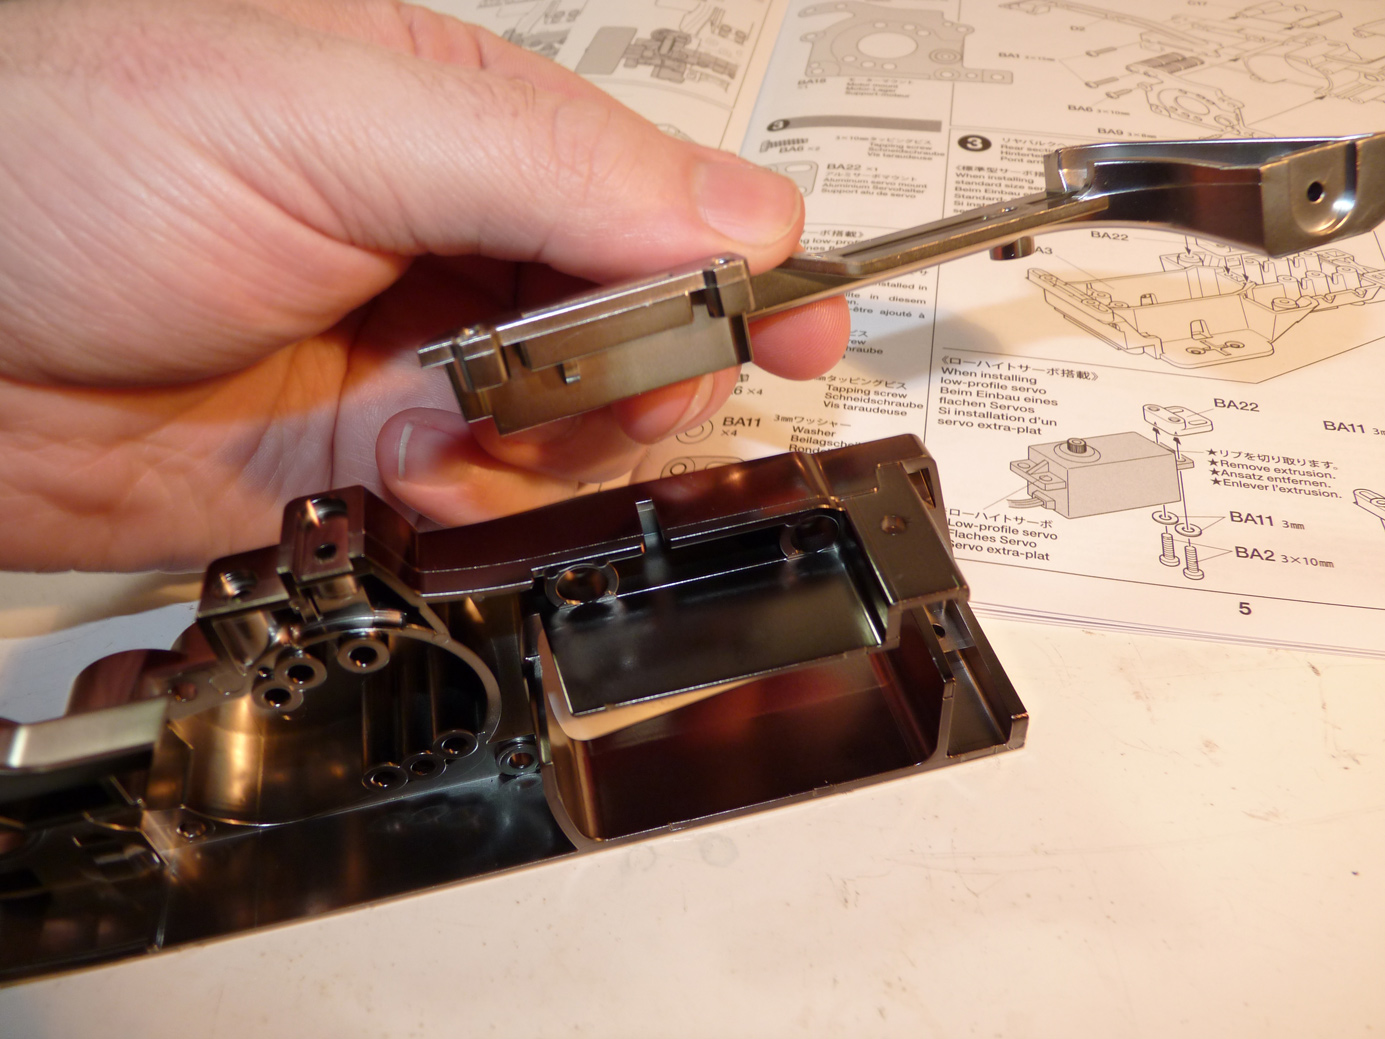
This is the rear section of the car.
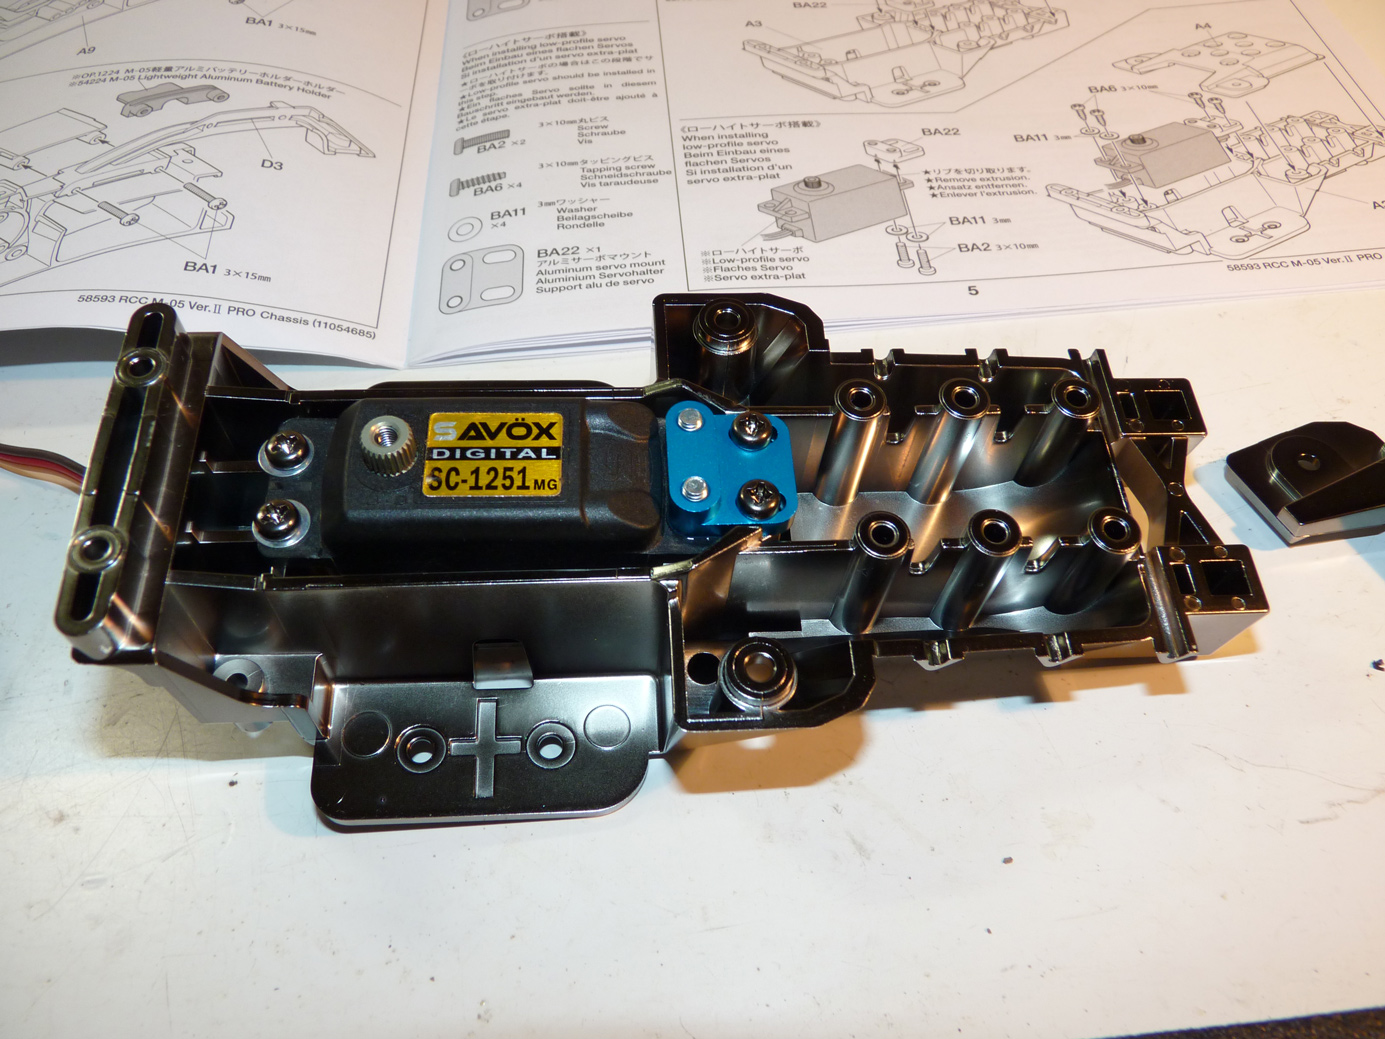
The servo is installed in the back of the car on most M-series cars. The M-05V2 is no different.
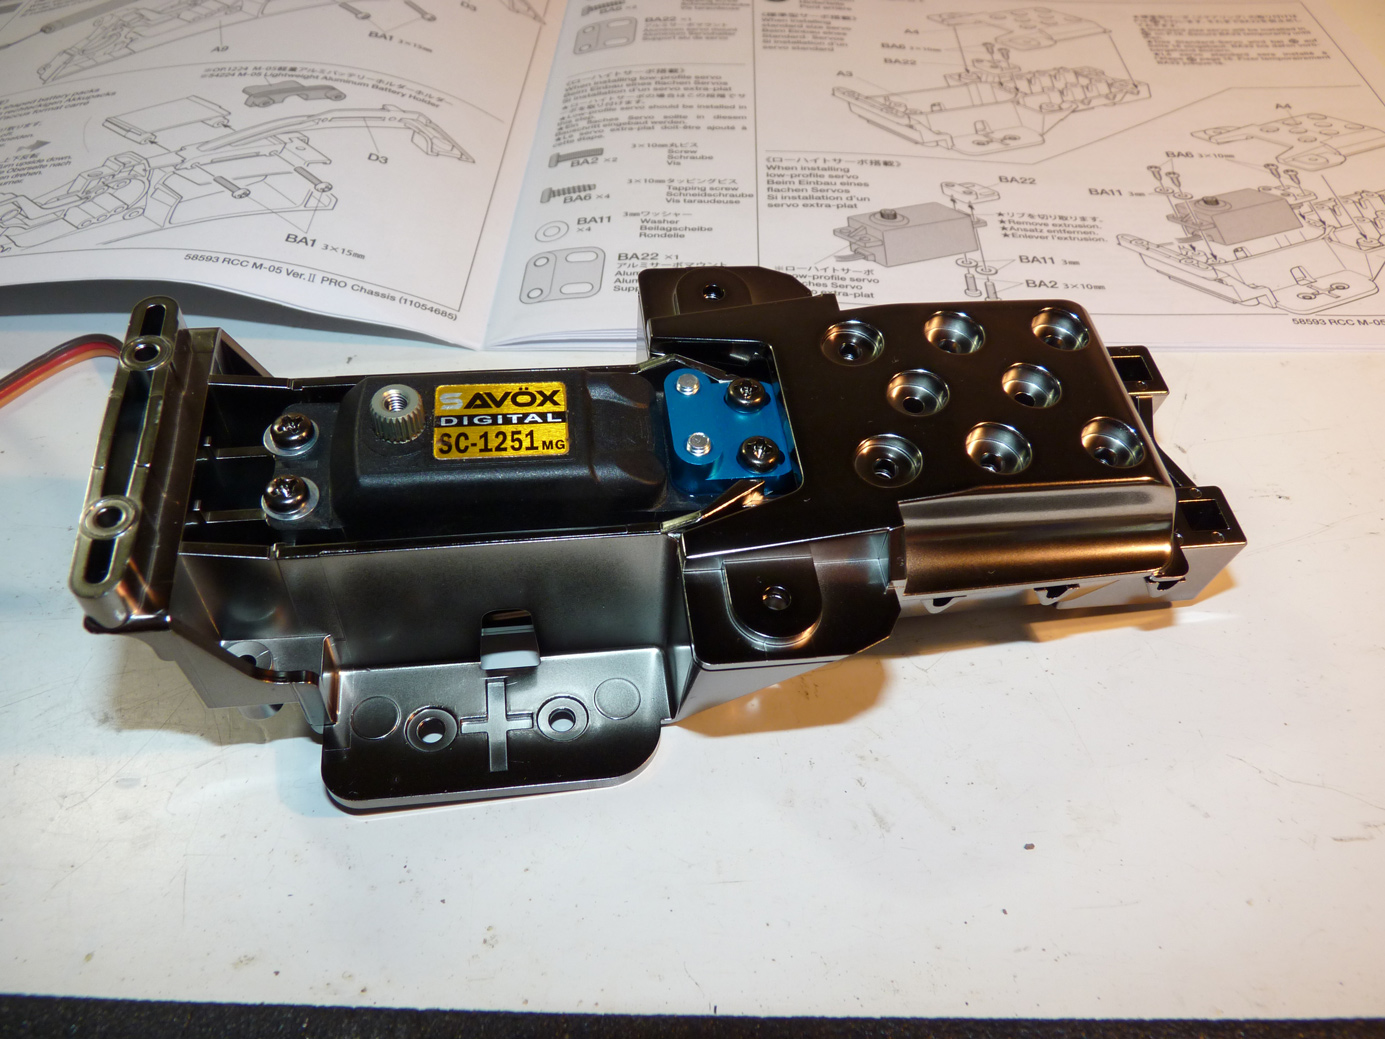
It gets clamped down into the rear bulkhead section of the car.
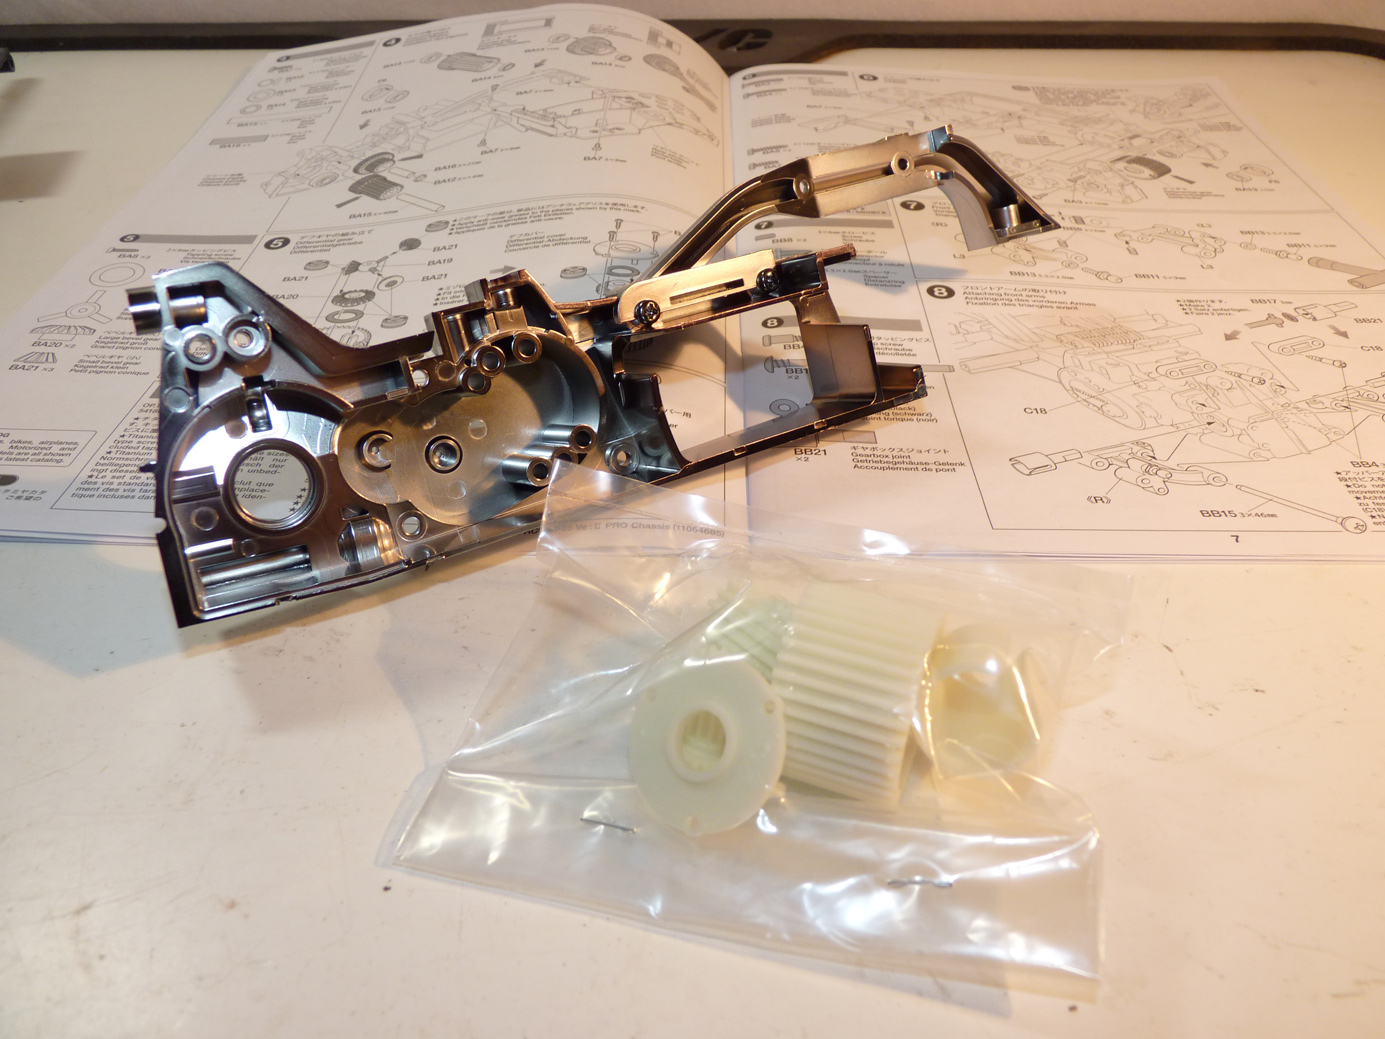
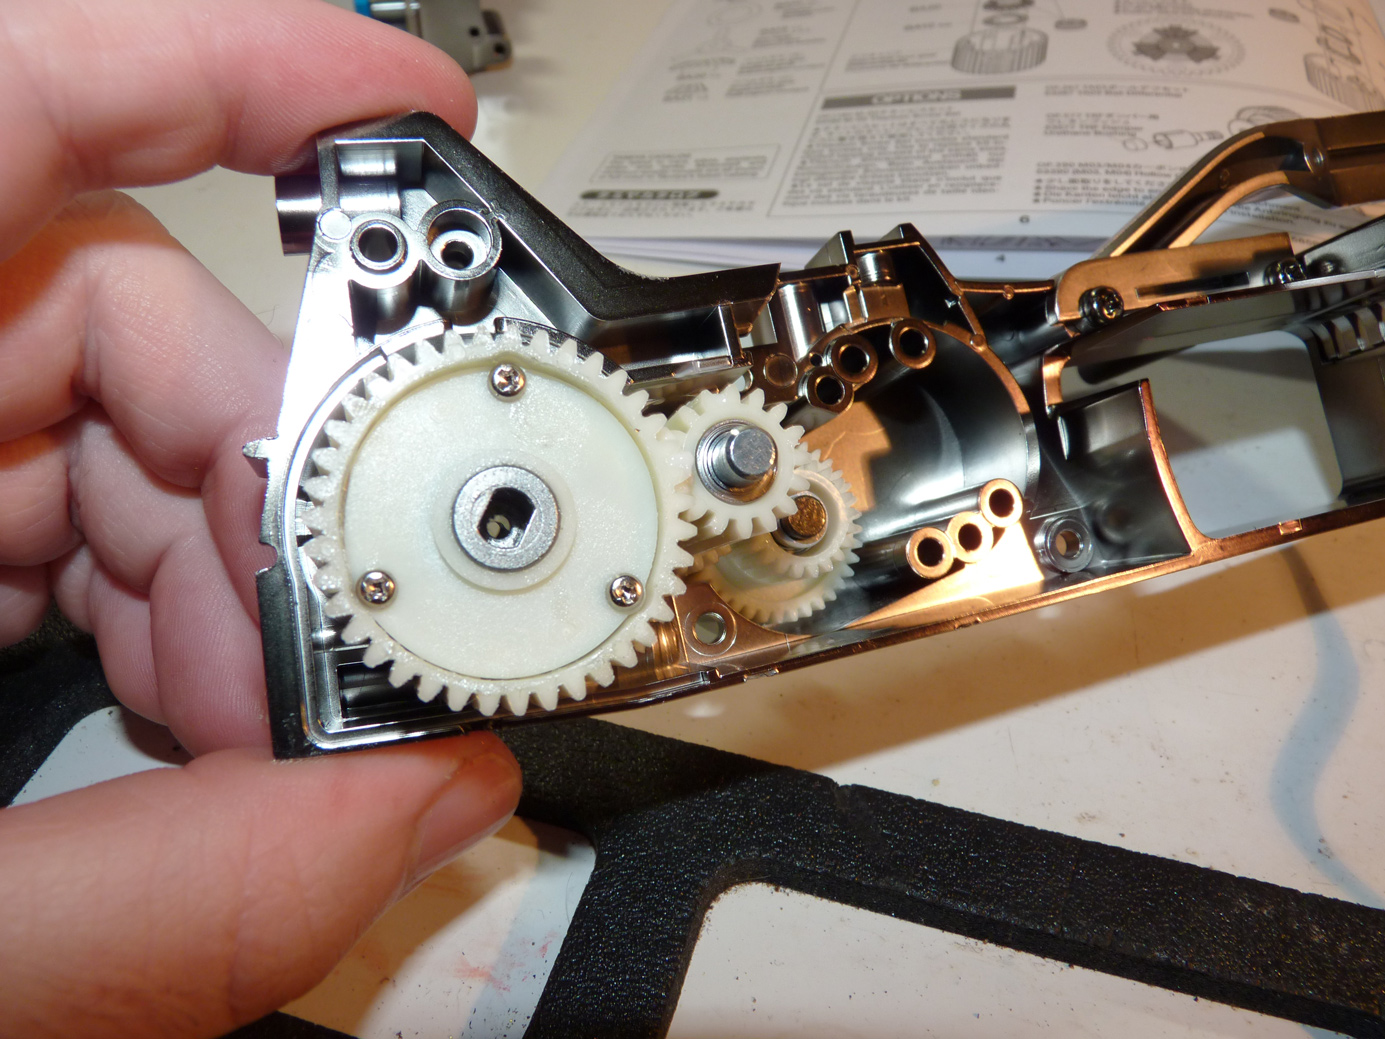
Next we move onto assembling the gears.
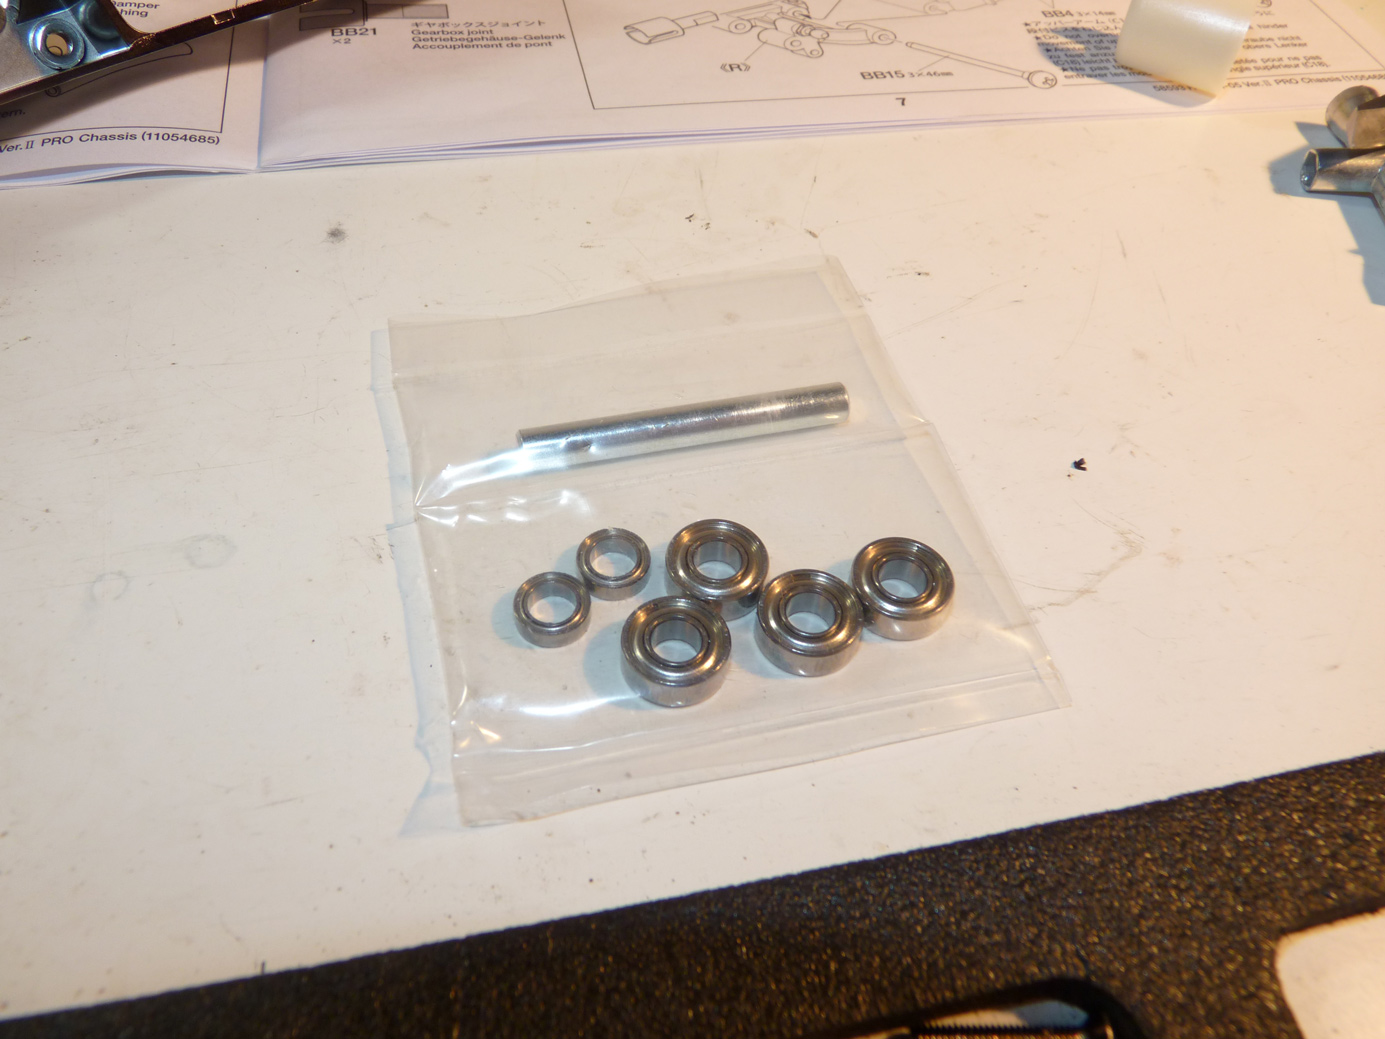
Full ball bearings included! That’s ~$20 we won’t have to spend when compared to buying a standard M-05 kit. Although if you ever need replacements, don’t hesitate to hit up our friends at FastEddyBearings.
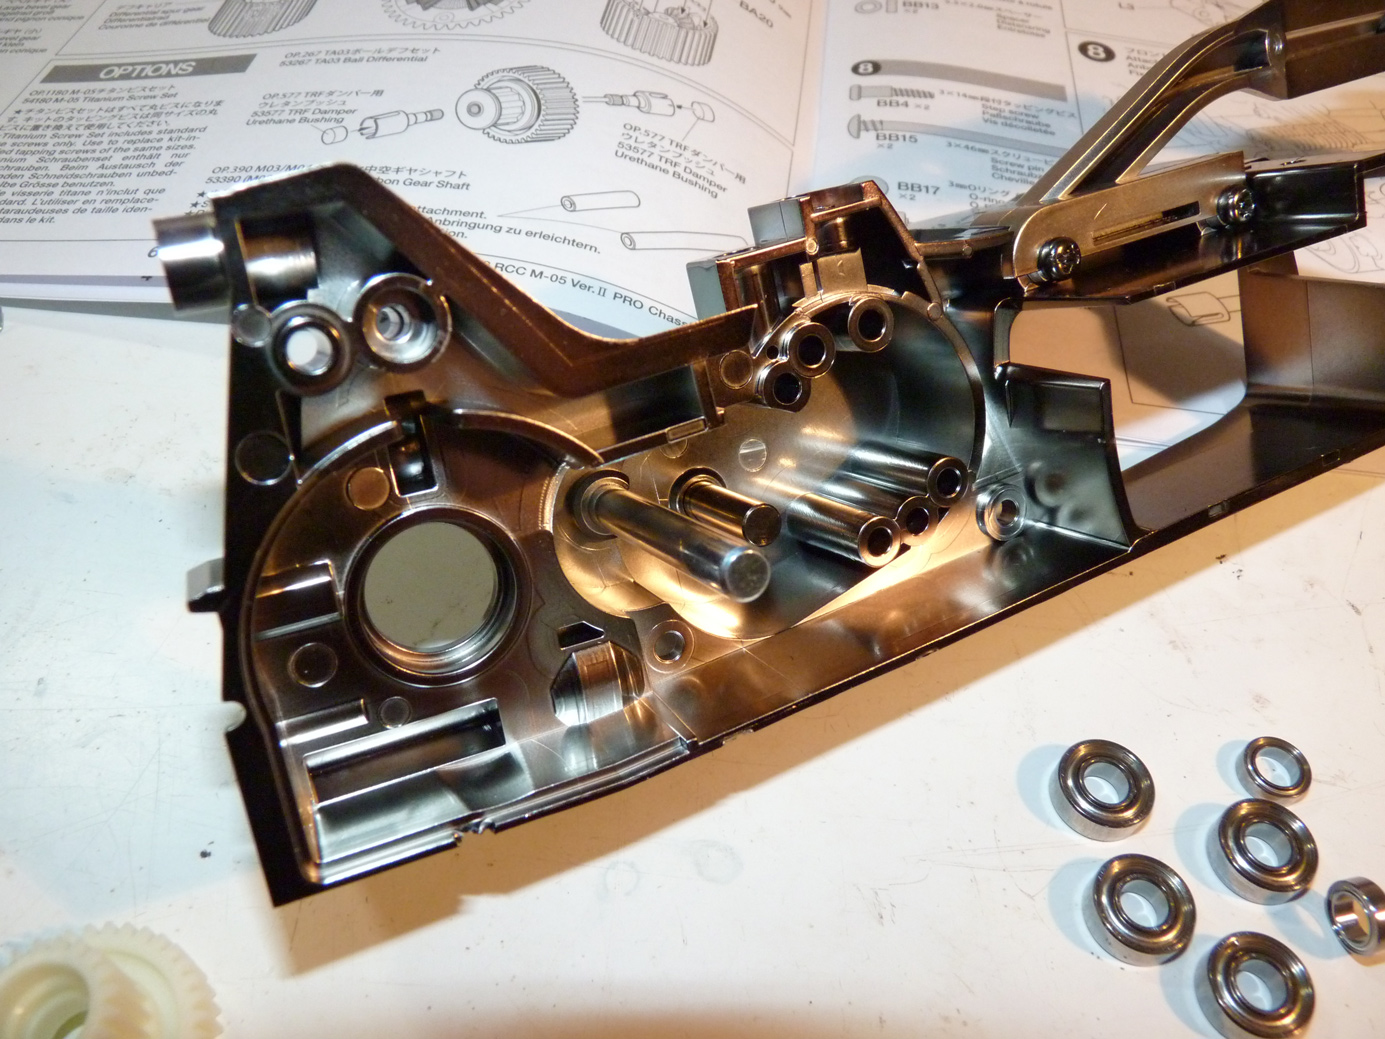
Gear shafts installed. They make a lightweight version of these shafts if you need to shave weight. They’re under $3. For now we are running the stock ones.
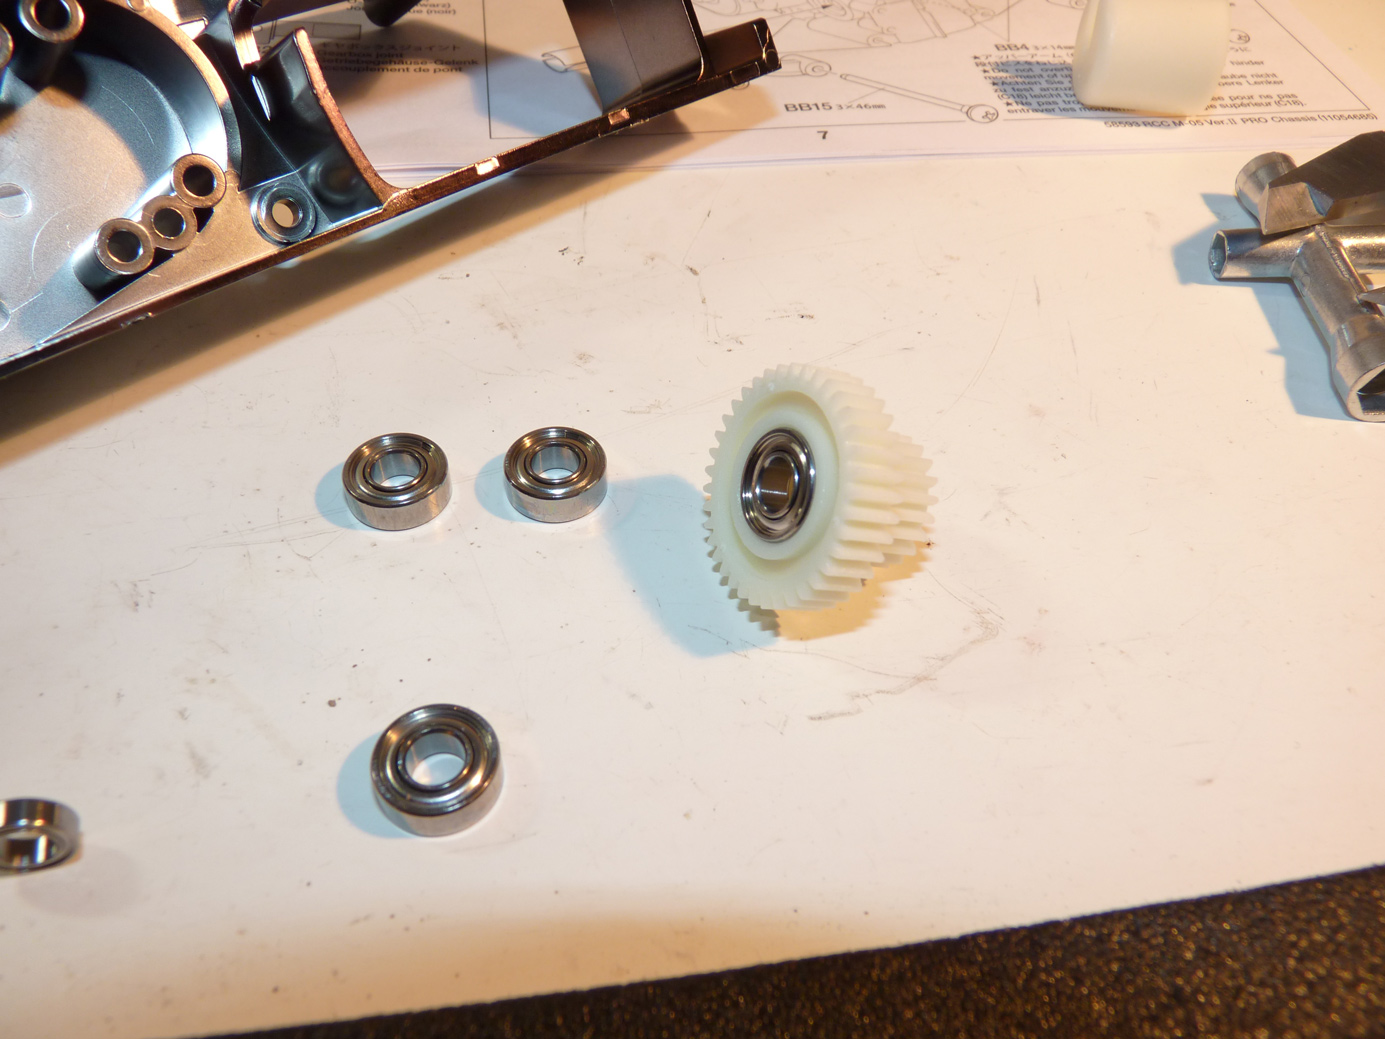
Putting bearings in the gears.
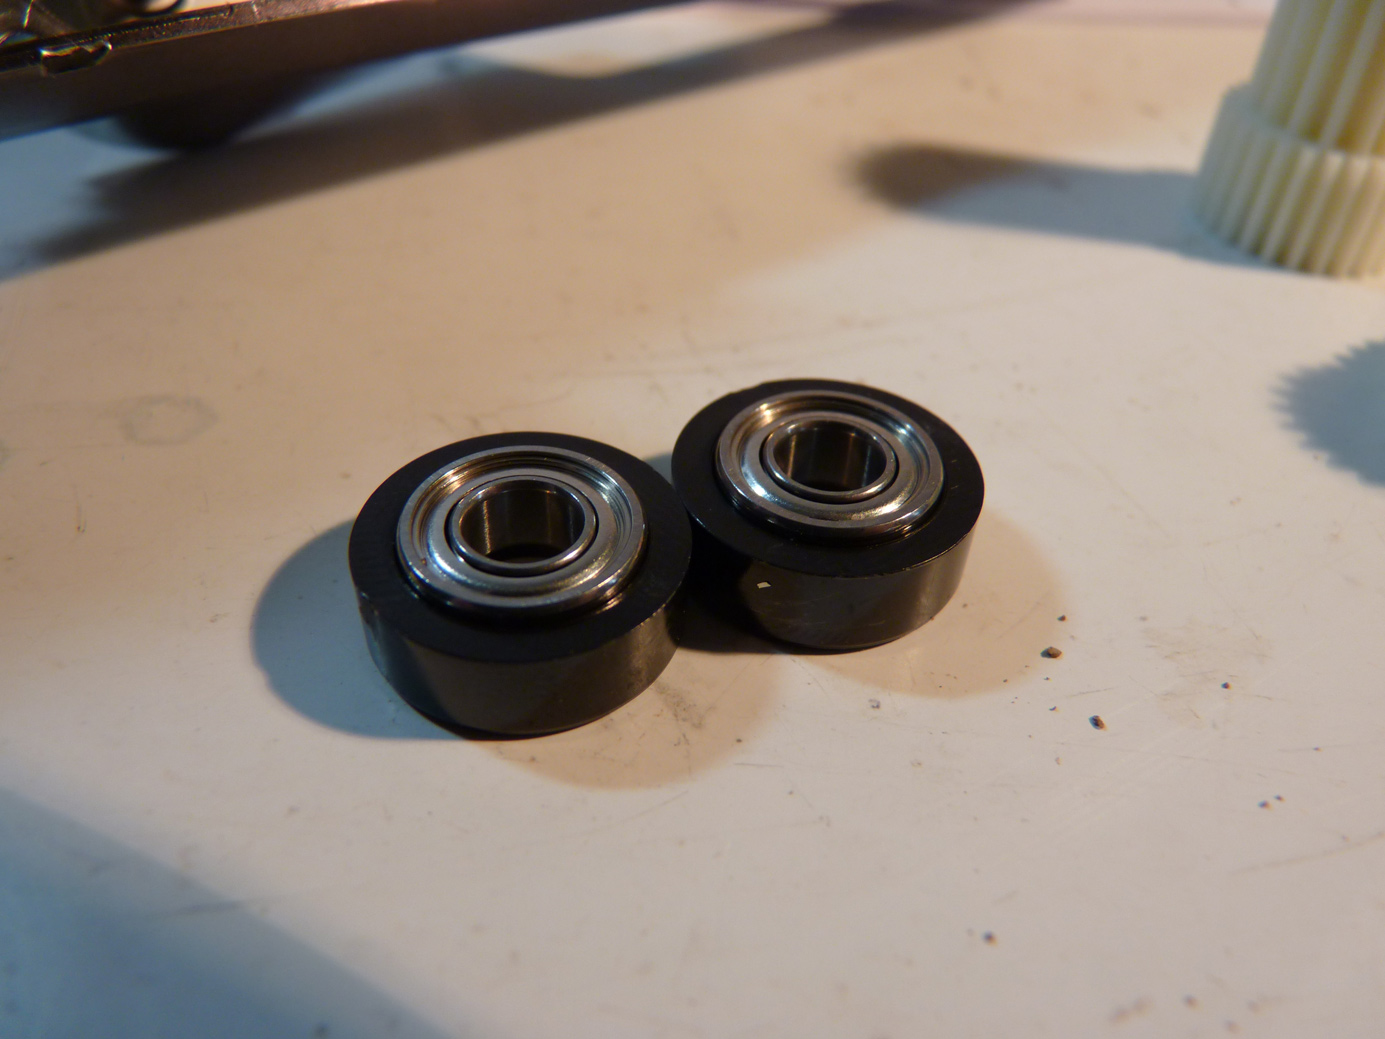
The M-05 uses an adapter to fit the bearings into the gearbox housing. They are shown above.
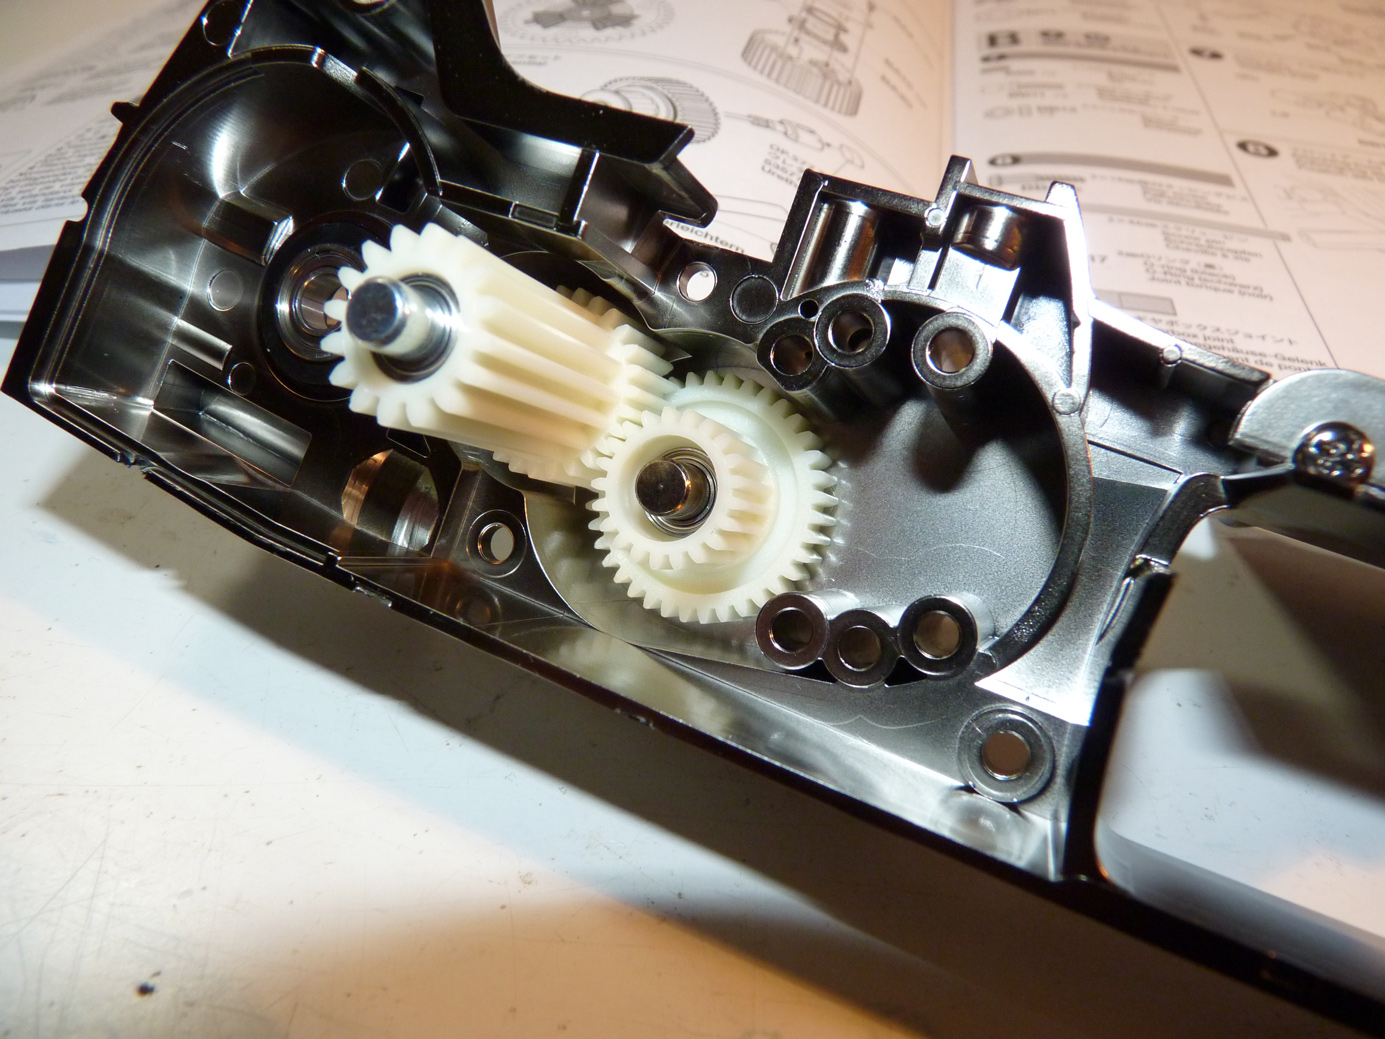
Installing the gears into the gearbox.
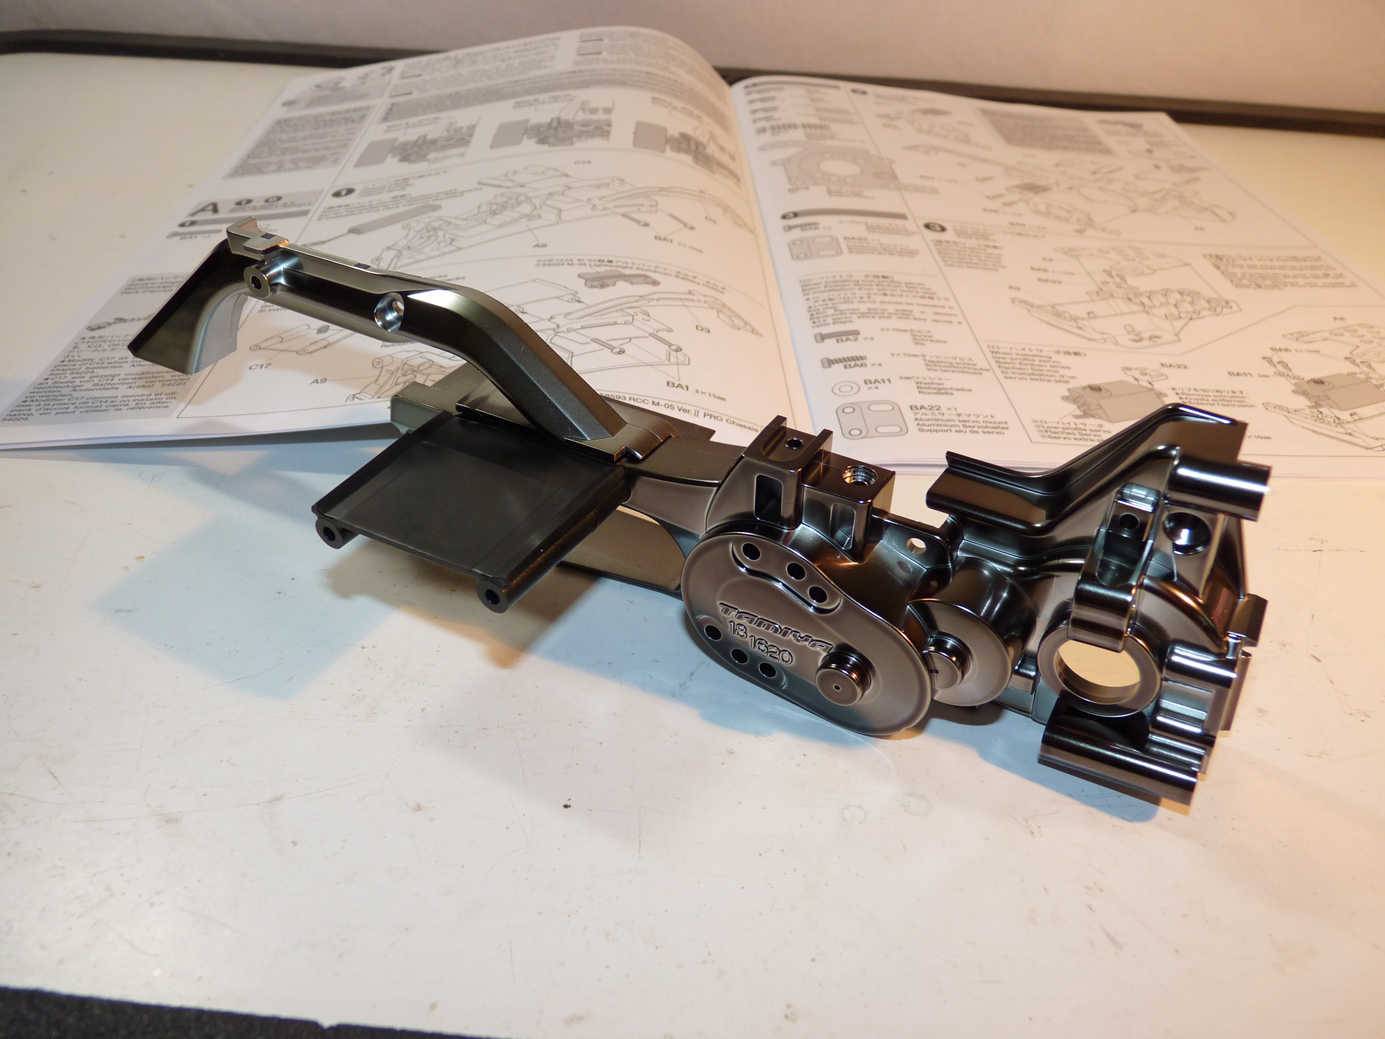
Here we can see the car starting to take shape as we join the front and rear sections.
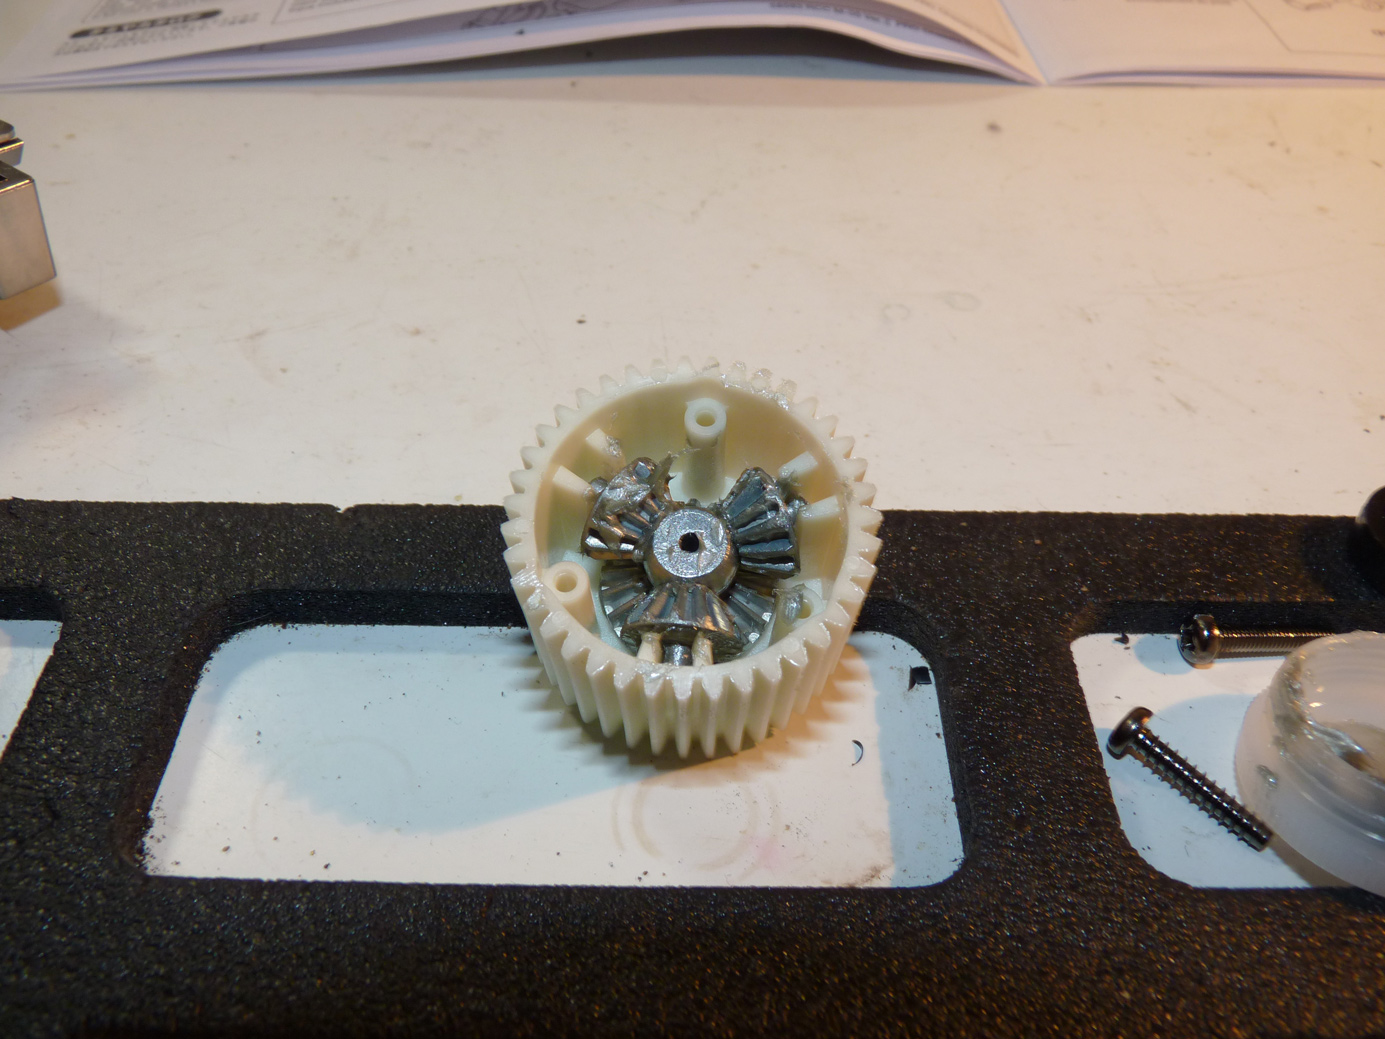
Now we build the gear differential. A ball differential is an option that is sold separately if that’s more your style.
Here the gear diff is installed.
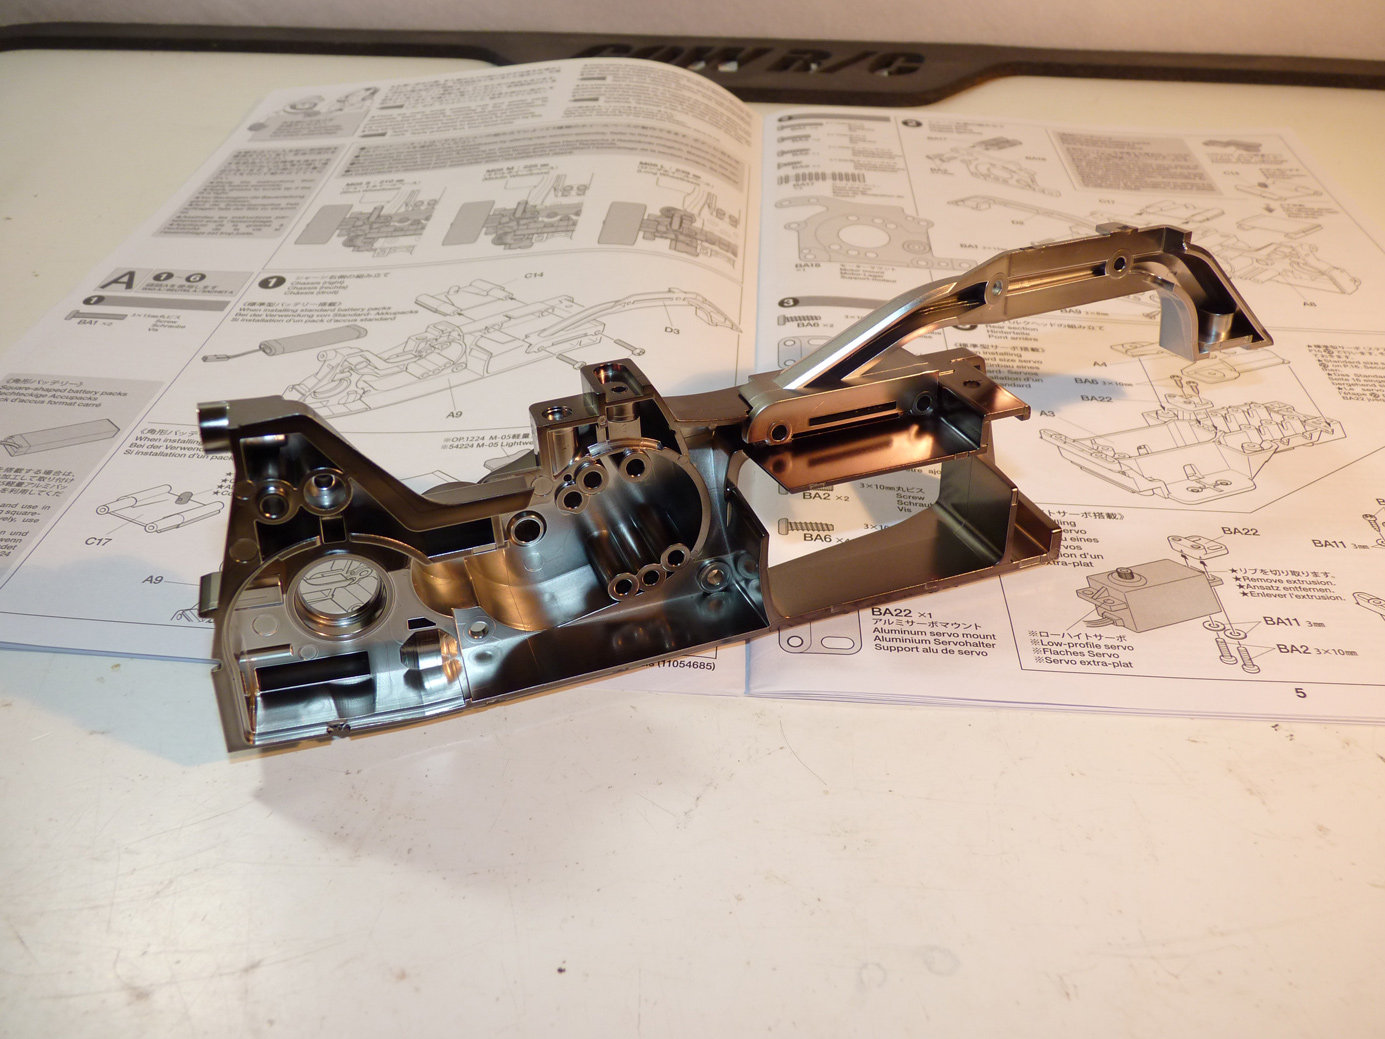
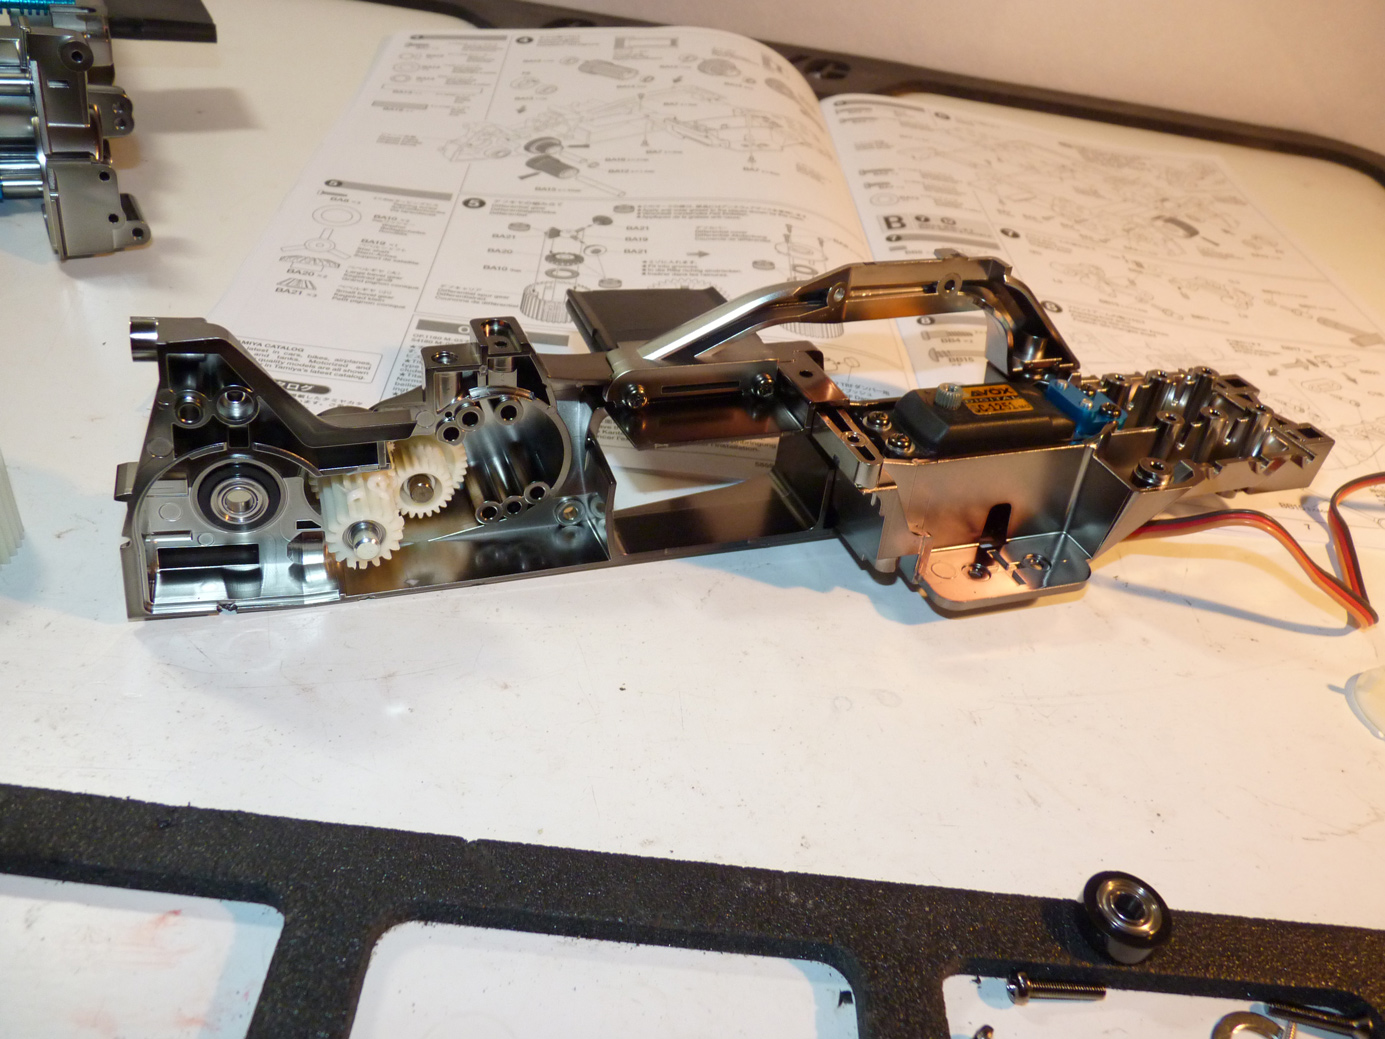
Next we join the other half of the front section together. This clamps onto the rear section and it all becomes a single unit.
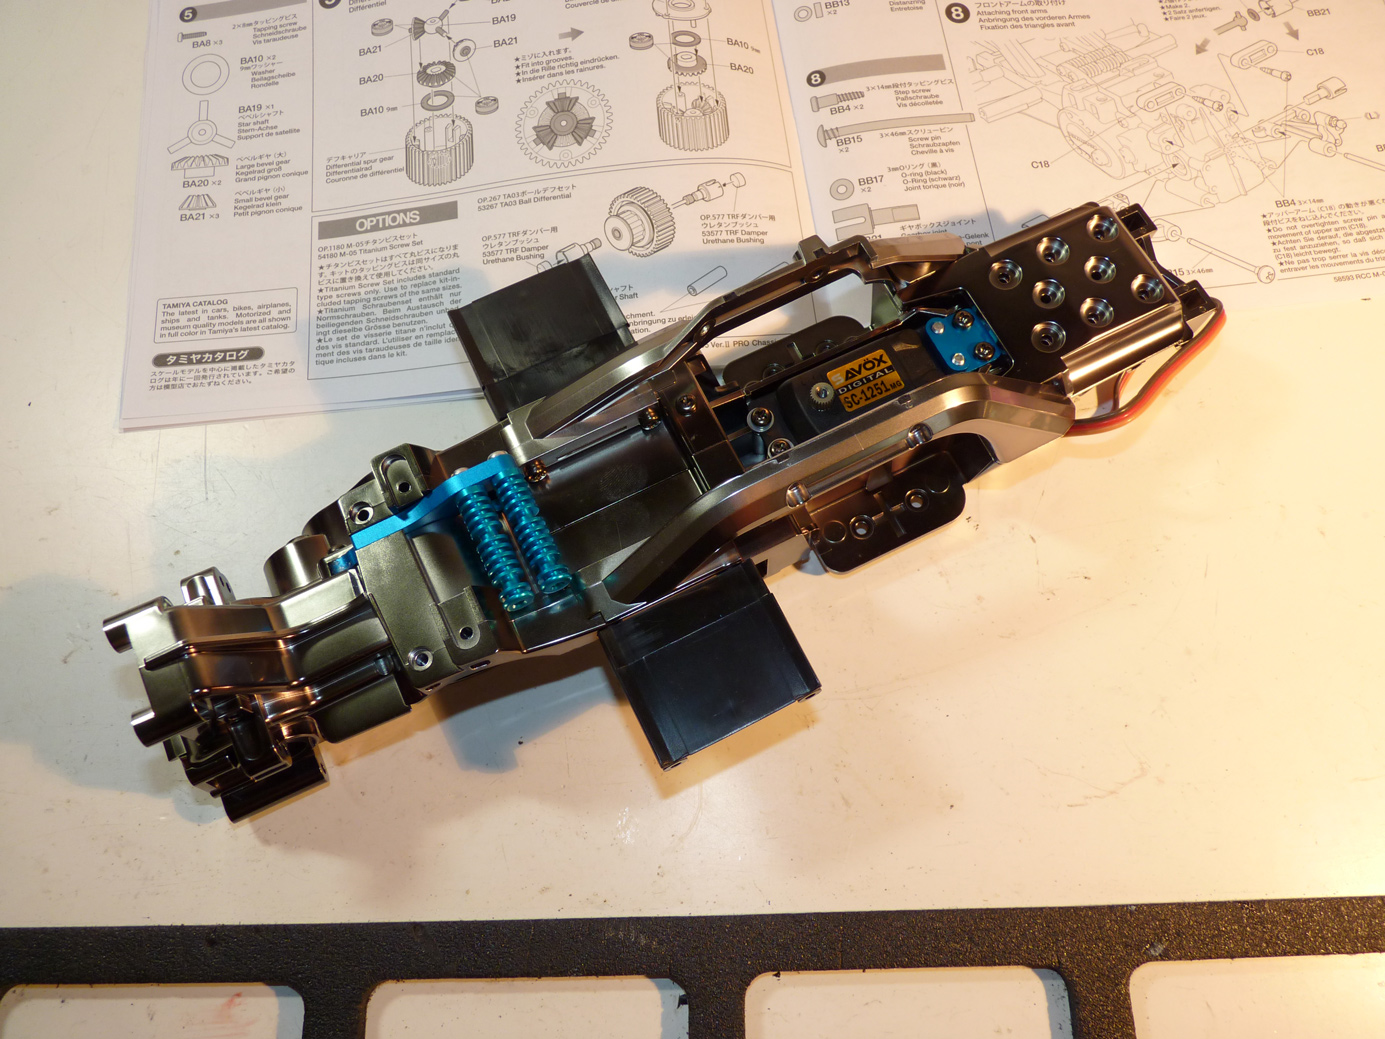
The main chassis and gearbox are now assembled.
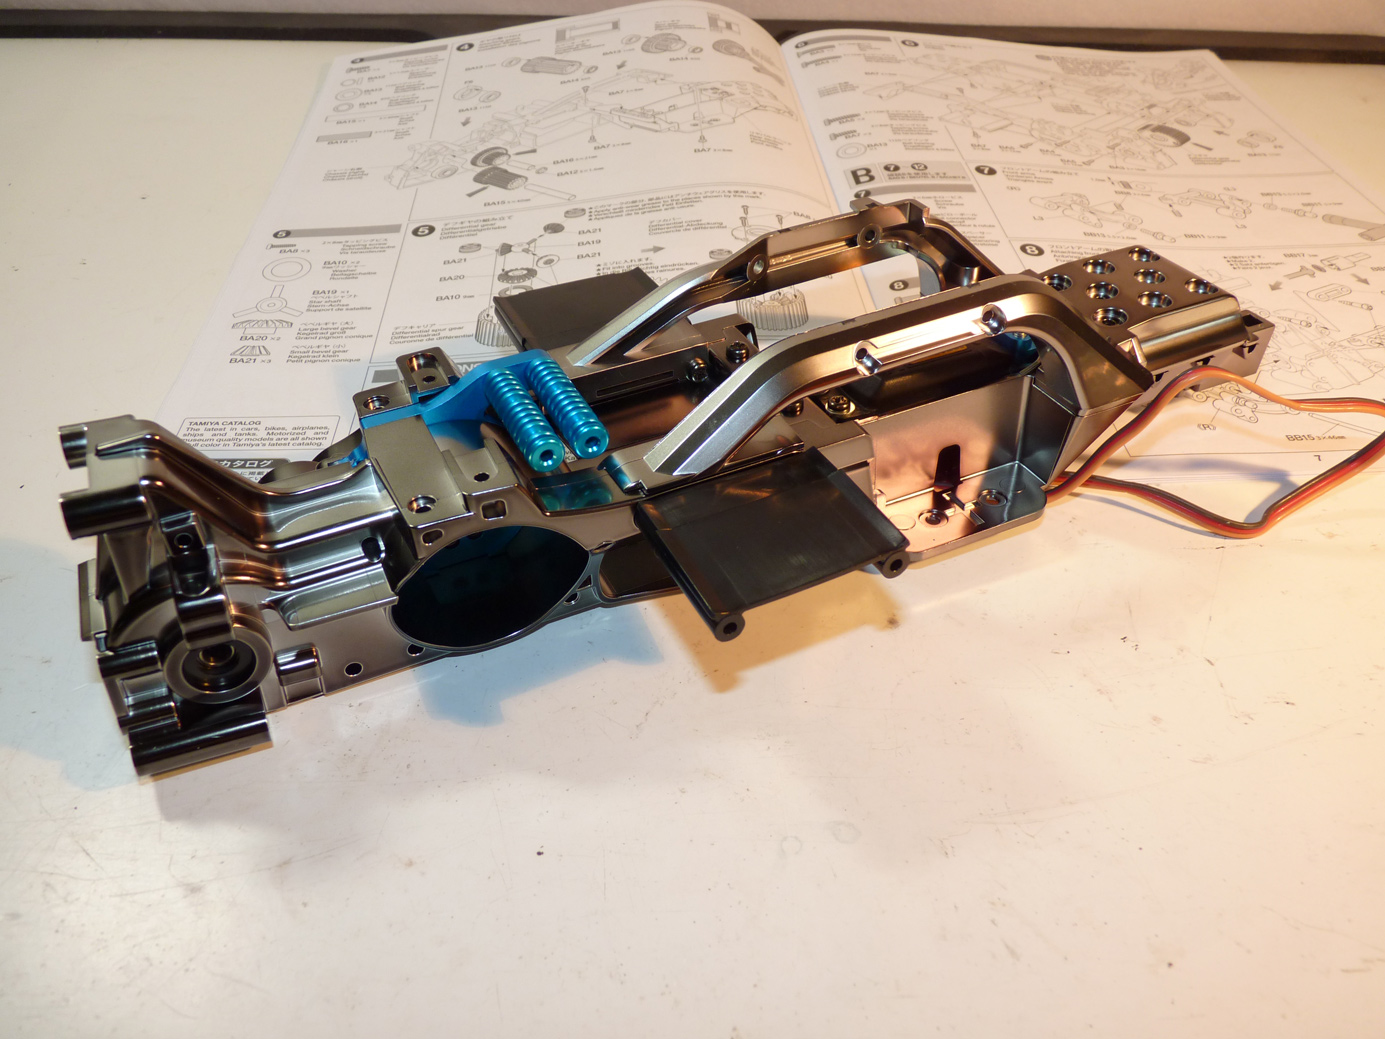
Here’s another angle.
Continue reading on the next page for more
 Posted in
  Tags:
Tags:
I also ordered a M05 V2 Pro Kit as soon as it came out. The update for making squared batteries fit into the chassis was my main reason. Another good thing is, that all hop-up parts from Tamiya and third party companies still work.
So my tip is to buy only the main chassis parts and attach all already existing things from the “normal” m05 chassis. This way you can save a lot of money and use squared batteries as well.
Best,
T-